Friday, March 28, 2014
I sooooo love this GORGEOUS kit.... I simply couldn't stop making cards.
Here's one for you with step by step instructions.
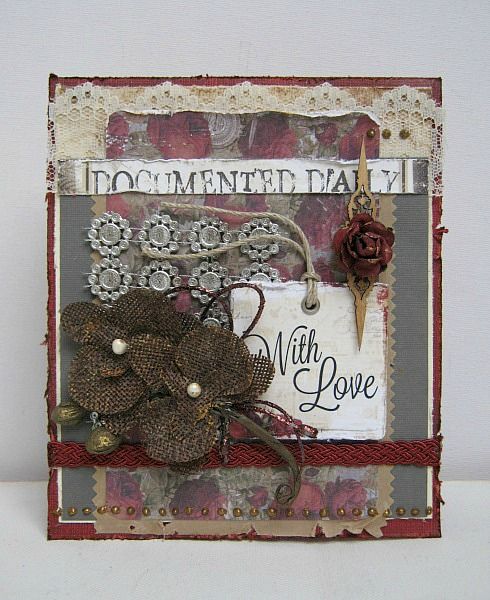
And here's how it came together:
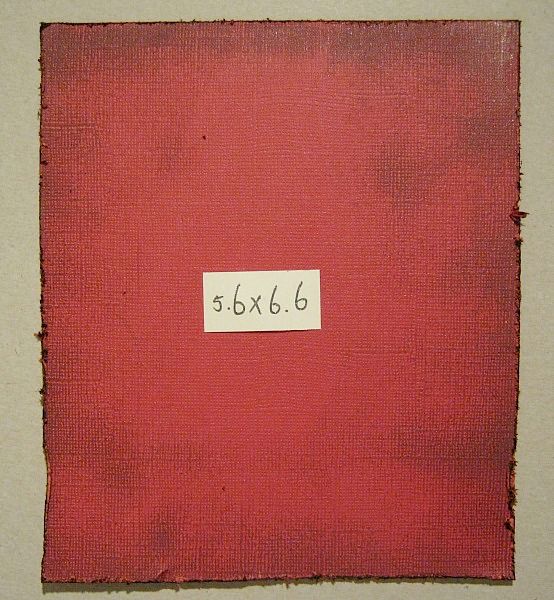
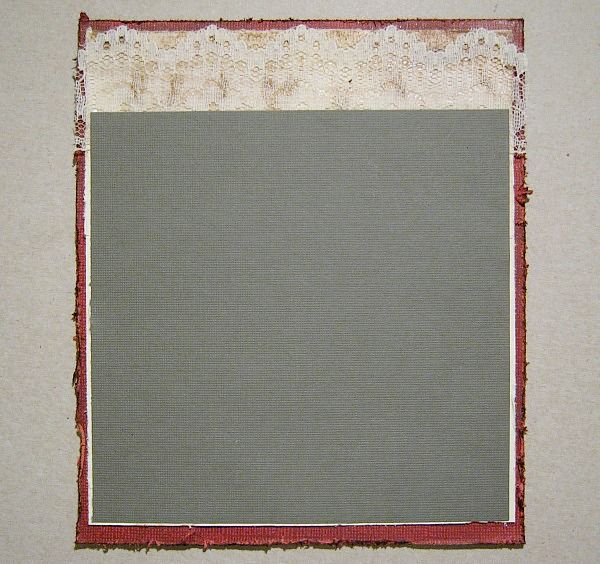
For the base of my card, I folded a piece of red cardstock double, and cut it down to 5.6 x 6.6 I distressed the edges a little and inked it up using Paper Soft.
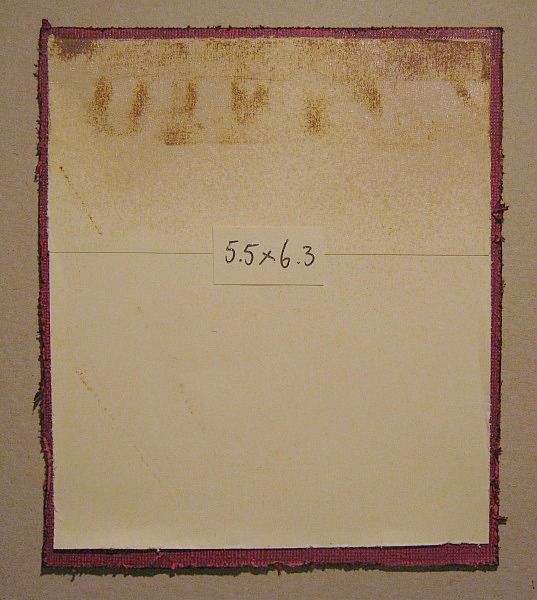
Then I cut a piece of cream cardstock at 5.5 x 6.3 and randomly inked it up.
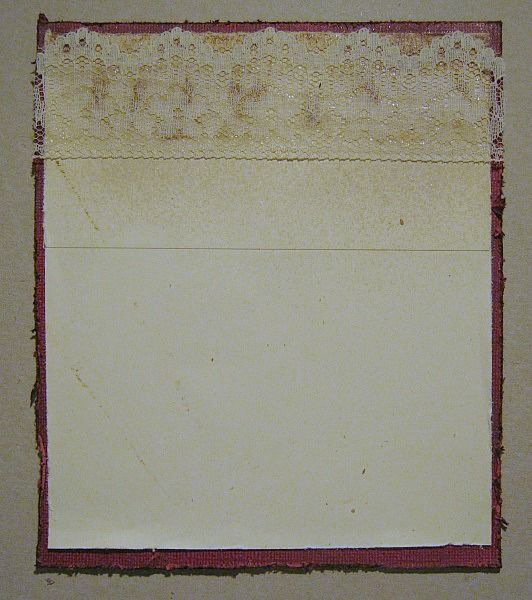
A piece of lace, (from my stash) was glued at the top, using Beacon 3 in 1 Craft Glue. Krissy has this in the boutique.
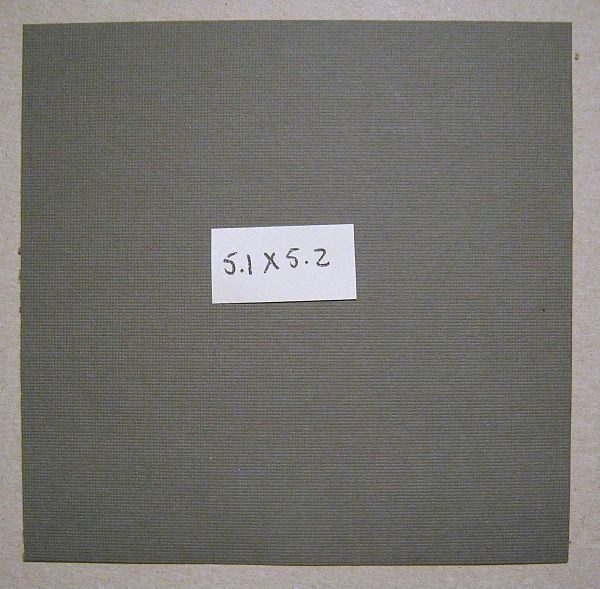
Then I cut another piece of cardstock at 5.1 x 5.2
I didn't do anything to the edges, just glued it on top of the lace.
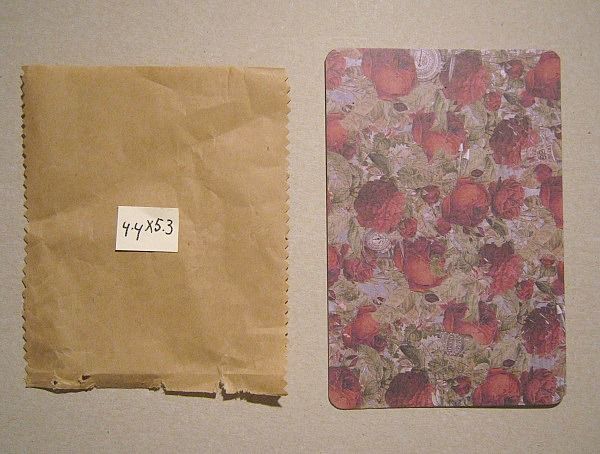
I cut a paperbag at 4.4 x 5.3 and scratched the bottom edge with my nails. The notecard on the right side came in the Salutaions Main Kit.
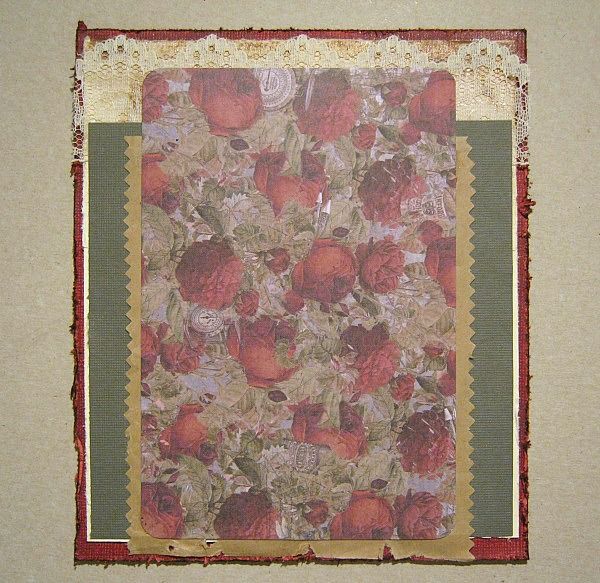
I glued both pieces like so. First the piece of paperbag, then the notecard.
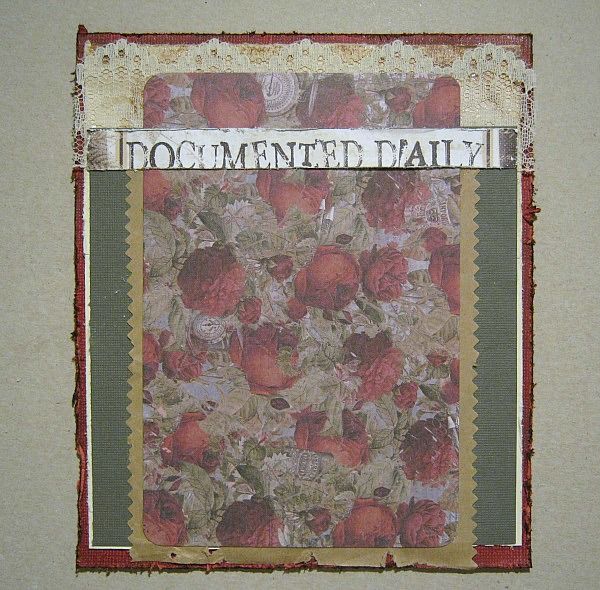
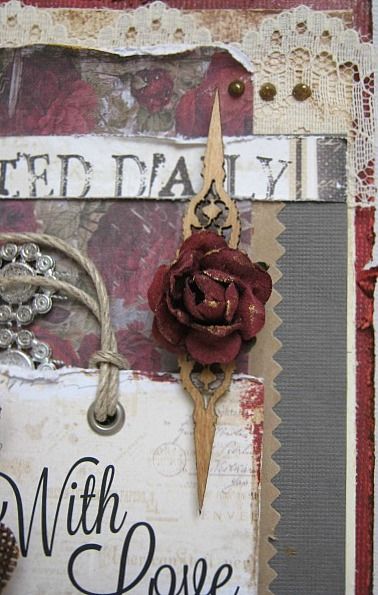
this "Documented Daily" strip was found on 1 of the papers. I slightly distressed it.
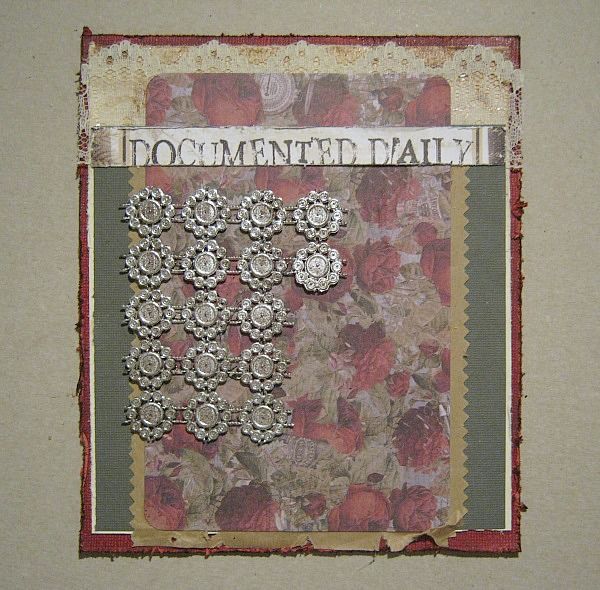
Then... OMW how I love this bling!!!! I cut a piece of it and glued it down, with the backside up.
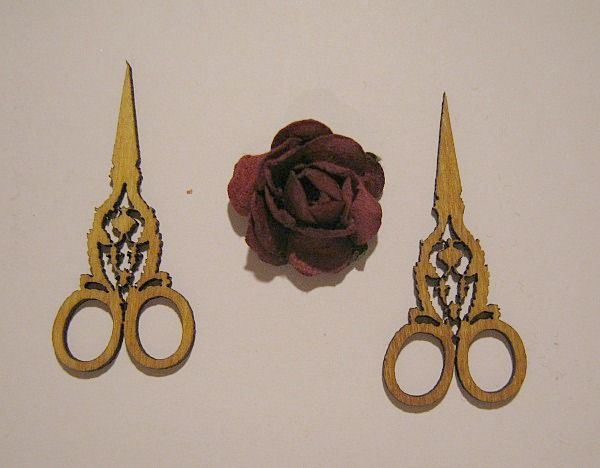
I had a hard time, figuring out what to do with these beautiful wood icon scissors, so I tranformed them into a new embellishment.
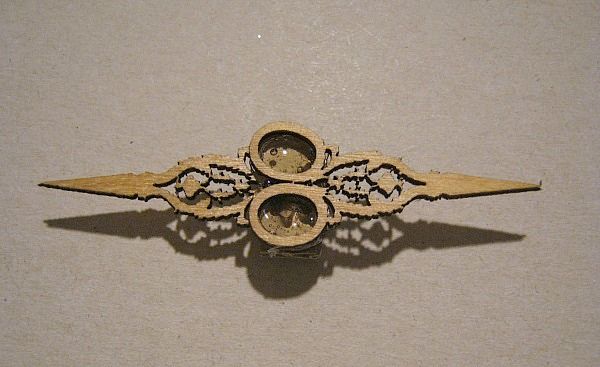
I glued them together like this....
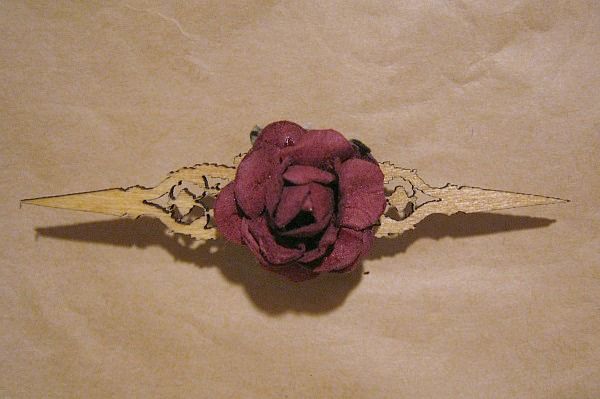
And put the rose on top of it.
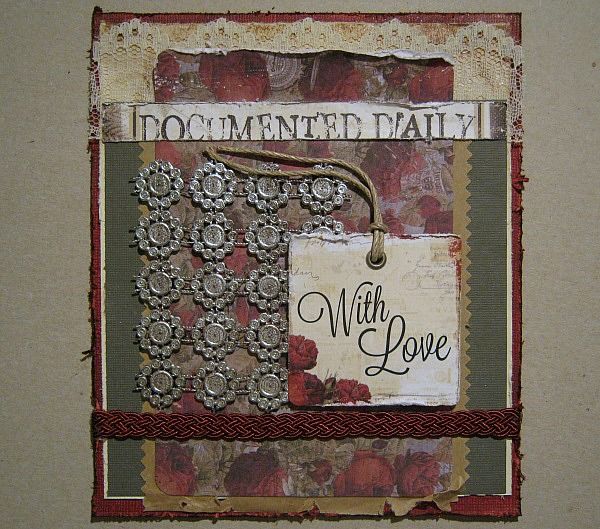
Then I wanted to use this "With Love" tag and slightly distressed the edges and glued it down. I also glued down a piece of the red trim, using Beacon Fabri-Tac.

The transformed embellishment, was glued at the right top, bringing all the layers together.
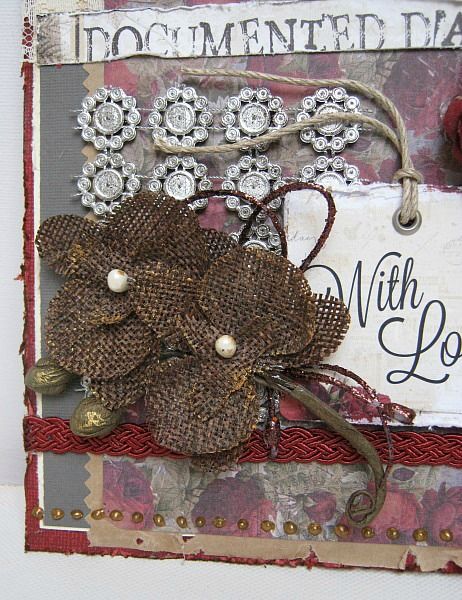
I placed my flowers.(I rubbed some inka gold on my flowers) And for the finishing touch I added some copper liquid pearls.
I hope you like it, and give it a try.
Here are some more cards, just for some extra inspiration
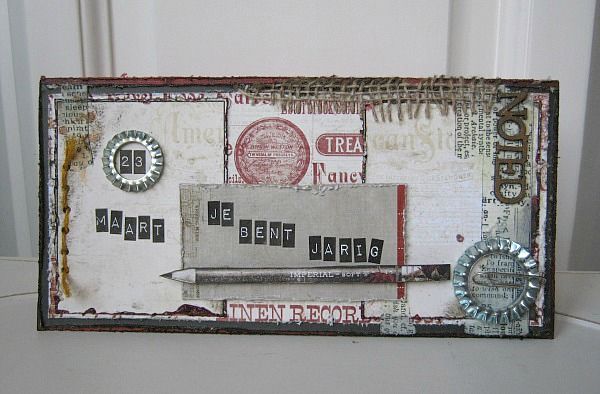
Jij bent jarig means: It is your Birthday.
een nieuwe woning means: A new home
Here's one for you with step by step instructions.

And here's how it came together:

For the base of my card, I folded a piece of red cardstock double, and cut it down to 5.6 x 6.6 I distressed the edges a little and inked it up using Paper Soft.

Then I cut a piece of cream cardstock at 5.5 x 6.3 and randomly inked it up.

A piece of lace, (from my stash) was glued at the top, using Beacon 3 in 1 Craft Glue. Krissy has this in the boutique.

Then I cut another piece of cardstock at 5.1 x 5.2

I didn't do anything to the edges, just glued it on top of the lace.

I cut a paperbag at 4.4 x 5.3 and scratched the bottom edge with my nails. The notecard on the right side came in the Salutaions Main Kit.

I glued both pieces like so. First the piece of paperbag, then the notecard.

this "Documented Daily" strip was found on 1 of the papers. I slightly distressed it.

Then... OMW how I love this bling!!!! I cut a piece of it and glued it down, with the backside up.

I had a hard time, figuring out what to do with these beautiful wood icon scissors, so I tranformed them into a new embellishment.

I glued them together like this....

And put the rose on top of it.

Then I wanted to use this "With Love" tag and slightly distressed the edges and glued it down. I also glued down a piece of the red trim, using Beacon Fabri-Tac.

The transformed embellishment, was glued at the right top, bringing all the layers together.


I placed my flowers.(I rubbed some inka gold on my flowers) And for the finishing touch I added some copper liquid pearls.
I hope you like it, and give it a try.
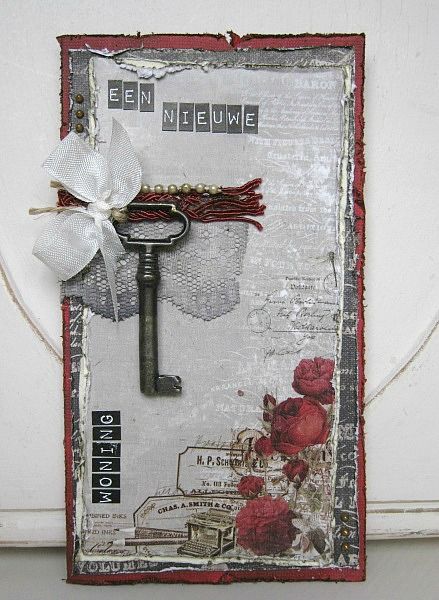
Here are some more cards, just for some extra inspiration

Jij bent jarig means: It is your Birthday.

een nieuwe woning means: A new home
Subscribe to:
Post Comments (Atom)

Be sure to "LIKE & FOLLOW" Swirlydoos for special FB only deals and promos
Follow this blog with bloglovin

Scrapbook Sketches

see all of our sketches here
Keep Tabs On Our Blog!


Popular Posts
-
Another month at Swirlydoos, and its my turn to share some projects. The Autumn Bloom kit has the gorgeous papers and blooms from 49 and M...
-
 Welcome to Swirlydoos' March Kit Reveal Blog Hop Block Party!! We have some amazing projects for you to see today and as a bonus...
 -
 Boy, oh boy do we have a stellar hop for you this month!! Just when I think that Krissy couldn't possibly created a prettier ki...
 -
 Welcome to Swirlydoos' Mystical Winter kit reveal Blog Hop Block Party!! Happy New Year and Welcome!!! This month's kit,...
 -
 Welcome to Swirlydoos November Kit Reveal Blog Hop BLOCK PARTY!!! That's right, we are having a party and you are all invit...
 -
 Welcome to Swirlydoos' February Blog Hop Block Party!! Welcome to Swirlydoos February Kit Reveal Blog Hop BLOCK PARTY!!! ...
 -
 Welcome to: Swirlydoos Kit Club February Scrapbook Kit Reveal & Blog Hop! Swirlydoos is proud to bring you our beautiful Febr...
 -
 SCROLL DOWN FOR THE 12 DAYS OF CHRISTMAS CONTEST: DAY FIVE! Welcome to: Swirlydoos Kit Club December Scrapbook Kit Reveal & Blo...
 -
 Thank you for joining us today for our ONE DAY blog hop featuring our September kit collection, Gilted Pleasure . **All collec...
 -
 Welcome to Swirlydoos' June Kit Reveal Blog Hop Block Party!! We are so pleased to show off our June kit, Antiquities!!! This kit...

2 comments:
Amazing projects, thanks for this fantastic tutorial is awesome!!!
Love this, Paulien!!!! Gorgeous design & such clever use of embellies!!!!