Tuesday, July 29, 2014
Hey Savages, Kim here to share some more of my layouts made with this months kit Celestial Summer. I had such a great time creating with this kit.
First up is a layout featuring my Goddaughter. This photo was taken at her senior prom and it goes so well with the kit. These papers in the kit are amazing. They take mixed media products so well. I did some masking, misting and stamping to highlight these gorgeous Blue fern papers.
I used items from the main kit as well as the flowers, embellishment and mixed media kit. I also used a few things from my stash.

My next layout features an older picture of my niece from her kindergarten graduation.There are some Prima Princess papers in this kit, what perfect papers to highlight my sweet little princess. I did some masking and misting. I added a few items from my stash, everything else came from the main kit.

Thanks for taking a peek at my final projects with the Celestial Summer kit. Don't forget to stop by the Boutique and pick up your Celestial Summer kit, if they haven't sold out. Or better yet, never miss another kit by subscribing to the monthly kits.


.png)
Friday, July 25, 2014
Our July kit has a beautiful collection of Blue Fern Studios papers, Ombre Dreams. This is my first chance to use Blue Fern's papers and I must tell you they are fabulous! Definitely the heaviest weight papers I have used so they work really well with mixed medias.
On this layout, I used a photo of my younger brother. He was the cutest kid ever, with blonde hair and blue eyes. I chose one of my favorite color combinations, using blue cardstock from the cardstock add-on and those gorgeous Petaloo yellow Botanica blooms from the flower add-on. The daisies are from I am Roses.
On this layout, I used a photo of my younger brother. He was the cutest kid ever, with blonde hair and blue eyes. I chose one of my favorite color combinations, using blue cardstock from the cardstock add-on and those gorgeous Petaloo yellow Botanica blooms from the flower add-on. The daisies are from I am Roses.
The chipboard pieces came in the Embellishment add-on and are a Blue Fern flourish that I cut apart and heat embossed. Those pretty doilies are part of the main kit.

I love Prima's wooden embellishments and this one came in a set included in the Embellishments add-ons.

I did a little masking using Golden's Crackle Paste and a Prima mask - both from my stash. You can see Prima's wooden rose embellishment peeking out here, also from the Embellishment add-on.

Supplies:
Cardstock: Core'dinations Vienna Lake
Patterned paper: Blue Fern Ombre Dreams collection: base - Susan's Dream, rectangle - Ginger's Dream, torn rectangle - Blue Fern packaging
Letters: Maya Road
Chipboard: Blue Fern Flourishes
Embossing powder: Ranger Antiquities Weathered White
Flowers: Petaloo Botanica Blooms yellow 1102 103, I Am Roses daisies
Masking paste: Golden Crackle Paste
Paint: On letters, Shimmerz Dimensionsz Blue Lagoon, then covered with glitter
Other: Melissa Frances Doilies, Prima Wooden Embellishments


.png)
I did a little masking using Golden's Crackle Paste and a Prima mask - both from my stash. You can see Prima's wooden rose embellishment peeking out here, also from the Embellishment add-on.
Supplies:
Cardstock: Core'dinations Vienna Lake
Patterned paper: Blue Fern Ombre Dreams collection: base - Susan's Dream, rectangle - Ginger's Dream, torn rectangle - Blue Fern packaging
Letters: Maya Road
Chipboard: Blue Fern Flourishes
Embossing powder: Ranger Antiquities Weathered White
Flowers: Petaloo Botanica Blooms yellow 1102 103, I Am Roses daisies
Masking paste: Golden Crackle Paste
Paint: On letters, Shimmerz Dimensionsz Blue Lagoon, then covered with glitter
Other: Melissa Frances Doilies, Prima Wooden Embellishments
I have used nearly every smidge of paper that came in the kit but I did manage to put together this little card using scraps from Prima Princess paper that was also part of the kit. I added the bit of lace and the small flowers. The leafy branch is a die cut using a Memory Box die from the store.
Tomorrow I have a video tutorial up, hope you'll stop by and check it out!
Thursday, July 24, 2014
Hello everyone! Today I'm sharing my last two projects using the Swirlydoos July Kit, Celestial Summer. It was such a fabulous kit to work with. I love the colors and of course the tiny fairies. The inspiration of my layout and trinket box. I loved fairies since I was a little girl and was more than overjoyed when Prima came out with the tiny fairy resins! Then, getting them in a kit was even better! Now my new fav kit! :)


When my two oldest were younger I love to dress them up as fairies and takes pictures. So, I knew I would use them for this kit. You can find the Mystic Dragonflies in my Etsy Shop.
My next project is Fairy Trinket Box. I painted a wooden box with gesso, sprayed with Prima mist then added Distress Crackle in Tattered Rose.
Here is the trinket box open. I made a little cushion to rest the key to the "Fairy Realm" with a little bottle of fairy dust. :)
Thanks for taking a peek!
Wednesday, July 23, 2014
Hi =) Today I have two layouts to share with you. Two layouts in two different color schemes but with mixed media mediums on both. Here´s the first one.. Me and our Icelandic horse Draupnier.
For this layout I used a diamond shaped stencil which suited well with the background paper from Blue Fern Studios. Love the SEI fabric paper that comes in the kit. It´s easy to tear and gives soft edges that melts in with the background paper.


For this layout I used a diamond shaped stencil which suited well with the background paper from Blue Fern Studios. Love the SEI fabric paper that comes in the kit. It´s easy to tear and gives soft edges that melts in with the background paper.
For this layout I´ve used the main kit, flower add on, embellisment add on and the medium add on.
My next page is of my daughter one day at the beach by the sea.. so the blues went well with this photo. I have layered some doilles , lace and chese cloth and then went over it all with a stencil and light modelling paste. On top of it I´ve used some spray colors
.
.
For this page I´ve used the main kit, flower add on and mediums add on. I have painted the chipboard piece with the galatos that was part of the medium kit.
Thanks for stopping by =)
Tuesday, July 22, 2014
Hello everyone, Debbie with you today to share my second reveal project with Swirlydoos July kit
Celestial Summer. I have 5 grand daughters and each one of them are a girly girl. When I started this little Ballerina Keepsake Box it was with them in mind.


I started out by making the Ballerina slippers and then painting the wooden box to match. The embellishments in the main kit are perfect for this little box. I added a little modeling paste to the box along with drywall tape in random areas. I finished up with a little gesso and chalk ink.
I finished up the Celestial Summer Kit with a final layout.

Thanks for stopping by the Swirlydoos blog today!!

Saturday, July 19, 2014
Happy Saturday! It's Rae with you today and I am excited to share a product review with you. Swirlydoos was asked to review Thermomorph Moldable Plastic:

This is an extremely versatile product that you can use for any type of craft, or any other practical use, but I am giving the scrapbooker's perspective. Check out my video review:
And, here's a card I made using the embellishments with the Thermomorph AND the Celestial Summer kit:

This is an extremely versatile product that you can use for any type of craft, or any other practical use, but I am giving the scrapbooker's perspective. Check out my video review:
And, here's a card I made using the embellishments with the Thermomorph AND the Celestial Summer kit:
Enjoy the rest of your weekend!
Friday, July 18, 2014
Tracey here to share my second reveal with the lovely July kit,”Celestial Summer”.My first project is a page using the apricot tones of the kit:

Using the fabric like SEI paper, I cut out flower layers using my trusted Tattered Florals die and stacked and sewed the layers together

Then I hit them with Perfect Pearl mist and the heat gun,which made the petals curl up-I really like how they turned out!

I created the pleats around the page with just water and paper strips.

Using a prima mask and Distress Inks, I created the shaded Damask background. I liked the distressed whites that the Prima wooden tokens already had, so I left them bare. I adore all the chroceted lace in the kit and used it as a mat for my pic.
My next project uses the wooden tray that the Prima resin fairies came packaged with.

I turned it over and mod-podged the Prima Princess paper. I shaded using the pretty Shimmerz and gesso.

The large Prima flowers were from my stash but I think complement the paper well. I love sparkle so everything gets a little Diamond Stickles!

I need to get more of the chippie alphas because I love the font and how well they take ink.
That’s all I have for today! Hope you love the kit as much as I do!


Thanks to everyone you joined us for our blog hop! We appreciate your kind comments!
Winners, please contact Rae (rae@swirlydoos.com) with your mailing address so we can get your prizes out to you. :)
Winners, please contact Rae (rae@swirlydoos.com) with your mailing address so we can get your prizes out to you. :)
Here are the winners:
Krystle, you have won this Blue Fern Studios prize pack!

This Die-Namites gift card goes to Stephanie!

Ginny Hickmott, this Authentique paper is YOURS!

And, Linda Pekrul, we hope you will love this paper from Bo Bunny!

Again, thank you for hopping with us, and be sure to join us for our August hop next month!
Saturday, July 12, 2014
Happy Saturday everyone!
Today I want to share a card I made with this month's GORGEOUS kit
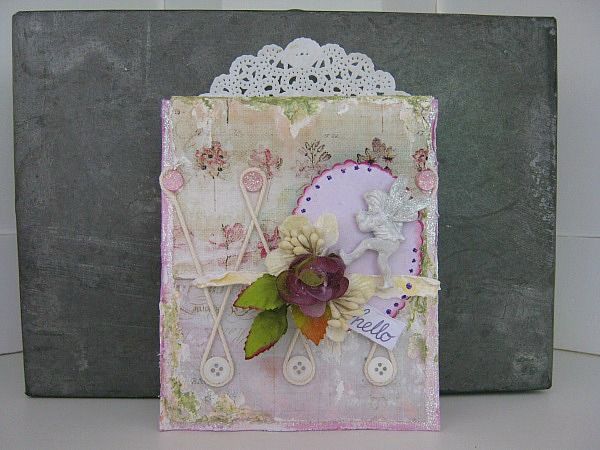
and of course I have photographed each step, for you to see, how it came together.
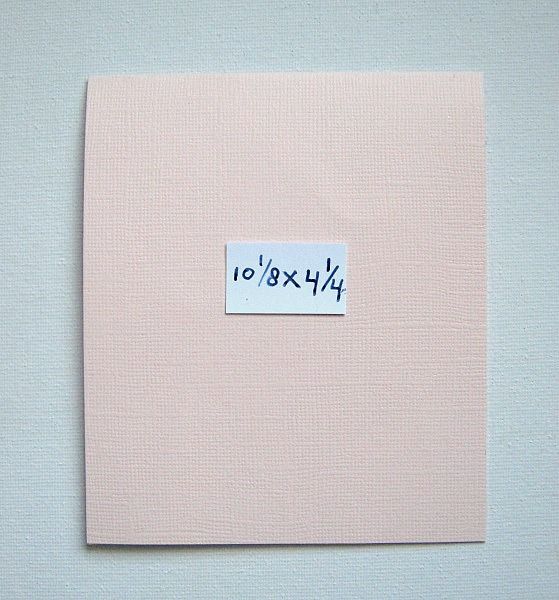
For the base of my card, I cut a piece of cardstock at 10.1/8 x 4.1/4 and folded it double lenght wise. So the fold is at the top.
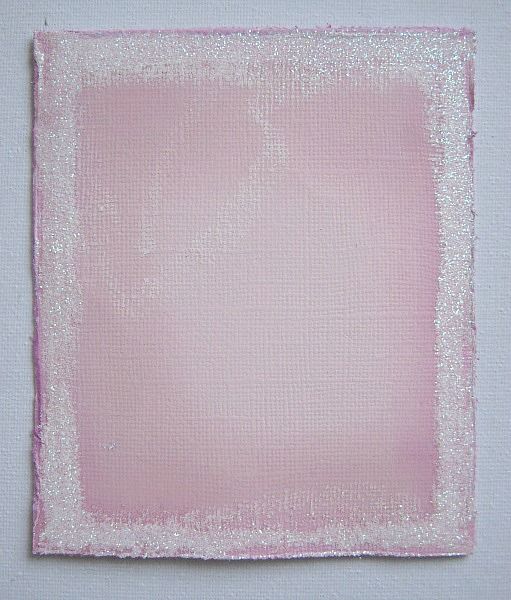
I spritzed my edges with a lilac mist. (which I made using the Izink's that came in the last 2 Medium AddOns) Then I brushed on some white acrylic paint and while the paint was still wet I sprinkled diamond glitter over it. let it dry for about 10 minutes and then fixed the glitter using hairspray.
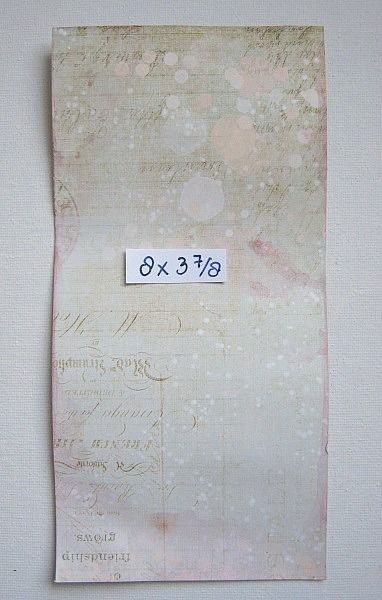
I cut a piece of pattern paper at 8 x 3.7/8

I marked it at 4.5/8 (where the line is) from the bottom and then glued that part to my base card. Like in the picture.
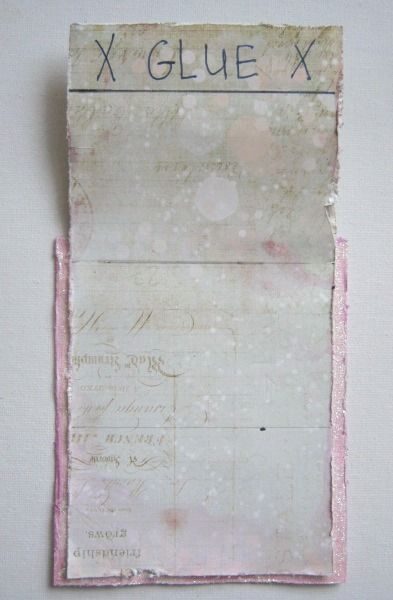
Then I measured about 1 inch from the top, scored it, and added glue to that part.
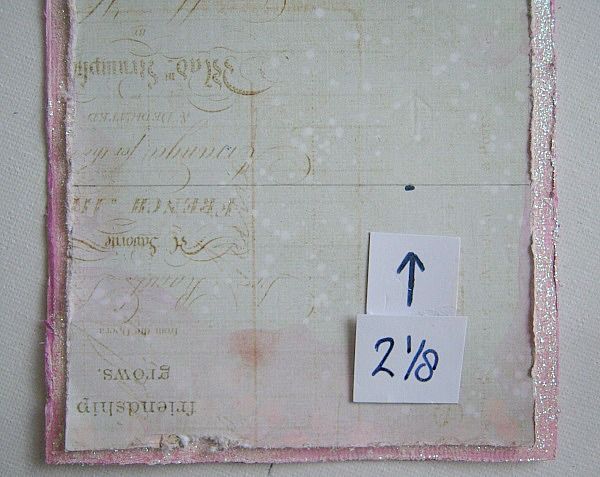
I made a pencil line at 2.1/8 from the bottom

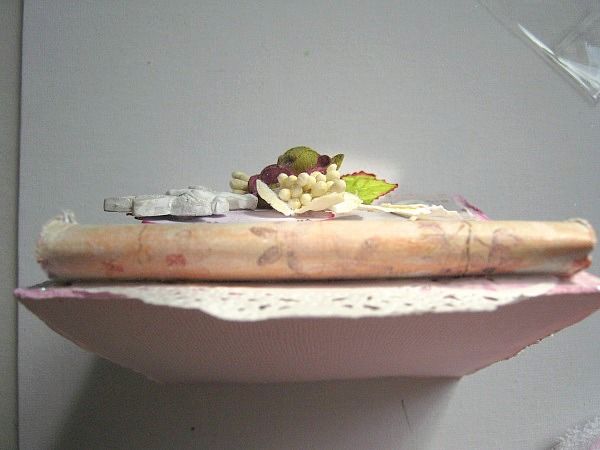
And glued the top part to that line. (and YES, I know the script on the paper is upside down)
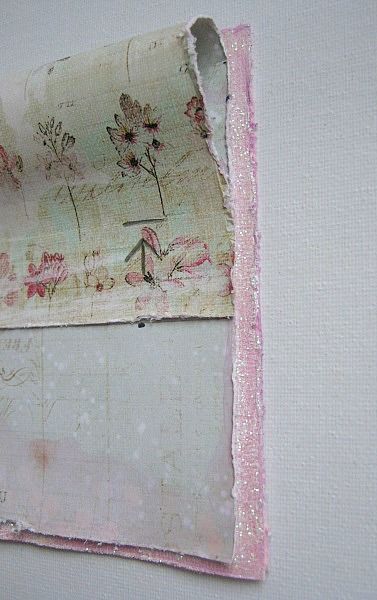
It looked like this from the side vieuw.
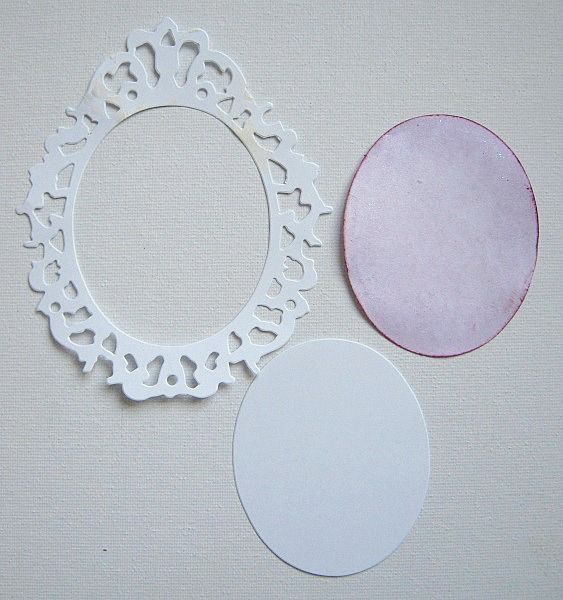
I had die cutted this frame earlier, but I only wanted to use the oval shape from the center. As you can see, I misted it in a lilac shade and added ink around the edge to the one I want to use.
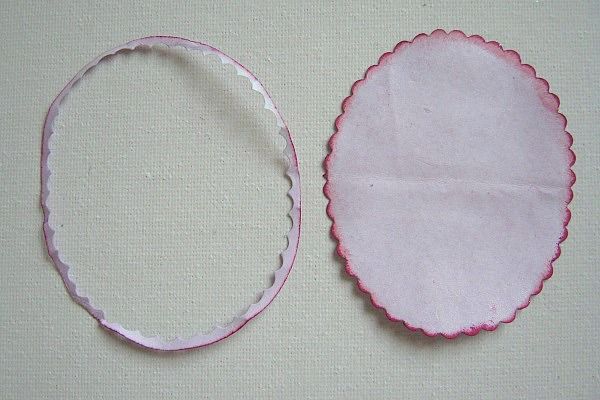
I hold the oval die cut to my base card and thougth it was a little too big. So I folded it double and cut around, using a deco-scissor. (Later on, I decieded that I needed to do that again.) I inked the edges with 2 different shades of lilac. I used colorbox chalk cat's eyes.

I took 1 of the fairies that came in the Main Kit. Gave it a light coat of white acrylic paint, and whilst the paint was still wet, I sprinkled diamond glitter over the wings. Set it aside for later use.
Then, I wanted to use an idea I had earlier: .....>> grab some buttons <<.....
and... ah well let me show you
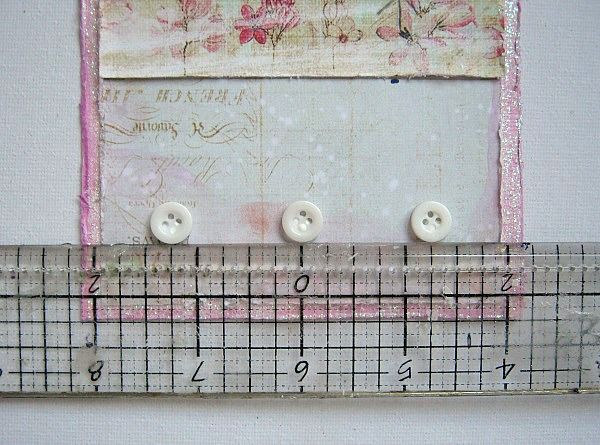
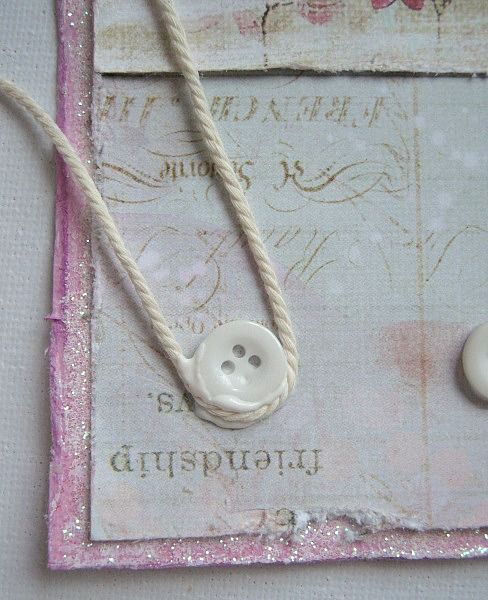
I glued 3 little buttons at the bottom of my card. I used Beacon Gem-Tac for it, as it dries clear.
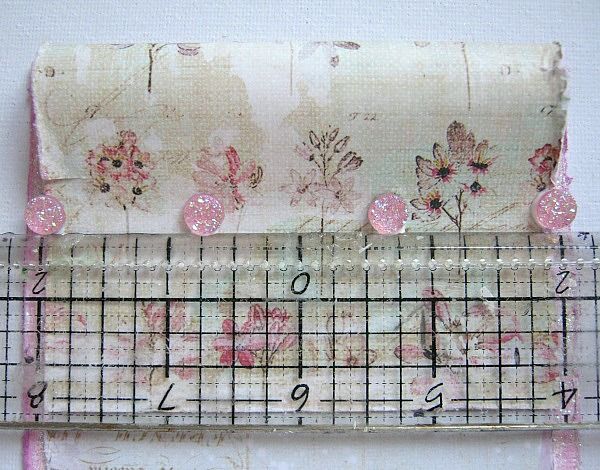
Then I glued 4 sparkles like this. (I later realized that these sparkles came from last month's kit)
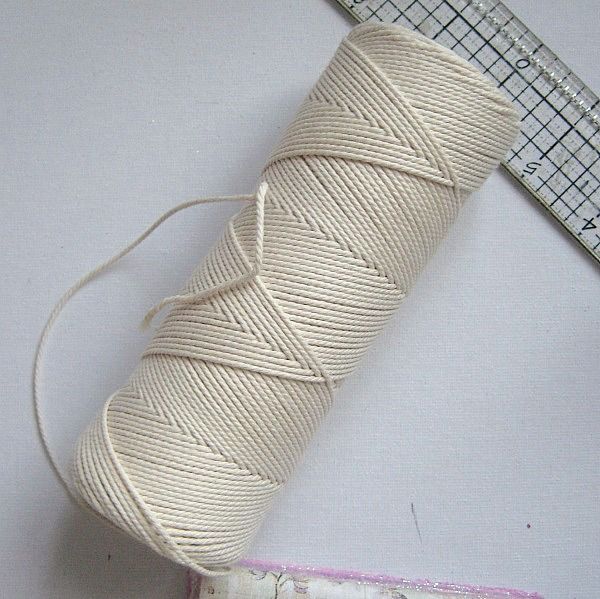
I grabbed my roll of cotton thread..
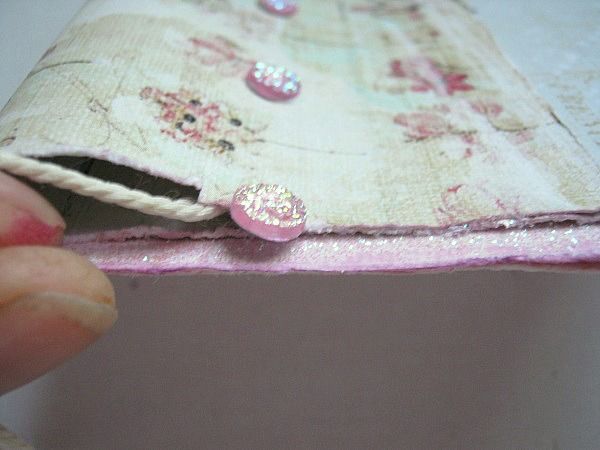
Glued one end in between, like the picture shows.
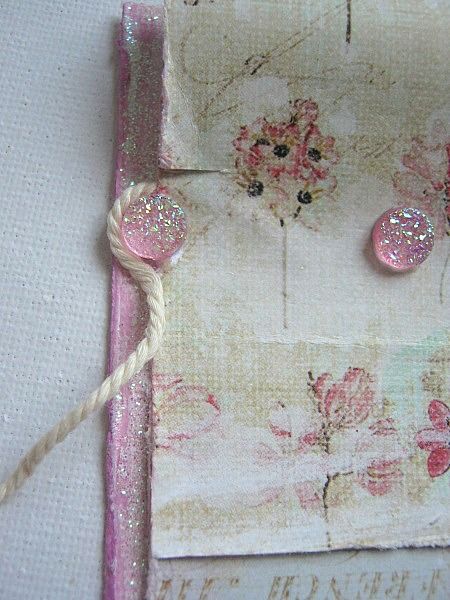
Added some glue around the sparkle and guided my thread like so
Then I added glue around the button and pushed the thread into the glue like this (Gem-Tac dries clear)
Then I moved my thread up like this, and added glue around the second sparkle.
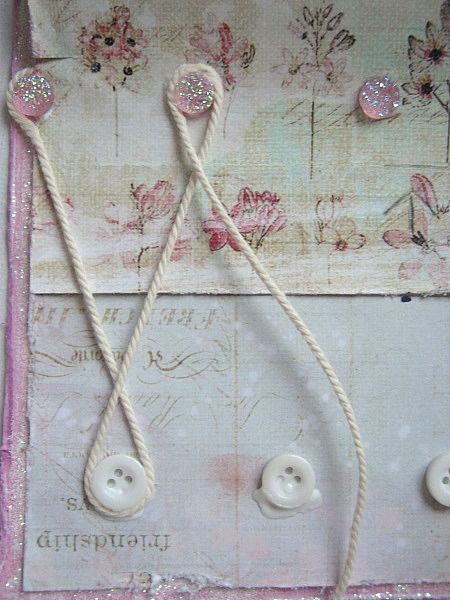
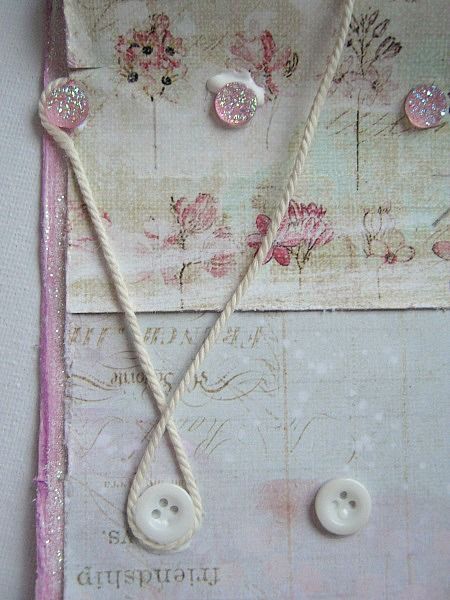
I pushed the thread into the glue and guided my thread towards the second button and repeated the previous steps.
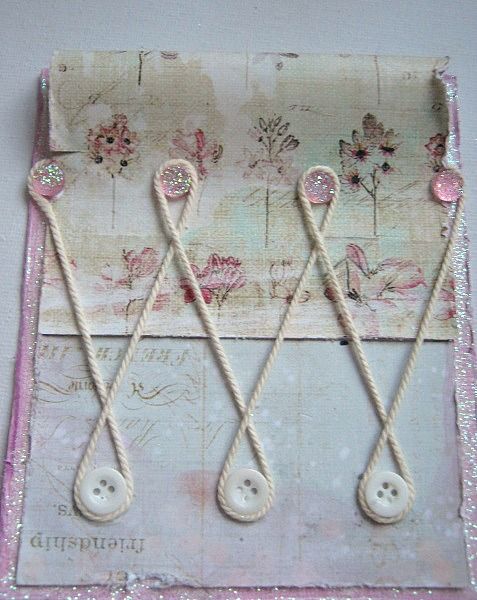
Till I created this pattern. I glued the end of my thread like I did the one, at the begin, on the left side.
I love how this pattern looks on the card. It really adds dimension.

Because I want the oval die cut to stand out from the card, I took a bottle cap and filled it up with foamtape.
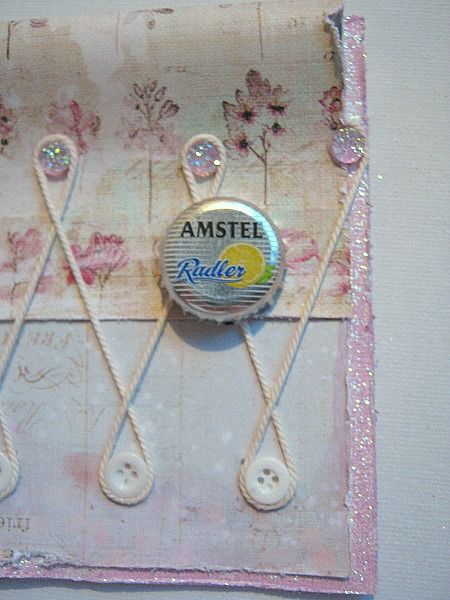
Then I hot glued it to my card. This is going to be the base for the oval shaped die cut. I could have used foamtape alone, but I thought it was taking too much time to go in between the lines of the thread.

Then I took a piece of scrap, which was perfect to go on top of the die cut and be the base for my flowers.
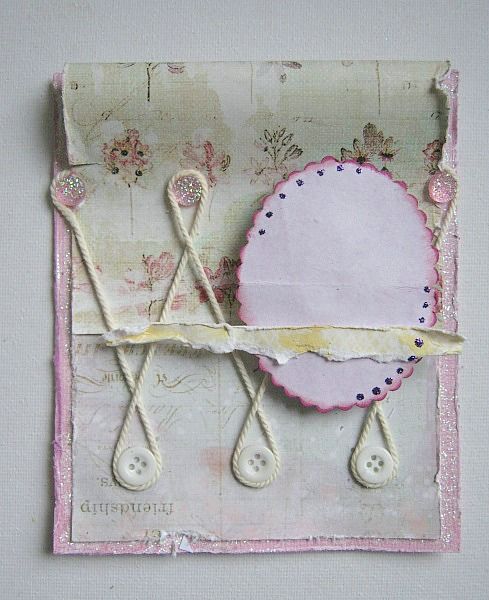
I glued it like this, and I also added a few tiny dots to the die cut, using Stickles in purple.
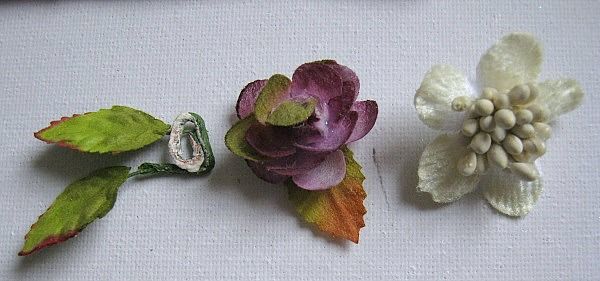
I selected the flowers I wanted to use
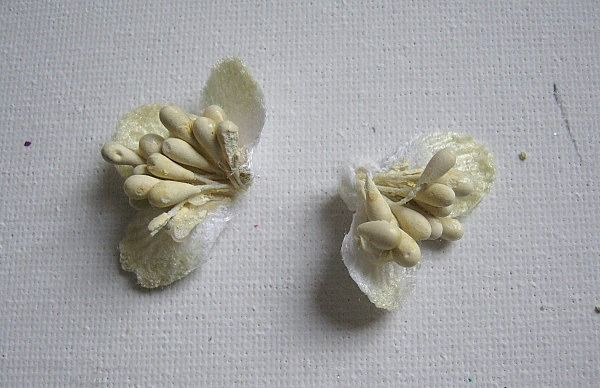
And I gently teared, the white-creamy one, in half. (Krissy has these in the Boutique - Petaloo Botanica Collection mini's)
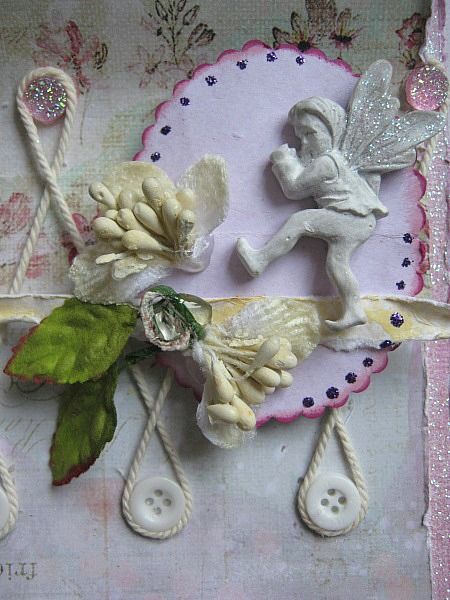
I added the resin fairy, the leaves and the 2, half flowers like this.
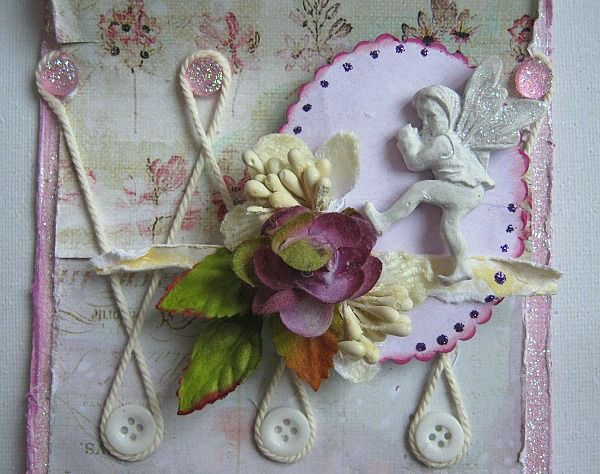
And then the little Petaloo rose that came in the Main Kit.
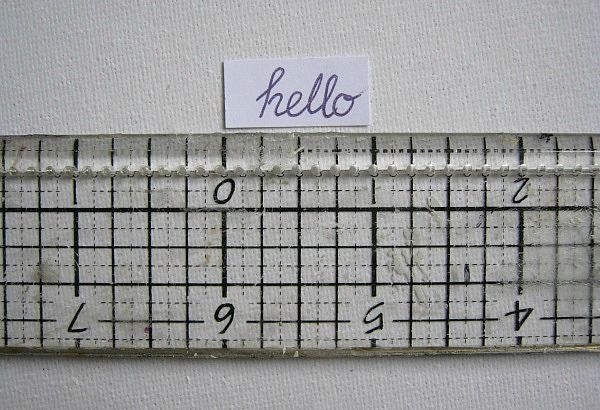
I wrote my sentiment on a piece of paper
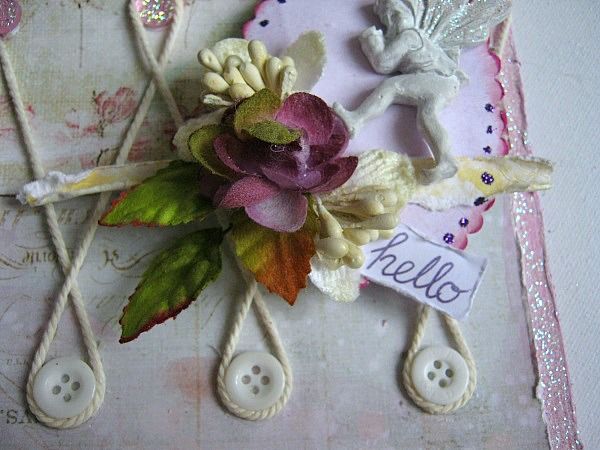
scratched the edges with my nails and glued it in place.

Then I cut a piece of a doily, that came in the Main Kit

And glued it at the top, in between the card base and the PP
Using the Shimmerz Dazzlerz in Dreamcycle, from the Mediums AddOn... I watered it down a bit and, almost dry brushed it to the top. If you didn't get the Mediums AddOn, you can use a deep peachy color water paint for this too. (Don't make it too wet!)
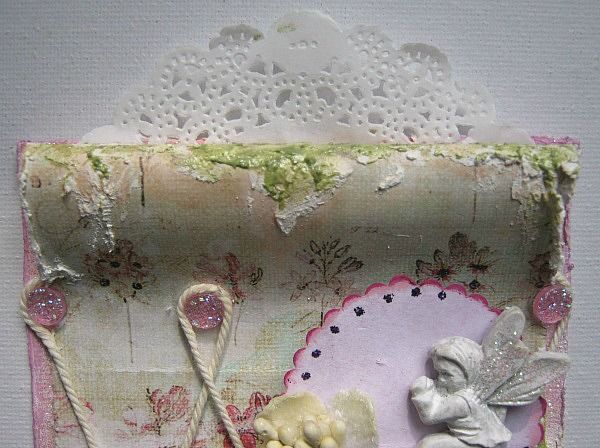
After the Dazzlerz dried, I added some structure paste with a palet knife and let it dry. (this dries fast) Then using the Shimmerz Texturez in Artie-Choked, also from the Mediums AddOn, I dabbed some on top of the structure paste using my finger. If you didn't get the Mediums AddOn, you can use any paint of your liking. The texture is already there because of the structure paste.
***If you don't have structure paste: You can take Gesso and add sand to it, give it a good stir and it is ready to go.***

I also added, some of the above, to the bottom and sides of my card.
And I called it done!
I hope you like it, and picked up a few tips.
Today I want to share a card I made with this month's GORGEOUS kit

and of course I have photographed each step, for you to see, how it came together.

For the base of my card, I cut a piece of cardstock at 10.1/8 x 4.1/4 and folded it double lenght wise. So the fold is at the top.

I spritzed my edges with a lilac mist. (which I made using the Izink's that came in the last 2 Medium AddOns) Then I brushed on some white acrylic paint and while the paint was still wet I sprinkled diamond glitter over it. let it dry for about 10 minutes and then fixed the glitter using hairspray.

I cut a piece of pattern paper at 8 x 3.7/8

I marked it at 4.5/8 (where the line is) from the bottom and then glued that part to my base card. Like in the picture.

Then I measured about 1 inch from the top, scored it, and added glue to that part.

I made a pencil line at 2.1/8 from the bottom

And glued the top part to that line. (and YES, I know the script on the paper is upside down)

It looked like this from the side vieuw.

I had die cutted this frame earlier, but I only wanted to use the oval shape from the center. As you can see, I misted it in a lilac shade and added ink around the edge to the one I want to use.

I hold the oval die cut to my base card and thougth it was a little too big. So I folded it double and cut around, using a deco-scissor. (Later on, I decieded that I needed to do that again.) I inked the edges with 2 different shades of lilac. I used colorbox chalk cat's eyes.

I took 1 of the fairies that came in the Main Kit. Gave it a light coat of white acrylic paint, and whilst the paint was still wet, I sprinkled diamond glitter over the wings. Set it aside for later use.
Then, I wanted to use an idea I had earlier: .....>> grab some buttons <<.....
and... ah well let me show you

I glued 3 little buttons at the bottom of my card. I used Beacon Gem-Tac for it, as it dries clear.

Then I glued 4 sparkles like this. (I later realized that these sparkles came from last month's kit)

I grabbed my roll of cotton thread..

Glued one end in between, like the picture shows.

Added some glue around the sparkle and guided my thread like so

Then I added glue around the button and pushed the thread into the glue like this (Gem-Tac dries clear)

Then I moved my thread up like this, and added glue around the second sparkle.

I pushed the thread into the glue and guided my thread towards the second button and repeated the previous steps.

Till I created this pattern. I glued the end of my thread like I did the one, at the begin, on the left side.
I love how this pattern looks on the card. It really adds dimension.

Because I want the oval die cut to stand out from the card, I took a bottle cap and filled it up with foamtape.

Then I hot glued it to my card. This is going to be the base for the oval shaped die cut. I could have used foamtape alone, but I thought it was taking too much time to go in between the lines of the thread.

Then I took a piece of scrap, which was perfect to go on top of the die cut and be the base for my flowers.

I glued it like this, and I also added a few tiny dots to the die cut, using Stickles in purple.

I selected the flowers I wanted to use

And I gently teared, the white-creamy one, in half. (Krissy has these in the Boutique - Petaloo Botanica Collection mini's)

I added the resin fairy, the leaves and the 2, half flowers like this.

And then the little Petaloo rose that came in the Main Kit.

I wrote my sentiment on a piece of paper

scratched the edges with my nails and glued it in place.

Then I cut a piece of a doily, that came in the Main Kit

And glued it at the top, in between the card base and the PP

Using the Shimmerz Dazzlerz in Dreamcycle, from the Mediums AddOn... I watered it down a bit and, almost dry brushed it to the top. If you didn't get the Mediums AddOn, you can use a deep peachy color water paint for this too. (Don't make it too wet!)

After the Dazzlerz dried, I added some structure paste with a palet knife and let it dry. (this dries fast) Then using the Shimmerz Texturez in Artie-Choked, also from the Mediums AddOn, I dabbed some on top of the structure paste using my finger. If you didn't get the Mediums AddOn, you can use any paint of your liking. The texture is already there because of the structure paste.
***If you don't have structure paste: You can take Gesso and add sand to it, give it a good stir and it is ready to go.***

I also added, some of the above, to the bottom and sides of my card.
And I called it done!
I hope you like it, and picked up a few tips.
Subscribe to:
Posts (Atom)

Be sure to "LIKE & FOLLOW" Swirlydoos for special FB only deals and promos
Follow this blog with bloglovin

Scrapbook Sketches

see all of our sketches here
Keep Tabs On Our Blog!


Popular Posts
-
 Welcome to: Swirlydoos Kit Club February Scrapbook Kit Reveal & Blog Hop! Swirlydoos is proud to bring you our beautiful Febr...
 -
 Thank you for joining us today for our ONE DAY blog hop featuring our September kit collection, Gilted Pleasure . **All collec...
 -
 Welcome to Swirlydoos November Kit Reveal Blog Hop BLOCK PARTY!!! That's right, we are having a party and you are all invit...
 -
 Welcome to Swirlydoos' June Kit Reveal Blog Hop Block Party!! We are so pleased to show off our June kit, Antiquities!!! This kit...
 -
 Welcome to Swirlydoos' March Kit Reveal Blog Hop Block Party!! We have some amazing projects for you to see today and as a bonus...
 -
 Welcome to Swirlydoos' Mystical Winter kit reveal Blog Hop Block Party!! Happy New Year and Welcome!!! This month's kit,...
 -
 Welcome to: Swirlydoos Kit Club March Scrapbook Kit Reveal & Blog Hop! Swirlydoos is proud to bring you our beautiful March co...
 -
 SCROLL DOWN FOR THE 12 DAYS OF CHRISTMAS CONTEST: DAY FIVE! Welcome to: Swirlydoos Kit Club December Scrapbook Kit Reveal & Blo...
 -
 Welcome back! We have a really fun blog hop all set for you today. Our May kit, So Chic , is well.....just that...so chic! This kit is ...
