Wednesday, April 30, 2014
An exciting day for us at Swirlydoos as we are adding three fabulous new designers to our team starting in June! Thank you to all of the ladies who applied to be a part of our team. You all made it very difficult for us! Please give a warm welcome to these very talented ladies!
Hi, I´m Maja Stokk from Sweden a full time working teacher in mathematics and science subjects,
married and mother of five children. I have been into scrapbooking since 2008 and love it!
For me scrapbooking is meditation and a perfect way to live out my creativity. I always try to develop
myself and love to try new things. I say that I don´t have any particular scrappy style, but I guess it´s romantic and sometimes a bitgrungy. I love flowers, layers and to play with stamps, stencils and paint.
I do mostly layouts but also some cards, canvases and altered things. I´m so happy to be a part of Swirlydoos kit club team."
My name is Kimberly (Droopidog) Heard. I’ve been married for 19 yrs and we have no children. Since it’s just the 2 of us we travel as often as we like. Most of my scrappy subjects are involve the many adventures of the Mr and I. Boy does he provide me with plenty of fun and funny scrappy photos. Have to love a man who doesn't mind my scrappy addiction.
I started scrapping in 2001, after my mom died. I had all these copies of photos and didn’t know what to do with them. I had a friend that was into scrapbooking so I called her. Once I did my first page, I was hooked.
Like any good scrapper, I am never without my camera and am always looking for an opportunity to take scrap worthy pictures.
Hi! I'm Debbie Sherman from the Cowboy State, big beautiful Wyoming! I'm so ecstatic be part of the Swirlydoos DesignTeam! I've been admiring this team for a long time! When I'm not scrap booking I am a road designer, photographer, wife, mother, grandmother of 7, auntie and friend. I have been crafting since I was a little girl. I started out sewing and making jewelry around the age of 7 and have been creating ever since. I still bead and sew but now it's mostly on my paper projects. I love photography and sometimes get that "great shot" that all photographers live for! I am fortunate enough to have a press pass and am able to shoot big events occasionally. The city I live in has a yearly old west celebration called the"Daddy of 'em all" and I'm fortunate enough to attend the big rodeo's, Native Americans and several other events in town. With my press pass I have front row seating for these events which allows for some awesome photos. With all the photos I take it gives me the perfect reason to scrap them! I'll be sharing some of those with all of you! I'm so excited to be part of this wonderful team and hope to inspire and be inspired along the way.
Maja Stokk
Hi, I´m Maja Stokk from Sweden a full time working teacher in mathematics and science subjects,
married and mother of five children. I have been into scrapbooking since 2008 and love it!
For me scrapbooking is meditation and a perfect way to live out my creativity. I always try to develop
myself and love to try new things. I say that I don´t have any particular scrappy style, but I guess it´s romantic and sometimes a bitgrungy. I love flowers, layers and to play with stamps, stencils and paint.
I do mostly layouts but also some cards, canvases and altered things. I´m so happy to be a part of Swirlydoos kit club team."
You can check out Maja's beautiful designs on her blog: http://stokk-eyovine.blogspot.
Kim Heard
I started scrapping in 2001, after my mom died. I had all these copies of photos and didn’t know what to do with them. I had a friend that was into scrapbooking so I called her. Once I did my first page, I was hooked.
Like any good scrapper, I am never without my camera and am always looking for an opportunity to take scrap worthy pictures.
Check out Kim's lovely designs on her blog: www.droopidog.typepad.com
Debbie Sherman
You can see Debbie's gorgeous designs on her blog: http://debbie-lovescrappin.
And, we are pleased to announce that we will have a guest designer very soon!
Linda Pekrul
You can see her stunning designs on her blog: www.blueskyscrapping.blogspot.
Congrats, ladies! We look forward to working with you!
Tuesday, April 29, 2014
Hello Everyone,
Today I want to share my lastest card tutorial with you...
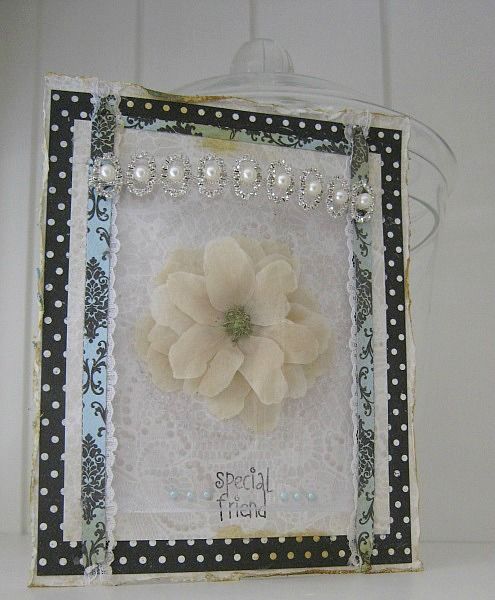
The inspiration for this card, was found whilst doing some garden work. I have this Clematis plant in my garden and oh, how much I love those flowers. Then an idea came to mind, to pick a few flowers and see if I could dry them, and so I did. Of Course, dried flowers are very, very delicate and need some protection, or they will tear. Anyway... this is what I came up with:
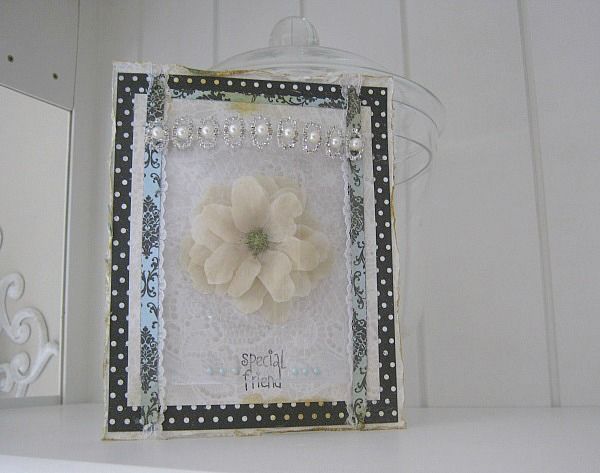
And here's how it came together:
For my base card I folded a A4 piece of white cardstock double and cut it a tad bit smaller than 5.7/8 x 7.4/8
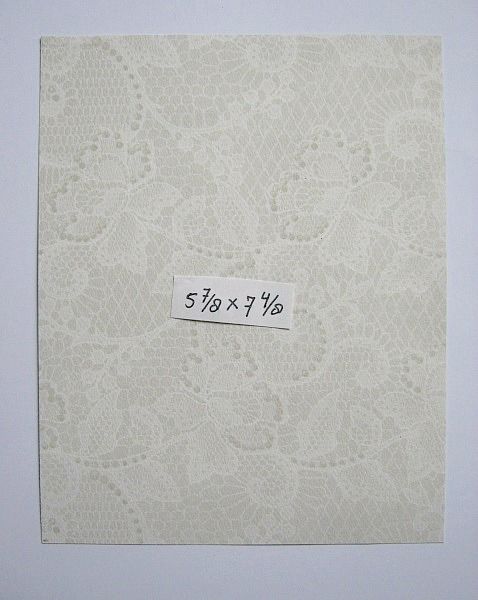
For my first layer I cut a piece of the white lace PP at 5.7/8 x 7.4/8
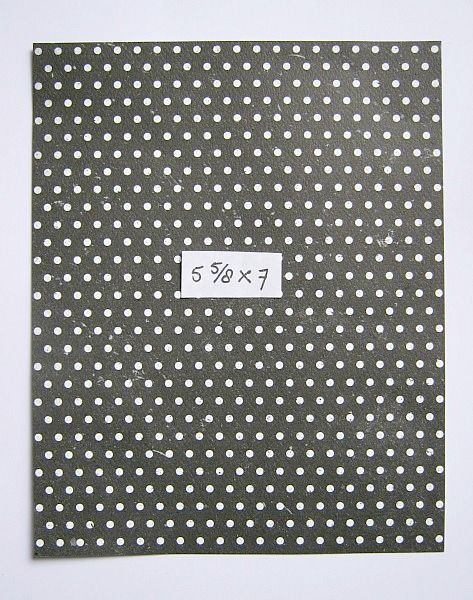
For my second layer I cut a piece of the polka dot PP at 5.5/8 x 7 inch
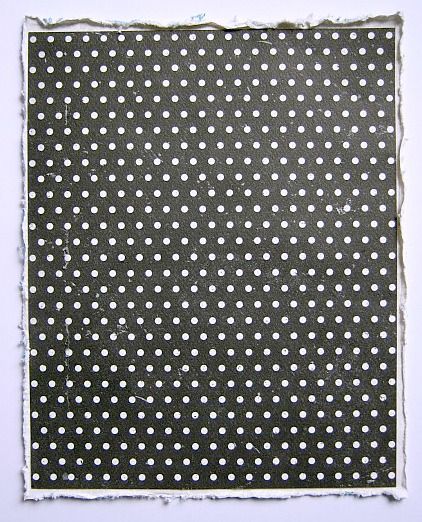
I glued both layers to the base card. I only distressed the first layer.
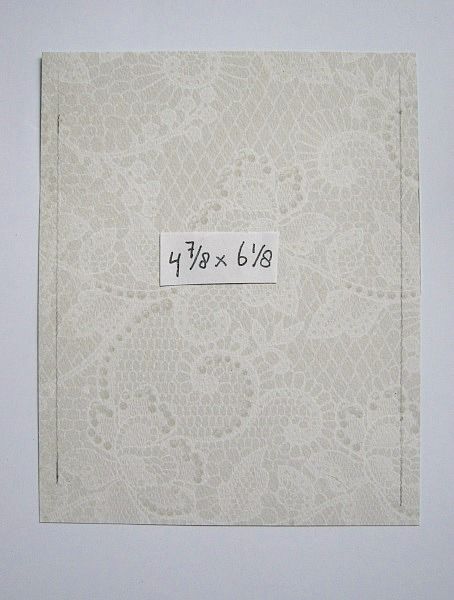
Then I cut a piece of the white lace PP at 4.7/8 x 6.1/8 inch and made a pencil mark at both sides
at 1/4 of an inch
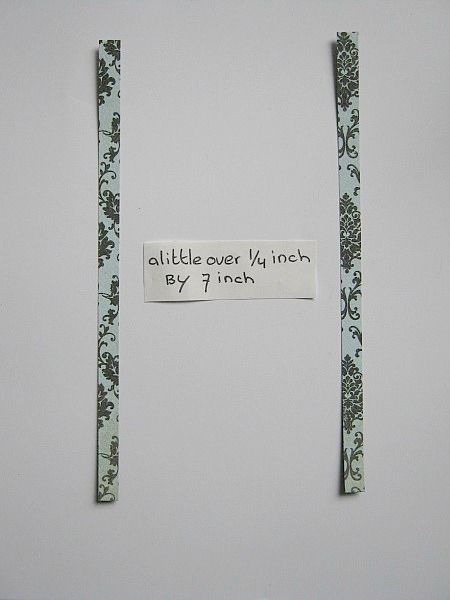
I cut 2 strips of that beautiful teal/black PP
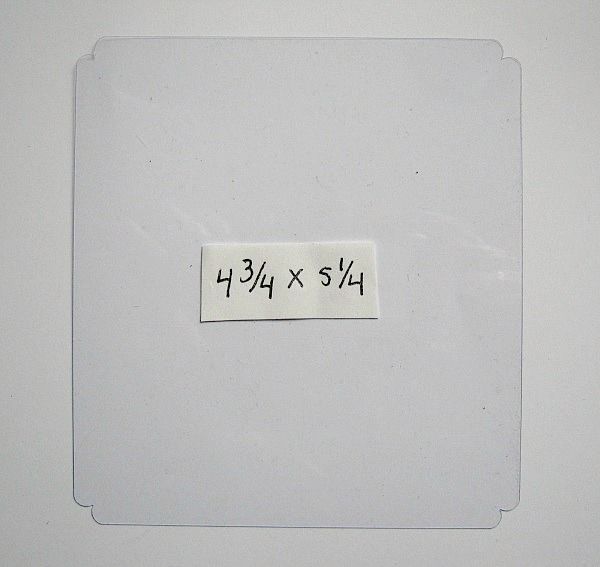
and a piece of acetate at 4.3/4 x 5.1/4 inch. (5.1/4 is the highth) I punched the corners.
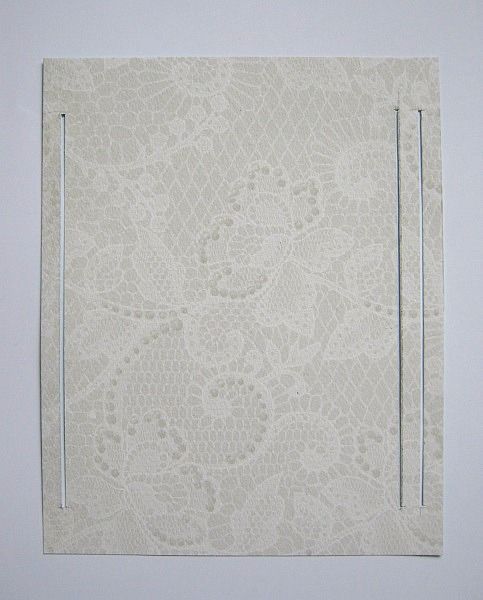
Then on the pencil marks I made cut lines, for the acetate to stick through. LEARN FROM MY MISTAKE ....On the right side you have to go 2/4 of an inch, inwards. So ignore the outer cutline at the right side.
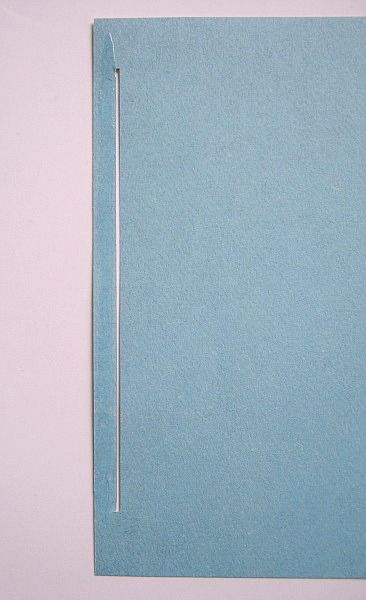
then I flipped the paper over, and if you look closely in the pic, you'll see that I added glue to the left side of the cutline.
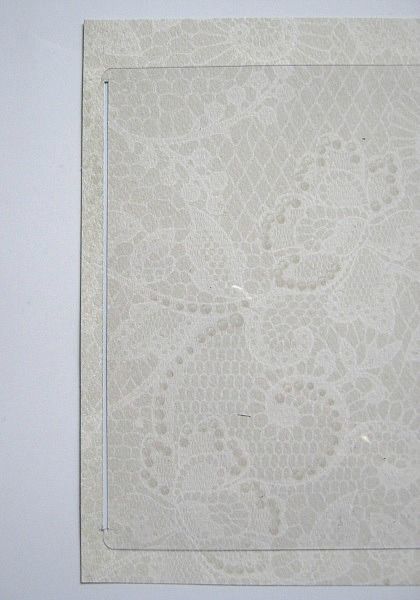
Flip it over again and stick one side of the acetate like in the picture and press the outher edge down.
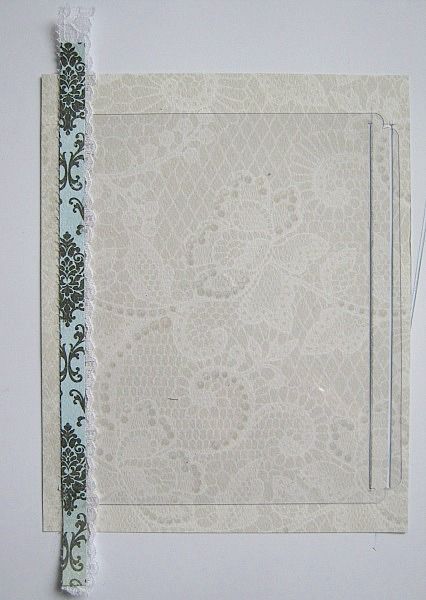
I then added a strip of lace and a strip of the PP. I glued this down using Beacon 3 in 1.
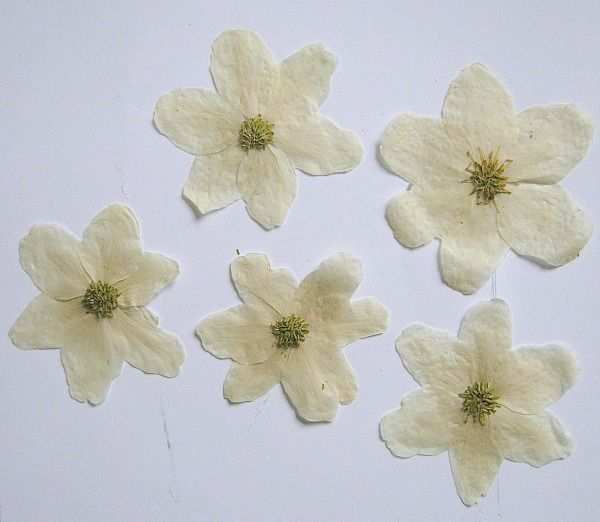
From my garden I took 5 clematis flowers and I wrapped them in paper towel and let them dry for about a week, in an old book. This is how they came out. I want to stack them together.
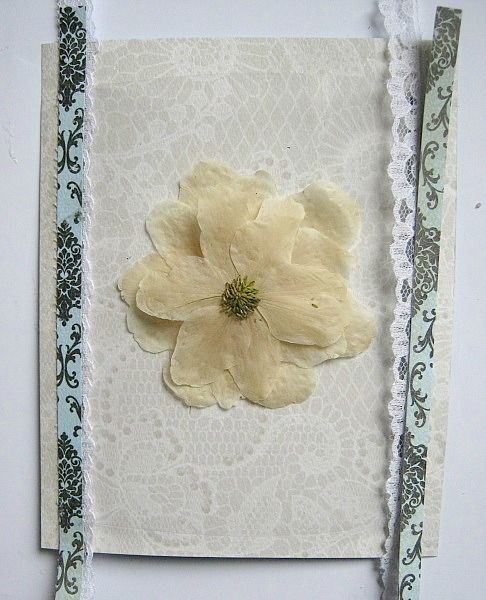
And place them something like this in the center of my card. The acetate will protect this delicate flower.
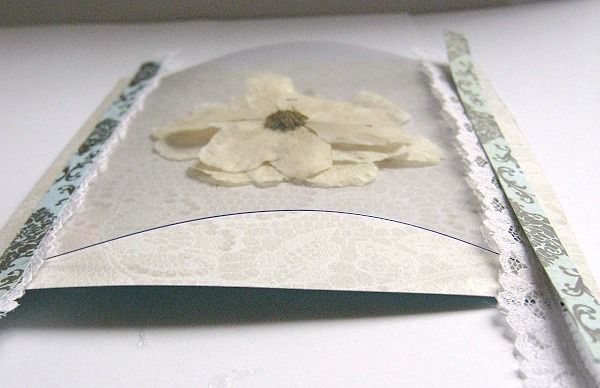
And this is how the acetate will stand out from the card. Okay, back to the flower
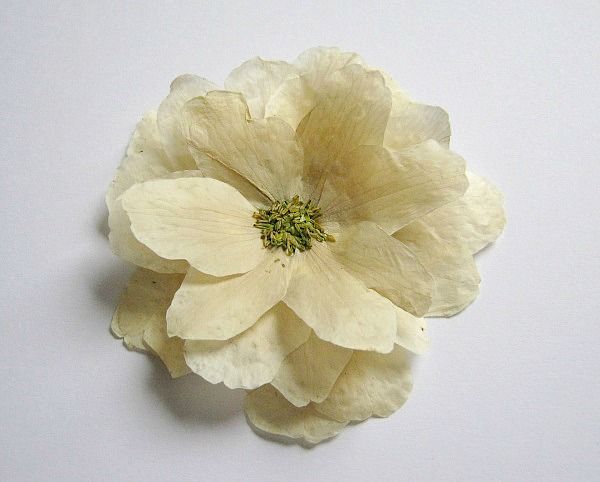
I stacked my flowers together, using Beacon 3 in 1, for the centers..... Isn't that PRETTY?????
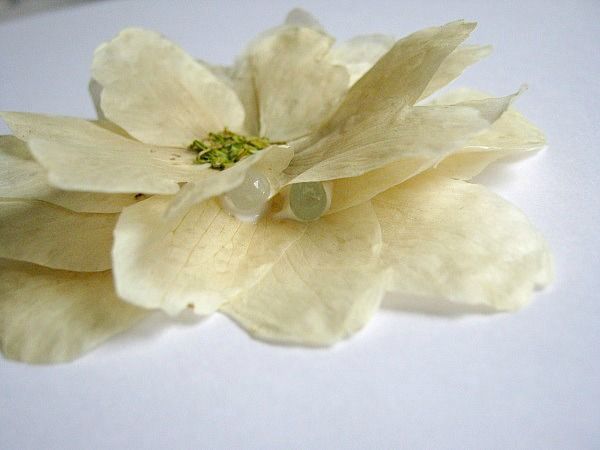
In between the layers I glued some glass beads using Beacon Gem-Tac, for dimension.
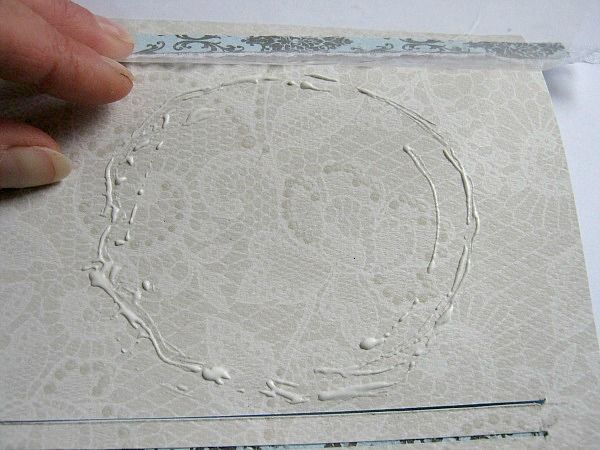
I aslo added a sloppy circle with Beacon Gem-Tac, but you can use Glossy Accents just as well.
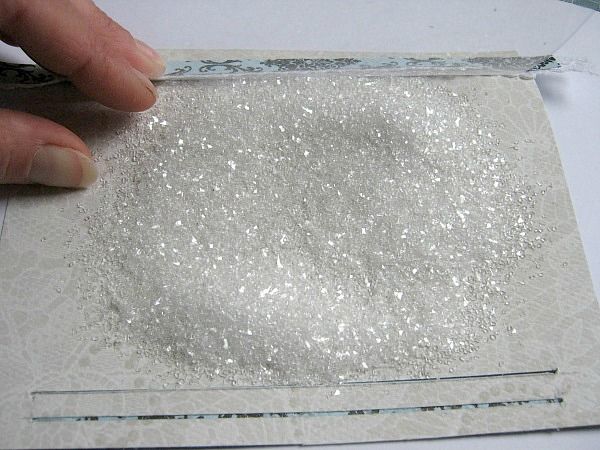
I covered it with Diamond Dust Glass Glitter and on top of that I used a piece of scrap to press the diamond dust into the glue
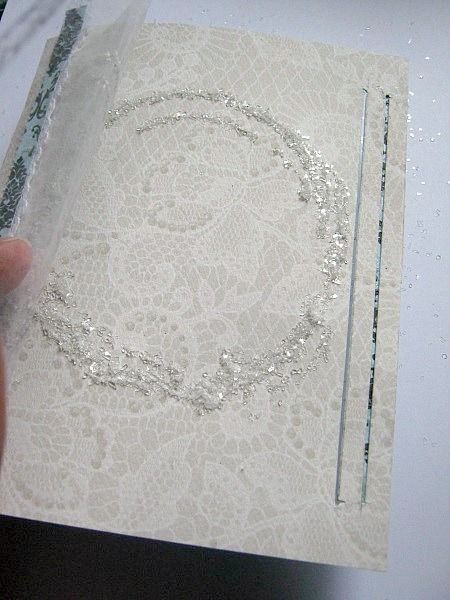
I shook off the excces
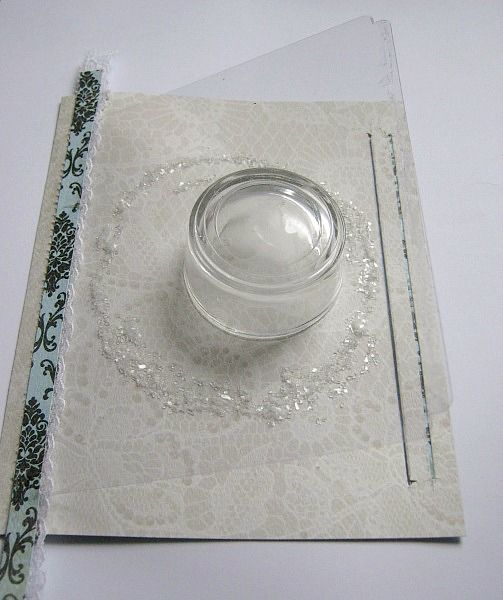
And put a little glass tub in the middle, and left it to dry for about an hour. If you don't have the glass glitter you could use Diamond or chrystal stickles, to make the circle.
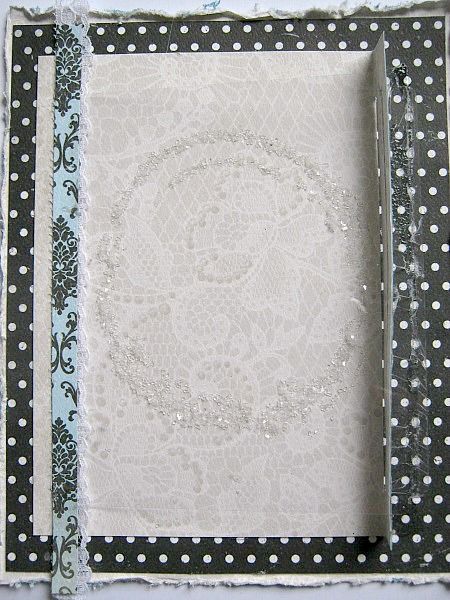
Then I glued this layer, accept for the right side, to the polka dot paper. My acetate leans on the,
folded up, right side.
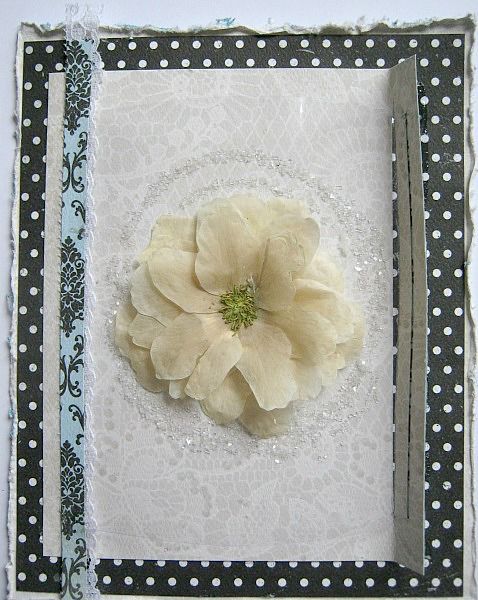
Then I glued my beautiful flower in place. Love how it turned out.
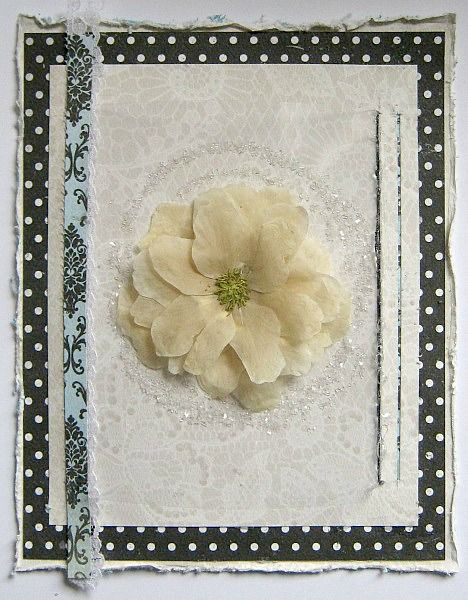
I added glue to the back of the right side, and stick my acetate trough the cutline and pressed everything down.
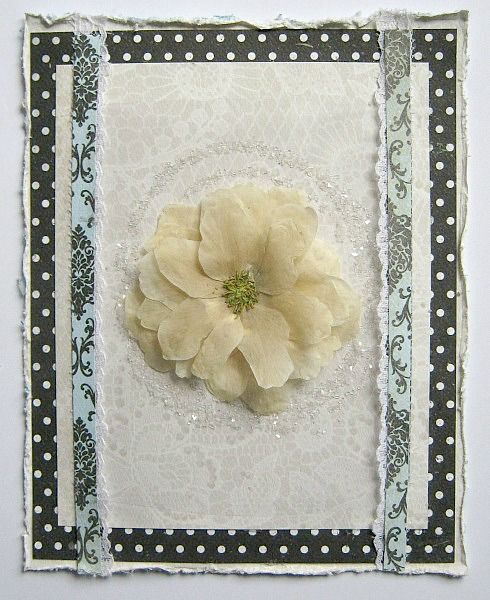
Then I glued my lace and paper strips at the right side, like in the picture.
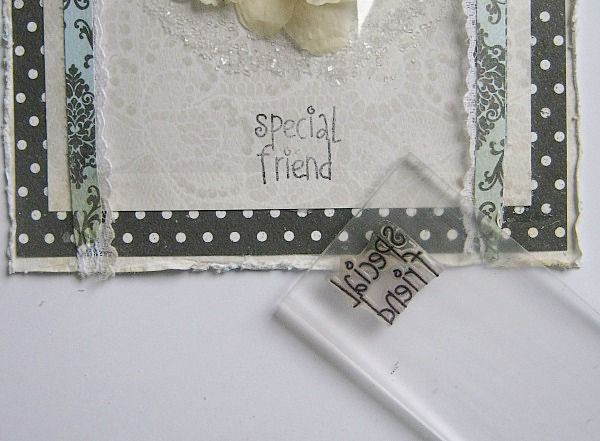
Because of the acetate is standing out, I was able to stamp my sentiment underneath the acetate
using a small stamping-block.
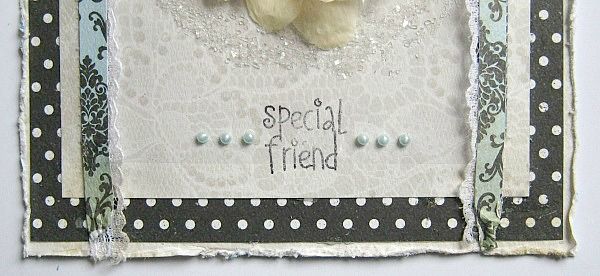
For the finishing touch I added tiny blue pearls on each side of my stamped sentiment.
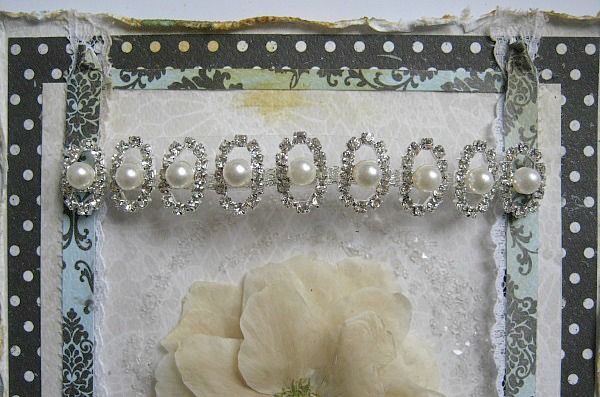
From the Bling AddOn, I had this piece of jewelery left and decieded that it was the perfect match, to top off the acetate. I also added some watered down distress ink (Gathered Twigs) which I applied using a watercolor brush.
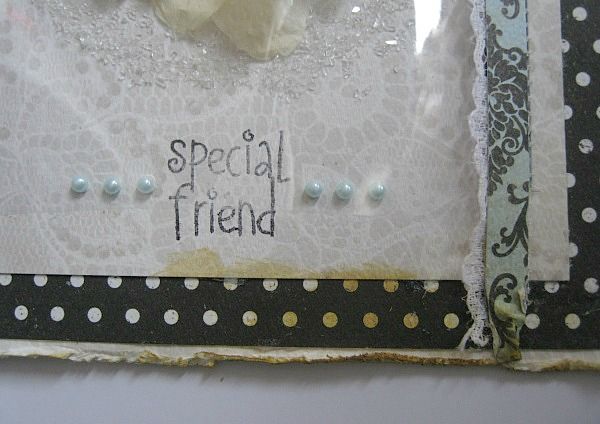
Of course, to balance it out, I added some ink at the bottom too.

I hope you like it and will dry some of those beautiful flowers from your garden.

And here's how it came together:
For my base card I folded a A4 piece of white cardstock double and cut it a tad bit smaller than 5.7/8 x 7.4/8

For my first layer I cut a piece of the white lace PP at 5.7/8 x 7.4/8

For my second layer I cut a piece of the polka dot PP at 5.5/8 x 7 inch

I glued both layers to the base card. I only distressed the first layer.

Then I cut a piece of the white lace PP at 4.7/8 x 6.1/8 inch and made a pencil mark at both sides
at 1/4 of an inch

I cut 2 strips of that beautiful teal/black PP

and a piece of acetate at 4.3/4 x 5.1/4 inch. (5.1/4 is the highth) I punched the corners.

Then on the pencil marks I made cut lines, for the acetate to stick through. LEARN FROM MY MISTAKE ....On the right side you have to go 2/4 of an inch, inwards. So ignore the outer cutline at the right side.

then I flipped the paper over, and if you look closely in the pic, you'll see that I added glue to the left side of the cutline.

Flip it over again and stick one side of the acetate like in the picture and press the outher edge down.

I then added a strip of lace and a strip of the PP. I glued this down using Beacon 3 in 1.

From my garden I took 5 clematis flowers and I wrapped them in paper towel and let them dry for about a week, in an old book. This is how they came out. I want to stack them together.

And place them something like this in the center of my card. The acetate will protect this delicate flower.

And this is how the acetate will stand out from the card. Okay, back to the flower

I stacked my flowers together, using Beacon 3 in 1, for the centers..... Isn't that PRETTY?????

In between the layers I glued some glass beads using Beacon Gem-Tac, for dimension.

I aslo added a sloppy circle with Beacon Gem-Tac, but you can use Glossy Accents just as well.

I covered it with Diamond Dust Glass Glitter and on top of that I used a piece of scrap to press the diamond dust into the glue

I shook off the excces

And put a little glass tub in the middle, and left it to dry for about an hour. If you don't have the glass glitter you could use Diamond or chrystal stickles, to make the circle.

Then I glued this layer, accept for the right side, to the polka dot paper. My acetate leans on the,
folded up, right side.

Then I glued my beautiful flower in place. Love how it turned out.

I added glue to the back of the right side, and stick my acetate trough the cutline and pressed everything down.

Then I glued my lace and paper strips at the right side, like in the picture.

Because of the acetate is standing out, I was able to stamp my sentiment underneath the acetate
using a small stamping-block.

For the finishing touch I added tiny blue pearls on each side of my stamped sentiment.

From the Bling AddOn, I had this piece of jewelery left and decieded that it was the perfect match, to top off the acetate. I also added some watered down distress ink (Gathered Twigs) which I applied using a watercolor brush.

Of course, to balance it out, I added some ink at the bottom too.

I hope you like it and will dry some of those beautiful flowers from your garden.
So Go out into your garden and pick yourself some of the gorgeous flowers,and dry them.
Have a lovely day!
Sunday, April 27, 2014
Today's layout of the week isn't a layout at all but a stunning frame. The frame was entered in the Butterfly Challenge and I knew immediately it would be this weeks winner. To me it looks like a vintage cameo...so beautiful and elegant!
Congrats Patty!!!!!!!!!!!!

Congrats Patty!!!!!!!!!!!!

Saturday, April 26, 2014
Happy Saturday!
Today I am sharing a layout I made using the April kit.
I have a start to finish video to show you how I made this project:
Thanks for visiting the Swirlydoos blog today!
Today I am sharing a layout I made using the April kit.
I have a start to finish video to show you how I made this project:
Thanks for visiting the Swirlydoos blog today!
Friday, April 25, 2014
Happy Friday, friends!! Today I'm sharing two more projects I made using the Swirlydoos April Kit, Tiffany's.
First up is the chipboard frame that came in the Main Kit. I painted it with black gesso and stippled on some bead gel medium for texture. Once it was dry I used the Prima Chalk Edger that came in the Embellie Kit and dabbed it in random areas. Then, I took a Distress Stain in Brushed Pewter rubbed it on lightly. I really love the effect of all the texture and layers on the bare chipboard. I made the flower on the lower left using the awesome Bloom Tool and crepe paper that came in the Tech kit.
Here is a close-up of the texture.
My second project is a layout. I love working with layers. So, a great tip I like to use it foam dots. Lots and lots of foam dots. I even layer the foam dots on top of each other for more dimension.
Thursday, April 24, 2014
Hello Scrappy friends! Today I want to share 2 more projects I created using the "Tiffany's" April Kit from Swirlydoos:
Lots of gesso,mist and stamping in this one!I love how the newsprint can still be seen. I randomly stamped the music notes and the alpha from my stash in the Ingvild Bohme chalk ink in "Turquoise Stone" (from the kit).
. I punched the butterflies out of the coordinating cardstock as well as the doily border using Martha Stewart punches. I love the sweet flowers from the kit!
I hate to waste anything so the little blue heart above is actually one of the negative space pieces from the large Dusty Attic chandelier Krissy picked out for us. I inked with the same ink and with some Holtz crackle accents, covered it with turquoise glass beads.
I pre-ordered the Marion Smith Bloom tool and used it with my Tattered Floral Die to create the large blue flower here. I love the fullness!
My last project for today is created with the large frame from the kit. I chose to cover the picture part with black chalkboard paint. I gave it to my daughter for her Tiffany Blue painted room and she plans to use it to write herself self-affirmation quotes on it.
Here is a side view so you can see the depth and detail of the frame. I coated it with blue embossing powder and Rub n Buff in Patina. Except for the one lace black flower (which was a leftover from my daughter's semi-formal dress) everything,including all the bling, comes from the kit and add-ons.
Fabulous combination of textures and colors to play with in the "Tiffany's" kit!
Tuesday, April 22, 2014
Hi everyone, Maggi here with my first blog post for Swirlydoos!! I am so excited to share with you some of my kit creations.
First up is a very special layout for me because it is a photo of me with my beautiful Chena who I miss so much. Chena crossed over the bridge Sept 5, 2013 and there is not a day that goes by that I don't miss her and think about her sweet soul. Ah, but such is the nature of pet ownership, their time on our earth is much too short. I have to thank my dear friend, Jen aka jrabs, for taking this beautiful photo of me and Chena conversing in our own special way. AND I must note that my hair is not red, its just the beautiful late afternoon soon making it look that way.
Ok so let me tell you a little about this layout. The base paper was a beautiful black/white sheet but I thought it would be fun to color it so I used Silks paint from my stash to paint the flowers and leaves. Then I sprayed on a little of the Luminarte Radiant Rain Bashful Blue included in the mediums add-on kit. I also popped up the layers to give my layout more dimension. All the flowers are from the kit and add-ons except for the silver flower and the tiny black and silver rolled roses which are handmade.
Oooh I really love the mediums add-on, that gorgeous turquoise embossing powder that I used on my chippies is Ranger Antiquities turquoise embossing powder. LOVE this stuff!!! And the silver paint on the chippy? Yep, that's from the mediums add-on too! The chippies are from my stash but all the other embellies are from the kit and add-ons or are handmade.
I first painted this swirled chippy with Viva Precious Metal Color - silver (in the mediums add-on) and then painted on a little embossing ink, sprinkled with embossing powder and this is the effect. I love this two toned effect!
Supplies - from the April kit and addons:
Cardstock: Core'dinations BluebellPatterned paper: Authentique Classique - Elegant collection: black dotted - Twelve, white floral print - Six, fussy cut header - Two
Embossing powder: Ranger Antiquities Turquoise
Flowers: Prima Vermont leaves black 553623, Prima Audrey Rose blue ice 546700, Prima Plume black 575526
Mist: Luminarte Radiant Rain Bashful Blue
Ink: Prima turquoise stone
Paint: Viva Precious Metal silver
Paint: Viva Precious Metal silver
Other: Prima SIIC 573218
Other Supplies from my stash:
Chipboard: Leaky Shed Chipboard Live Love and Laugh 8072, Leaky Shed flourish
Thanks so much for stopping by our blog today!! Be sure and check out our kit subscriptions and available kits!
Other Supplies from my stash:
Chipboard: Leaky Shed Chipboard Live Love and Laugh 8072, Leaky Shed flourish
Diecuts and punches: Martha Stewart Swirling Lace, WRNK Lucky 8 Frilly Lace, McGill Floriano
Paint: Silks african jade
I love love love the frame that came in the main kit this month!! WOW, I just love the piece I made with this. I decided to frame our wedding picture. OMG that picture is nearly 22 years old. It's hard to believe that it's been that long!
I pulled out one of my favorite products to do the frame, Stampendous Aged Ivory Embossing Enamel to coat the wooden frame. Then I thought that the only thing this needed was a simple floral cluster so I made the flowers using Authentique papers from the kit. I diecut some vines using Memory Box's Caserta Bloom die and added a few pine sprigs (cut with a McGill's punch) to my cluster. I finished it off with a couple crystals from the embellishment add-on.
Ok, this is the year of the card for me! Card making has never been my "thing" but I decided that this is the year that Maggi masters card making! So here is my effort. I've used papers from the kit with the addition of a piece of Core'dinations cardstock. I used a Spellbinders die to die cut the white frame. That awesome resin telephone is included in the embellishment add-on. The flowers are bits and pieces from my stash left over from assorted manufacturer's packages.
Thanks so much for stopping by our blog today!! Be sure and check out our kit subscriptions and available kits!
Labels:
Maggi,
Tiffany's
|
8
comments
Subscribe to:
Comments (Atom)
Swirlydoos Site Links
Pin Us!!
Popular Posts
-
Welcome to Swirlydoos December Kit Reveal Blog Hop BLOCK PARTY!!! We are having a party and you are all invited. We have some amazing projec...
-
Welcome to Swirlydoos' Mystical Winter kit reveal Blog Hop Block Party!! Happy New Year and Welcome!!! This month's kit,...
-
Boy, oh boy do we have a stellar hop for you this month!! Just when I think that Krissy couldn't possibly created a prettier ki...
-
Introducing Vintage Fae Check out our home page for details on the kit and the Add On kits! Welcome to Swirlydoos July Kit Reveal Blog ...
-
Welcome!!! Today is a beautiful day to reveal our April kit, Whispers of Spring. Take a look at how pretty this kit is! I have to tel...
-
Welcome to Swirlydoos' June Kit Reveal Blog Hop Block Party!! We are so pleased to show off our June kit, Antiquities!!! This kit...
-
Welcome back! We have a really fun blog hop all set for you today. Our May kit, So Chic , is well.....just that...so chic! This kit is ...
-
Welcome to: Swirlydoos Kit Club November Kit Reveal & Bloghop! Swirlydoos is proud to bring you our November collection: ...
-
Swirlydoos is PROUD to present our April collection Hello Beautiful! Be sure to check out a video "tour" of the main...
-
Thank you for joining us today for our ONE DAY blog hop featuring our September kit collection, Gilted Pleasure . **All collec...
Blog Archive
- 2017 (134)
- 2016 (173)
- 2015 (169)
-
2014
(230)
- December(20)
- November(17)
- October(21)
- September(23)
- August(20)
- July(19)
- June(19)
- May(11)
-
April(19)
- New Design Team Members
- Card tutorial using the April "Tiffany's" Kit
- Layout Of The Week 4/27/2014
- Tiffany's Kit: Start to Finish Layout (Video Tutor...
- More Tiffany's Creations with Angelica
- "Tiffany's" Kit Second Reveal with Tracey
- Creations with the April kit, Tiffany's
- April Challenge Updates!
- Layout of the Week 4/20/2014
- Card tutorial, using the April, Tiffany's kit.
- Salutations Sketch Challenge WINNER!
- April Blog Hop Winners!
- April Reveal and Blog Hop!
- DESIGN TEAM CALL!!!!!!
- April Challenge Highlights!
- LOTW 4/6/14
- Featured Member *Erica Ortiz*
- Altered Library Drawer Tutorial
- March Layout of the Month Winner!
- March(20)
- February(23)
- January(18)
- 2013 (207)
- 2012 (252)
- 2011 (181)
- 2010 (118)
- 2009 (38)




.png)


