Friday, February 28, 2014
Hi Swirlydoos Fans.
Georgia here today to share some more projects created with the gorgeous 'Lady Belle' kit.
First up a layout about my love for this hobby. I have used one of the stunning Kaisercraft papers from the kit as my base and layered it with paper scraps, Gesso and different mists and watercolors. I have painted the glass tiles with a combination of alcohol inks, gesso and watercolors.
Next up is a card. I've used the stunning chipboard clock as my focal point and embellished with flowers and the jewel trim from the kit.
Thanks so much for stopping by
Georgia
Thursday, February 27, 2014
Every week we pick a layout of the week for the Swirlydoos gallery. At the end of the month, the design team votes for their favorite layout of the week, making it the layout of the month.
The entire DT was loving this fabulous layout:

We loved the layering and the design, not to mention that SWEET photo!
Congrats, Kim!
The entire DT was loving this fabulous layout:
We loved the layering and the design, not to mention that SWEET photo!
Congrats, Kim!
Tuesday, February 25, 2014
Hello everyone! Today I'm sharing two more projects I made using the Swirlydoos February Kit, Lady Belle. I was head over heels for this kit because of all the lovely purple. The gorgeous Maja Designs and Authentique paper coordinated beautifully.
First to show you is a scrapbook page. I used up most of my flowers from the kit and flower-add on....lol! I did a bit of light distressing and lots of layers with paper.
Just a close up of all the yummy flowers!
I made this card using Paulien's tutorial. You can find that HERE. Paulien makes the most beautiful cards and her tutorial are easy to follow.
Monday, February 24, 2014
We are very excited to have Tracey Gregory joining the Swirlydoos design team! Tracey is no stranger to Swirlydoos, and we are excited to have her back in our wonderful community on the forums.
Here' a little bit about Tracey:
Here' a little bit about Tracey:
Hello! My name is Tracey Gregory and I live in the Berkshires of Western Massachusetts with the love of my life,my husband Gary. I have been blessed to be the mother of four children: Hayden (22), Austin (20), Lukas (15) and the baby girl, Naomi (13). I am also a proud auntie to my adorable niece,Vivien.
To support my scrapping habit I work as a Quality Assurance/Staff Educator RN for a Hospice.
I am definitely a shabby chic style scrapper.I love all things vintage,tattered and worn. I like to play with Mixed Media and off the page projects as well. My family is the focus of much of my scrapping! I have been fortunate to be be published in both online and print magazines. Currently I am also on Design Teams for Berry71Bleu, Something Tattered Vintage Stamps, HeArt and Soul and Stuck on U Sketches.
I started scrapping at the suggestion of a friend,who thought I might like it.After a year or so of telling her I just didn't have time for something like that,I went to a crop and got hooked! I started looking at online sites for inspiration and kept being drawn to layouts made by "Swirlydoos" designers. I joined up and a whole new world opened up for me. I truly credit the lovely ladies,Krissy,the Design Team and the members,for helping me become the scrapper I am today. The techniques, inspiration and friendships found at Swirlydoos truly are like no other. Being able to serve as a Swirlydoos Designer feels like coming full circle,coming "home." I am thrilled to be here!
Please join us in welcoming Tracey to the team!
Sunday, February 23, 2014
We've had so many gorgeous projects popping all over our Gallery lately and it was definitely a tough choice but this week's LOTW goes to Kim (droopidog)! I love the distressing and amazing layering that she achieved here! She used the February Kit wonderfully and the picture of her niece is adorable!
If you like, please stop by her layout and leave her some love!
Congrats again Kim!!!

Labels:
LOTW
|
4
comments
Saturday, February 22, 2014
Happy Saturday, everyone! I'm sharing a project I made with the Lady Belle kit (and a couple of things from my stash) today. I was so inspired by the Maja Design paper, and I just KNEW I had to use it on this Kaisercraft wishing well that I've had in a box for two years!
And, here's the video:
I hope you like it.
Enjoy the rest of your Saturday!
Labels:
altered projects,
kit club,
Maja Design,
Prima,
Scrapbooking,
Swirlydoos,
wishing well
|
2
comments
Thursday, February 20, 2014
Hi Everyone! Amarilys here sharing with you some of my Lady Belle February Kit projects! I just loved this kit and had so much fun working on these layouts!
Here are three more layouts that I made:
For this wedding layout, I used all the neutrals papers and embellies from the kit. I did a lot of tearing, distressing, layering and punch work to create this fun layout of my hubby and I during our second photo shoot at the beach during our wedding day. I used flowers from the Flower Add On Kit as well as the main kit. From my stash i used the Prima bling that I've had saved for a while and the white rose. The white resin clock is from a previous Swirlydoos kit.
For this slightly more elegant wedding page (and the last one for my two wedding albums!), I used the black background paired with a pretty purple roses paper and flowers from both the Flower Add On Kit and the main kit.The bling is from my stash and I handmade the butterflies to match the rest of my wedding album.
Last but not least I made this page using a picture of mom and I during my Feb 1st baby shower! I turned the picture B&W because it was a bit busy with the background and used the elegant B&W (and cream!) papers with the purples from the kit. I also used the gorgeous clock chippie which I inked and crackled to distress it.
Thanks for taking your time to check out my projects! If you want to see all the projects I made with this kit, please stop by my blog!

Wednesday, February 19, 2014
How SHOCKING is this? The winner of the Maja Design Prize pack, did not claim her prize!!!! So, we had to pick another winner.
Our winner of this amazing prize
is Sherri Spencer!!!!!!!!!!!
Congrats, Sherri! Please send your shipping info to rae@swirlydoos.com so we can let Maja Design know who to send it to!
Hello everyone! It's Elena, and today I'll show you another one of my pages I created with the February kit, Lady Belle. The kits are so perfectly matched, it was a breeze to work with!
For the background, I added some gesso and paint in complimentary colors. And some stamping for a layered effect.
Here's a closeup of my layered design:
I left the chipboard unaltered, and cut it up to fit my design.
Thanks for looking!
For the background, I added some gesso and paint in complimentary colors. And some stamping for a layered effect.
Here's a closeup of my layered design:
I left the chipboard unaltered, and cut it up to fit my design.
Thanks for looking!
Tuesday, February 18, 2014
Thanks to all who participated in our January sketch challenge!
Jodie is our winner this month!
Congrats, Jodie!
Don't forget: ANYONE can participate in our sketch challenges! So, if you are a subscriber or not, play along! The Lady Belle sketch challenge is already running, and you can check it out HERE.
Jodie is our winner this month!
Congrats, Jodie!
Don't forget: ANYONE can participate in our sketch challenges! So, if you are a subscriber or not, play along! The Lady Belle sketch challenge is already running, and you can check it out HERE.
Monday, February 17, 2014
Here at Swirlydoos, we LOOOVE challenges! We have many going on, and many beautiful entries!!!!
Sketch Challenge
Our site-sponsored challenge is our monthly sketch challenge. This challenge runs until the 15th of every month. And, it is open to EVERYONE. So, even if you aren't a subscriber, you can still enter and are eligible for a prize. This is our current sketch:
Sketch Challenge
Our site-sponsored challenge is our monthly sketch challenge. This challenge runs until the 15th of every month. And, it is open to EVERYONE. So, even if you aren't a subscriber, you can still enter and are eligible for a prize. This is our current sketch:
We already have some entries. Take a look at this amazing interpretation from Jodie:
Butterfly Challenge
Our amazing designer, Angelica, also hosts a a butterfly challenge every month, and it runs through the 15th of each month.
This is the layout she created for your inspiration:
Here's Sherrenea's entry:
We also have three member-hosted challenges each month:
This month, subscriber Andie is hosting, and it's very inspiring! It's all about your
"deepest darkest desire", and you can click on the link above to find out more.
This beautiful entry is by : Barbara P.
Subscriber Peggy hosts this every month. Of course signups happen before the first of the month, so it's too late to join for February, but there will certainly be lots of beauty to look at all month long. And be on the lookout for March sign ups so you can play too!
Here's a beautiful page, by Tracey:
Round Robin for Cards Challenge
This is another challenge where the sign ups have passed for February, but sign ups for March will start next week. You can find this thread in the "Challenges section of our forum.
Amy is our hostess for February, and she has challenged these ladies to come up with an easel card.
Ginger's card is so pretty:
Ginger's card is so pretty:
Thanks to everyone who participates in our challenges! If you haven't played along yet, be sure to jump in- the more the merrier!
Sunday, February 16, 2014
We've had so many gorgeous projects popping all over our Gallery lately and it was definitely a tough choice but this week's LOTW goes to Peggy! I love the distressed layers and amazing layering that she achieved here! She used the February Kit wonderfully and those picture are stunning!

If you like, please stop by her layout and leave her some love!
Congrats again Peggy!!!

Labels:
LOTW
|
2
comments
Saturday, February 15, 2014
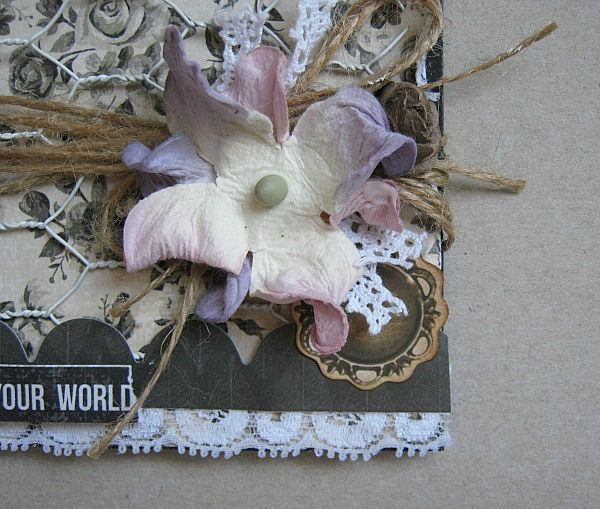
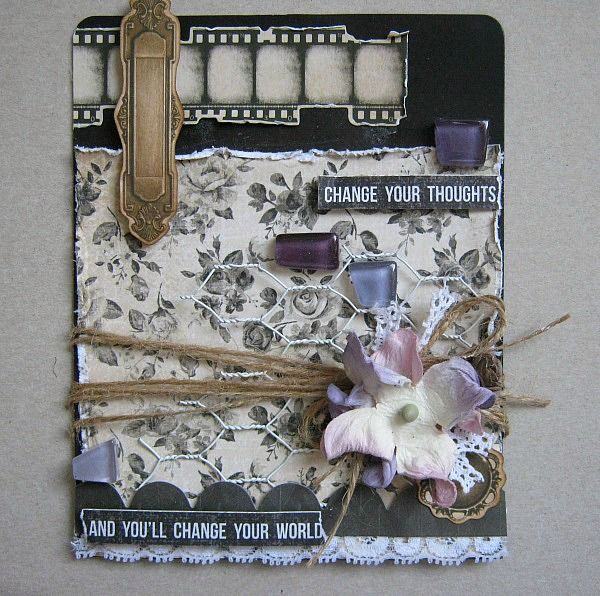
You probably have seen this card, during our monthly Blog Hop:
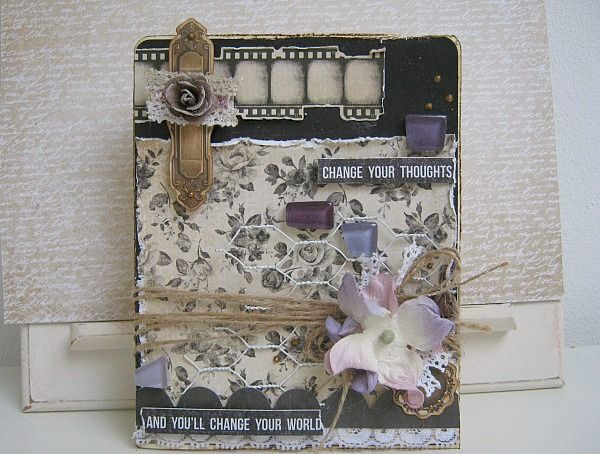
and as promised, I've done a step by step tutorial on it. So here we go:
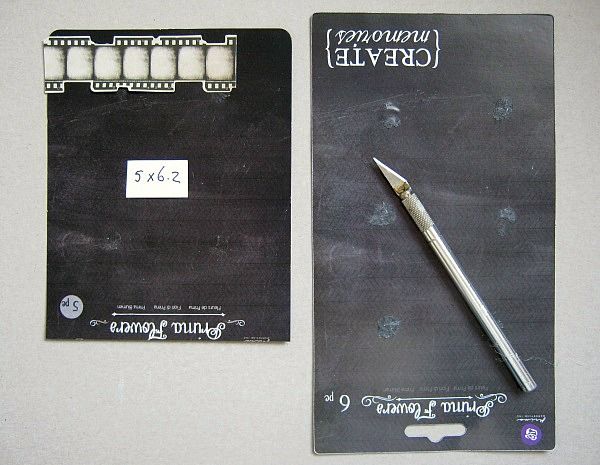
For the back ground of my card I took a Prima packaging, (on the right there's the whole piece)and I cut it down to 5x6.2 At the top I added a piece of the filmstrip sticker.
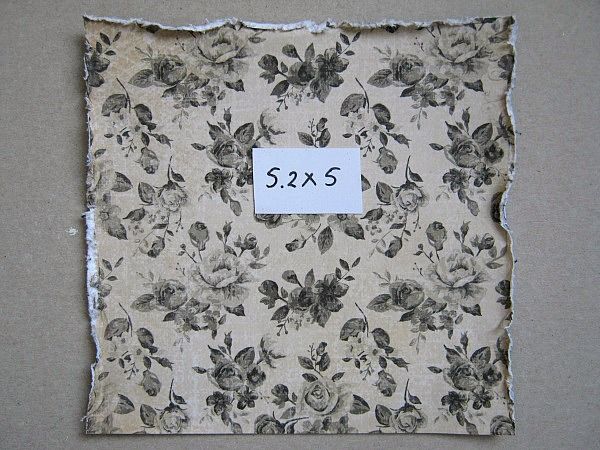
I cut a piece of PP at 5.2x5 Distressed the edges.
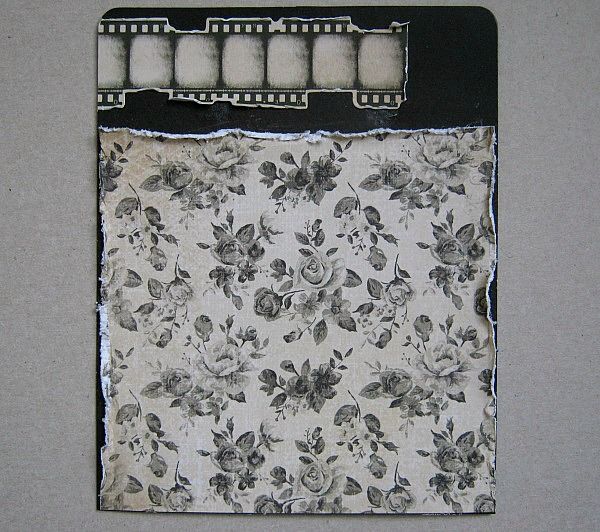
And glued it to my back ground. I also scratched the edges of the filmstrip sticker with my nails.
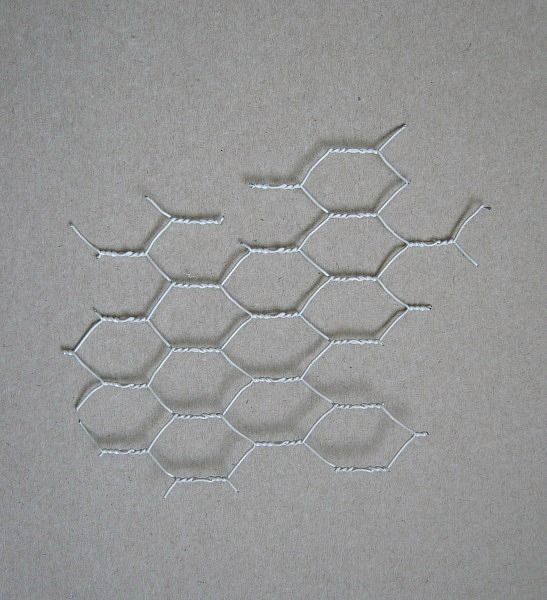
I then cut a piece of chickenwire
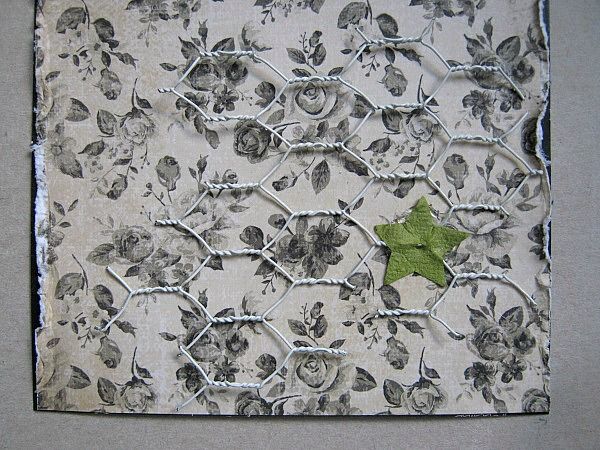
and glued it down with a drop of hot glue and a green piece of the little roses that came in the kit.
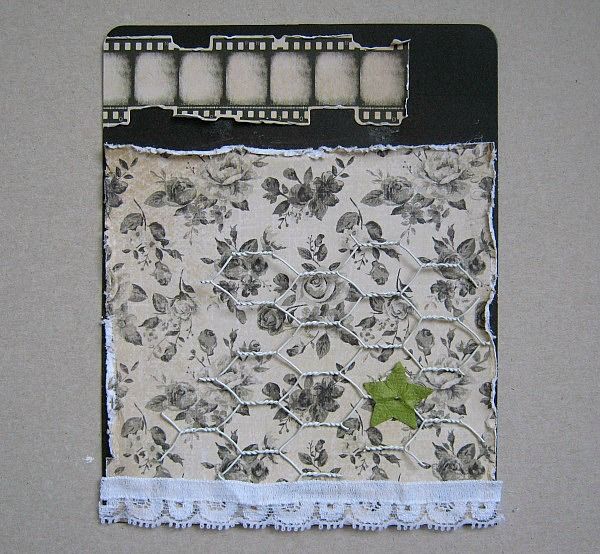
I (hot) glued a strip of lace at the bottom. (This lace came from my stash)
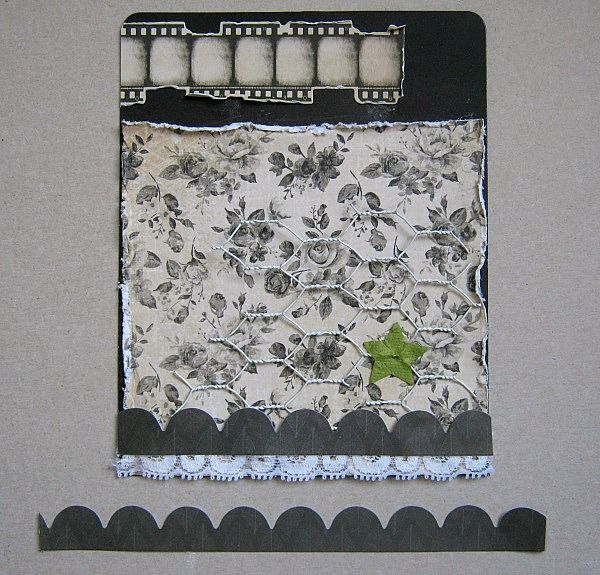
And I cut down the scalloped strip, (you can find this on the sticker sheet also) and glued it in place
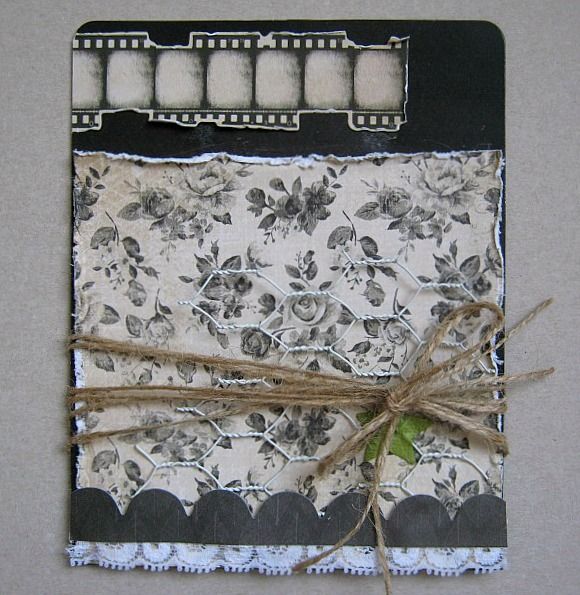
Then I wrapped, generously, some twine around and tied a bow. Time to work on my embellies.
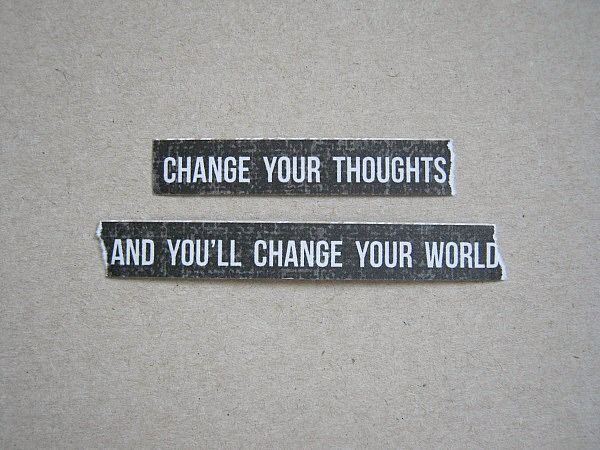
These word strips are going to be my sentiment.
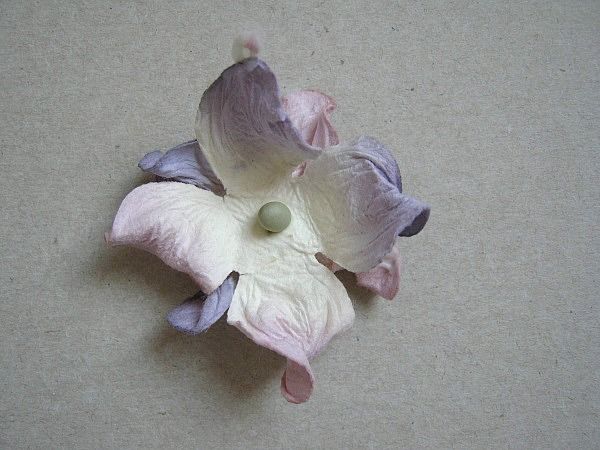
I stacked 2 of the flowers, that came in the kit, together
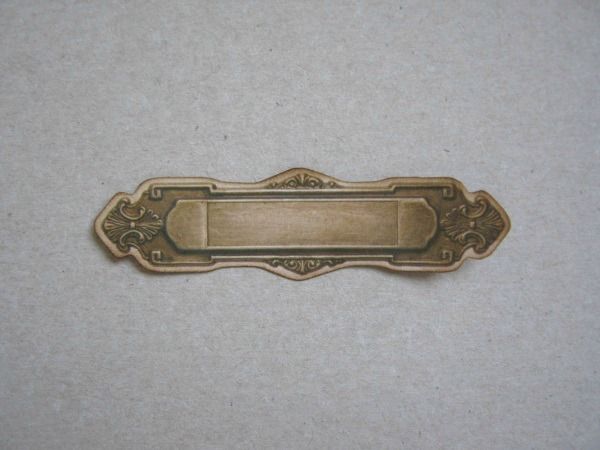
I choose this gorgeous sticker for the top of my card. I inked the edges
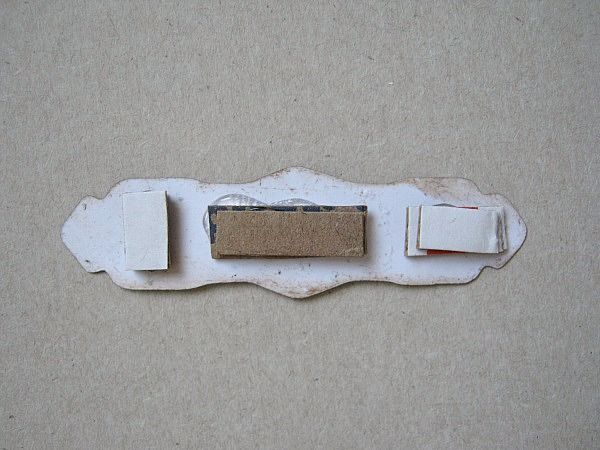
and pop dotted the back. Or in my case... I used the box my kit came in and added 2 layers.
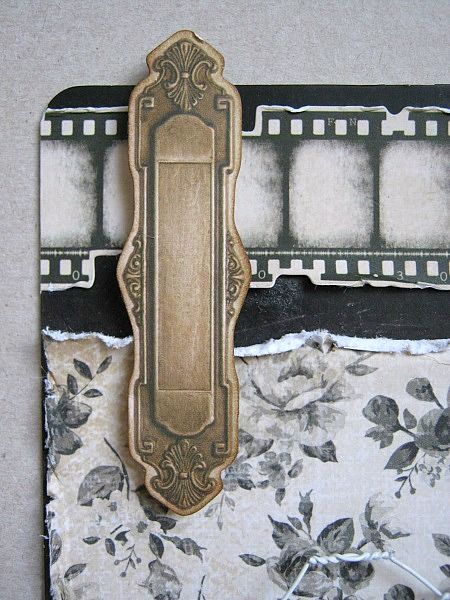
Then glued it in place at the left top of my card.
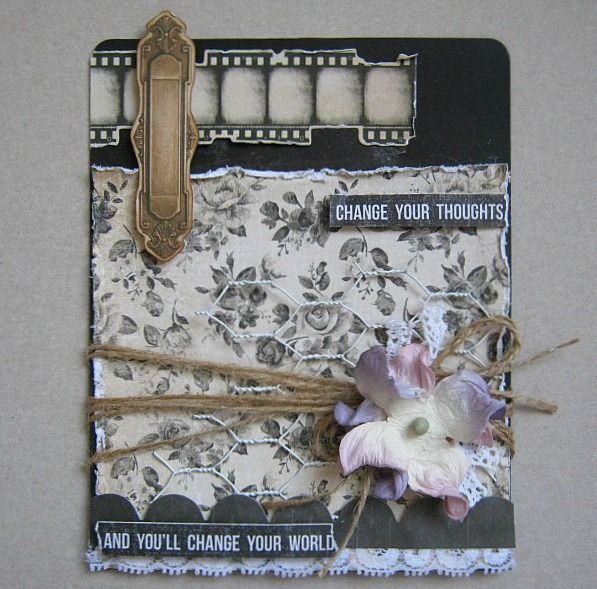
I also pop dotted (1 layer of cardboard) the sentiment strips and glued them in place. Flower also.
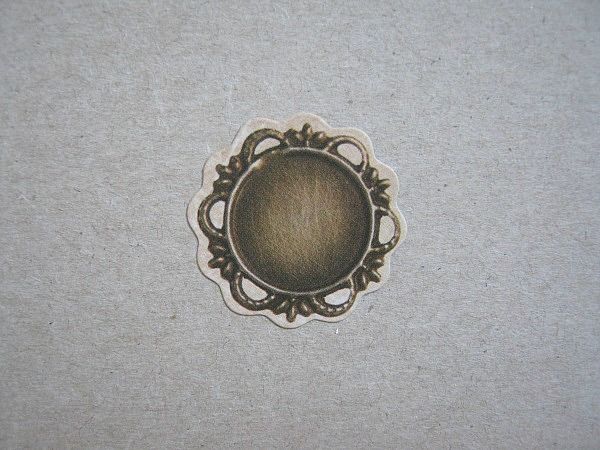
This sticker is going to be dressed up a little.
I first inked the edges and glued it in place. I also cut tiny bits of lace that are tucked in under and around the flower.
Then I randomly placed some of those fantastic glass tiles, using hot glue.
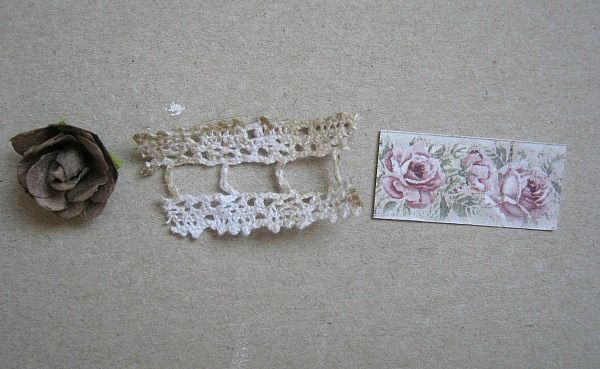
I still found that the left top needed something more. It was too dull, so I choose these 3 elements
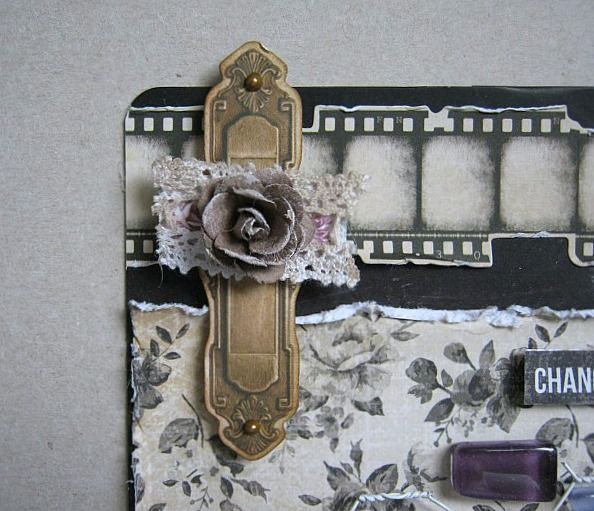
and glued them down on the sticker. First the paper strip, then lace and the rose on top. I also got that bottle of (gorgeous color) liquid pearls and placed some dots at the top and bottom of the sticker.
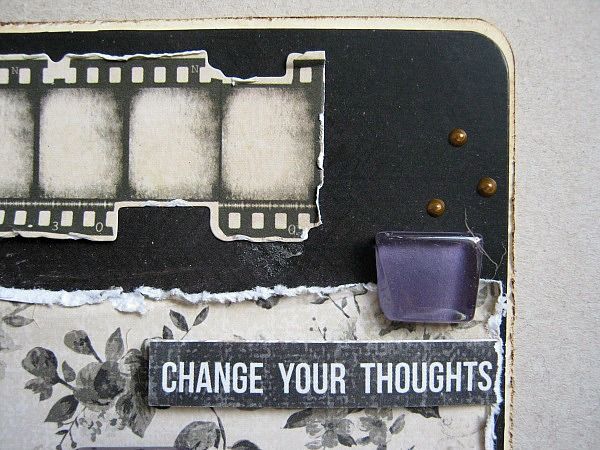
and there
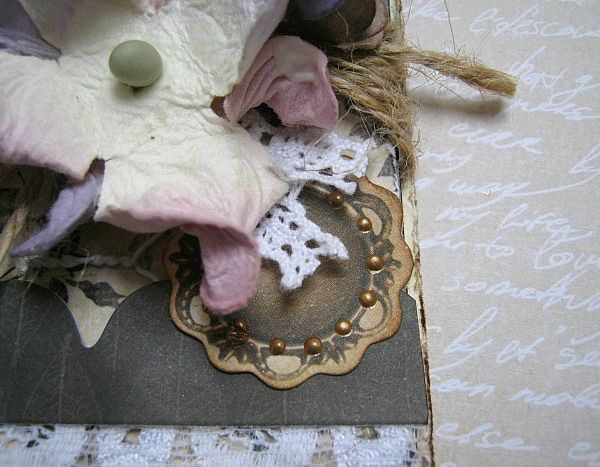
and here
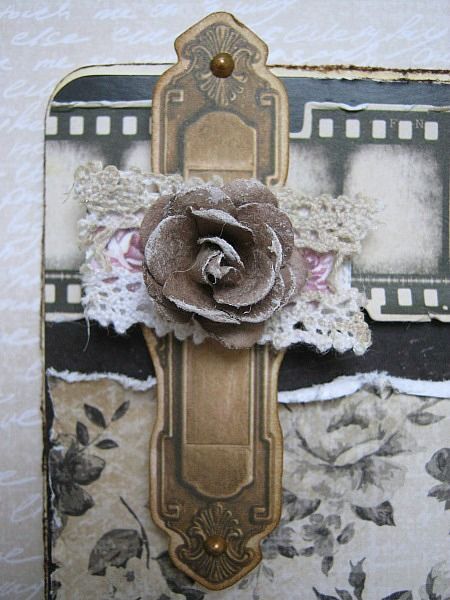
And for the last detail, I lightly added some Gesso to my flowers.
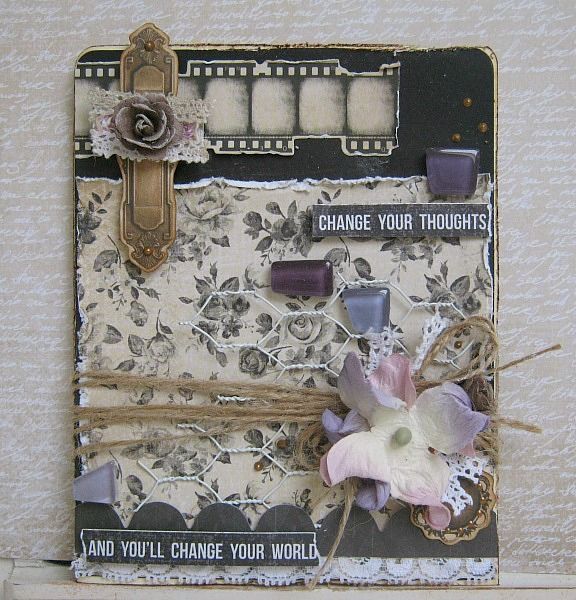
Simple and quick.... Hope you like it and give it a try.

and as promised, I've done a step by step tutorial on it. So here we go:

For the back ground of my card I took a Prima packaging, (on the right there's the whole piece)and I cut it down to 5x6.2 At the top I added a piece of the filmstrip sticker.

I cut a piece of PP at 5.2x5 Distressed the edges.

And glued it to my back ground. I also scratched the edges of the filmstrip sticker with my nails.

I then cut a piece of chickenwire

and glued it down with a drop of hot glue and a green piece of the little roses that came in the kit.

I (hot) glued a strip of lace at the bottom. (This lace came from my stash)

And I cut down the scalloped strip, (you can find this on the sticker sheet also) and glued it in place

Then I wrapped, generously, some twine around and tied a bow. Time to work on my embellies.

These word strips are going to be my sentiment.

I stacked 2 of the flowers, that came in the kit, together

I choose this gorgeous sticker for the top of my card. I inked the edges

and pop dotted the back. Or in my case... I used the box my kit came in and added 2 layers.

Then glued it in place at the left top of my card.

I also pop dotted (1 layer of cardboard) the sentiment strips and glued them in place. Flower also.

This sticker is going to be dressed up a little.

I first inked the edges and glued it in place. I also cut tiny bits of lace that are tucked in under and around the flower.

Then I randomly placed some of those fantastic glass tiles, using hot glue.

I still found that the left top needed something more. It was too dull, so I choose these 3 elements

and glued them down on the sticker. First the paper strip, then lace and the rose on top. I also got that bottle of (gorgeous color) liquid pearls and placed some dots at the top and bottom of the sticker.

and there

and here

And for the last detail, I lightly added some Gesso to my flowers.

Simple and quick.... Hope you like it and give it a try.
Subscribe to:
Comments (Atom)
Swirlydoos Site Links
Pin Us!!
Popular Posts
-
Welcome to Swirlydoos December Kit Reveal Blog Hop BLOCK PARTY!!! We are having a party and you are all invited. We have some amazing projec...
-
Welcome to Swirlydoos' Mystical Winter kit reveal Blog Hop Block Party!! Happy New Year and Welcome!!! This month's kit,...
-
Boy, oh boy do we have a stellar hop for you this month!! Just when I think that Krissy couldn't possibly created a prettier ki...
-
Introducing Vintage Fae Check out our home page for details on the kit and the Add On kits! Welcome to Swirlydoos July Kit Reveal Blog ...
-
Welcome!!! Today is a beautiful day to reveal our April kit, Whispers of Spring. Take a look at how pretty this kit is! I have to tel...
-
Welcome to Swirlydoos' June Kit Reveal Blog Hop Block Party!! We are so pleased to show off our June kit, Antiquities!!! This kit...
-
Welcome back! We have a really fun blog hop all set for you today. Our May kit, So Chic , is well.....just that...so chic! This kit is ...
-
Welcome to: Swirlydoos Kit Club November Kit Reveal & Bloghop! Swirlydoos is proud to bring you our November collection: ...
-
Swirlydoos is PROUD to present our April collection Hello Beautiful! Be sure to check out a video "tour" of the main...
-
Thank you for joining us today for our ONE DAY blog hop featuring our September kit collection, Gilted Pleasure . **All collec...
Blog Archive
- 2017 (134)
- 2016 (173)
- 2015 (169)
-
2014
(230)
- December(20)
- November(17)
- October(21)
- September(23)
- August(20)
- July(19)
- June(19)
- May(11)
- April(19)
- March(20)
-
February(23)
- More Lady Belle Projects with Georgia
- Layout of the Month: February 2014
- Lady Belle projects with Angelica
- New Design Team Member!
- Layout of the Week 2/23/14
- Lady Belle Wishing Well Tutorial
- February Lady Belle Kit Creations by Amy
- February Blog Hop Winner Update!
- Another Lady Belle Project with Elena
- Shabby Chalet Sketch Challenge Winner!
- More February Challenge Highlights
- Layout of the Week 2/16/14
- Card tutorial using the February *Lady Belle* kit
- Layout of the Week 2/09/14
- Lady Belle Mediums Add On Tutorial
- February Blog Hop Winners!!!!!
- February Kit Reveal and Blog Hop!
- BLOG HOP FEB. 5th 10:30am (mountain time)
- January Layout of the Month
- February Challenge Highlights
- Layout of the Week 2/2/2014: Jan
- Featured Member * Hanne Sinkerud*
- Shabby Chic Mini Shadow Box Tutorial
- January(18)
- 2013 (207)
- 2012 (252)
- 2011 (181)
- 2010 (118)
- 2009 (38)


.JPG)


