Wednesday, May 21, 2014
I'm thrilled to share 3 more projects that I did with the May KOM, Bohemian Spring! And as a little something extra, I'm sharing a sketch that I did with you.
This layout is really a simple layered layout, but I thought the photo was so sweet and goes with the papers so well that I didn't see a need to add alot to it.


You know I'm the crazy poodle lady, LOL! I wanted to make a tag and I wanted to use the divan from the April kit. Oooh then I remember my cute little poodle die and nex thing I knew, this sweet little pink poodle was sitting on the couch just like a little princess! You know I have a poodle die and I confess that I look for reasons to use it!
I made the tag from a scrap of the Authentique paper in the kit and then masked the it using a Prima stencil. Then I layered on some of the Kaisercraft collectibles from the Embellishments kit and I used cardboard to pop up the layers.. The little beads at the bottom and fibers are from my stash as are the flowers. They are left overs from other projects and kits.


Here's that gorgeous pelican again! The color of the water just went so perfectly with this sheet of paper, I had to use him again! I fussy cut the white flowers and doily from the SEI paper.

I love the clear blue floral vine in the Embellishment addon , it was just right for this page. I also added a tiny sprig of blue to that cluster that came from the January 2012 KOM! Guess I'm guilty of hoarding that !

.png)
This layout is really a simple layered layout, but I thought the photo was so sweet and goes with the papers so well that I didn't see a need to add alot to it.
Here's my sketch, I reversed it and left out one of the strips.
I just love these Petaloo Botanica blooms that I got from the store. I think I ordered every color!!
I added the chipboard title from my stash, its ScrapFx and of course I heat embossed it with Stampendous shabby pink embossing enamel.
You know I'm the crazy poodle lady, LOL! I wanted to make a tag and I wanted to use the divan from the April kit. Oooh then I remember my cute little poodle die and nex thing I knew, this sweet little pink poodle was sitting on the couch just like a little princess! You know I have a poodle die and I confess that I look for reasons to use it!
I made the tag from a scrap of the Authentique paper in the kit and then masked the it using a Prima stencil. Then I layered on some of the Kaisercraft collectibles from the Embellishments kit and I used cardboard to pop up the layers.. The little beads at the bottom and fibers are from my stash as are the flowers. They are left overs from other projects and kits.
I love the words on this Collectible tag!
Thanks so much for visiting our blog. I can't wait to see your creations with the May kit.
Saturday, May 17, 2014
Happy Saturday, crafty people! In our May kit we got a piece of 12X12 cardboard. (YAY!) There are so many things that you can do with it. Take a look at these projects that our design team has made incorporating cardboard this month:


Thanks for sharing a little bit of your Saturday with Swirlydoos! Have a lovely weekend!

Here's one I did- the cardboard is peeking out of the black circle:
(More details on this layout are here: ANATOMY TUTORIAL)
This layout is Angelica's- WOW!!!! I adore the effect she created with cardboard here!
And, here's another I made with cardboard peeking out:
I just adore cardboard. It creates incredible texture, and is so perfect for masculine layouts.
I made this video a while back that shows a few ways to incorporate cardboard into your projects, as well as an EASY way to get the layers off of the cardboard, so I'm sharing again:
Thanks for sharing a little bit of your Saturday with Swirlydoos! Have a lovely weekend!

Saturday, May 10, 2014
Happy Saturday!
I've been working on the inside of my mini album from the Bohemian Spring project add on kit this week. As luck would have it, my photo printer ran out of ink so I wasn't able to complete it 100%, but I've got a really good start on it.
So, in this video, I'm sharing some tips on how to make the mini album process a little less daunting. :)


But, I really can't wait to go get my printer ink to add the pics and MORE details!
Enjoy the rest of your weekend!
I've been working on the inside of my mini album from the Bohemian Spring project add on kit this week. As luck would have it, my photo printer ran out of ink so I wasn't able to complete it 100%, but I've got a really good start on it.
So, in this video, I'm sharing some tips on how to make the mini album process a little less daunting. :)
Here's a couple of pictures of what I've done:
Enjoy the rest of your weekend!
Wednesday, May 7, 2014
Thanks to everyone who joined us for our May blog hop! We appreciate your lovely comments. :)
Here are our winners!
Carrie Sedlack, you have won this paper collection!

This Petaloo prize belongs to Heather Thompson!

And, Hanne, you won the Die~Namites gift card!

Ladies, please contact Rae at rae@swirlydoos.com within seven days with your address to claim your prize!
Thanks!
Tuesday, May 6, 2014
Welcome to:
Swirlydoos Kit Club
May Scrapbook Kit Reveal & Blog Hop!
Swirlydoos is proud to bring you our beautiful May collection:
Bohemian Spring

And check out these coordinating add ons that perfectly compliment our May scrapbook kit!

Has it sold out? - become a subscriber and not only will you never miss a kit again, but you'll also pay less for your monthly scrapbook kits!
*Mention this blog hop and save 10% on your first kit*


We have some absolutely beautiful scrapbook projects for you to see today!! Make sure to leave a comment on all of the blogs for a chance to win!!!
Make sure you've "LIKED & FOLLOWED" us on Facebook to get sneak peeks and coupon codes good for the brand new, must have CHA goodies in our online store!
Video Tour of the May Collection
Look what our education team has created using our Faux Glass Acrylic Album Project Add On kit!
Our Education Team is going to show you how to create a faux glass finish on acrylic. Be sure to go to our home page for a link to a video tutorial using the project add on!

SKETCH CHALLENGE!!!
May Sketch, created by Beggahuna, specifically for the Bohemian Spring Collection!

May's sketch prize winner will receive this prize:

This beautiful sketch is your inspiration, now get creating! Our April sketch challenge runs until June 15th, and is open to EVERYONE! Upload your layout into the "Bohemian Spring" section of the Swirlydoos Gallery and you will be entered to win the fantastic prize pack pictured below from Swirlydoos! Check the sketch challenge thread in our forums to see what the designers and other members have created using this sketch for inspiration!
And, now for the prizes to be won during the Swirlydoos Scrapbook Kit May reveal blog hop!!!!!
Swirlydoos and some of our manufacturers are proudly offering up the following prizes:
So, let's get started! Make sure to leave a comment on all of the blogs for a chance to win!!!
You have until midnight, eastern time, on 5/6 to complete the hop. Winners will be announced on the Swirlydoos Blog on 5/7. In order to qualify to win here is what you need to do:
1: Visit all of the blogs and leave a comment on each. This way we know you were there. Take your time. There are REALLY beautiful things to see along the way.
2: Before you leave each blog, look for the “special” words and write it down.
Once you have visited all the blogs and collected all the special words, they will create a sentence.
3: Finally, go back to the Swirlydoos blog and leave a comment letting us know how much fun you had, tell us the sentence that was created with all of the special words you collected. Can't wait to hear from you.
The party starts at Rae's Blog. Have fun!
Here is the blog hop order:
Petaloo http://petaloo.typepad.com/
Die-Namites http://www.die-namitesblog.com/
Swirlydoos http://swirlydoos.blogspot.com/

Bohemian Spring
And check out these coordinating add ons that perfectly compliment our May scrapbook kit!
Has it sold out? - become a subscriber and not only will you never miss a kit again, but you'll also pay less for your monthly scrapbook kits!
*Mention this blog hop and save 10% on your first kit*
*Mention this blog hop and save 10% on your first kit*

We have some absolutely beautiful scrapbook projects for you to see today!! Make sure to leave a comment on all of the blogs for a chance to win!!!
Make sure you've "LIKED & FOLLOWED" us on Facebook to get sneak peeks and coupon codes good for the brand new, must have CHA goodies in our online store!
Video Tour of the May Collection
Look what our education team has created using our Faux Glass Acrylic Album Project Add On kit!
Our Education Team is going to show you how to create a faux glass finish on acrylic. Be sure to go to our home page for a link to a video tutorial using the project add on!
SKETCH CHALLENGE!!!
Our Education Team is going to show you how to create a faux glass finish on acrylic. Be sure to go to our home page for a link to a video tutorial using the project add on!
May Sketch, created by Beggahuna, specifically for the Bohemian Spring Collection!
May's sketch prize winner will receive this prize:
This beautiful sketch is your inspiration, now get creating! Our April sketch challenge runs until June 15th, and is open to EVERYONE! Upload your layout into the "Bohemian Spring" section of the Swirlydoos Gallery and you will be entered to win the fantastic prize pack pictured below from Swirlydoos! Check the sketch challenge thread in our forums to see what the designers and other members have created using this sketch for inspiration!
And, now for the prizes to be won during the Swirlydoos Scrapbook Kit May reveal blog hop!!!!!
Swirlydoos and some of our manufacturers are proudly offering up the following prizes:
Swirlydoos and some of our manufacturers are proudly offering up the following prizes:
So, let's get started! Make sure to leave a comment on all of the blogs for a chance to win!!!
You have until midnight, eastern time, on 5/6 to complete the hop. Winners will be announced on the Swirlydoos Blog on 5/7. In order to qualify to win here is what you need to do:
1: Visit all of the blogs and leave a comment on each. This way we know you were there. Take your time. There are REALLY beautiful things to see along the way.
2: Before you leave each blog, look for the “special” words and write it down.
Once you have visited all the blogs and collected all the special words, they will create a sentence.
3: Finally, go back to the Swirlydoos blog and leave a comment letting us know how much fun you had, tell us the sentence that was created with all of the special words you collected. Can't wait to hear from you.
The party starts at Rae's Blog. Have fun!
Here is the blog hop order:
Petaloo http://petaloo.typepad.com/
Die-Namites http://www.die-namitesblog.com/
Swirlydoos http://swirlydoos.blogspot.com/
Sunday, May 4, 2014
My eye was really drawn to this sweet layout with its cutout photo! I love the simple spring setting and the ruffled distressed edges seemingly gathered by the pearl bow. The spring scene is so well set with the floral sprigs and greenery. I just love the angelic little girl turned into a garden fairy with her resin wing!
Congratulations Barbara aka pala!

Congratulations Barbara aka pala!
What would Swirlydoos be without our wonderful subscribers?!? It's a pleasure getting to know these ladies on the forums and from the stories they tell through their layouts. Yes,we are an amazing community, but most of all, we're a family! We appreciate each and every member and they deserved to be spotlighted. With that being said, our featured member for May is.....


Ginny Hickmott
Here's a bit from Ginny:
Hi, I’m Ginny, I was born in Norfolk, England, UK but now live in Abergavenny, South Wales, UK. I’m married to my wonderful hubby Mathew, who puts up patiently with my scrapbooking obsession! We have 2 children, William 9 and Holly 5 years old. We live in the country with my 4 dogs (3 lurchers and my gorgeous Labradoodle! ), my horse Tommy and Holly’s pony Norman.
My ‘crafty’ side started with cross stitch, when I was a teenager, which I did for many years. Jewellery making followed, which I still do and then about 4 years ago my mum , an avid card maker at the time ( now scrapping!) got me into scrapbooking when we went to a craft show in 2010 and we met Hayley at Funky Farm Scrapbook barn. I loved the products she sold and her inspiration I was hooked!
I’ve tried all kinds of styles for my pages to see what I like and I would say that ‘shabby chic’, vintage, romantic, distress, pretty, flowers, sum up my pages. I do have a problem with ‘white’ space, the more I can fill the page up the better! I love ‘playing’ with texture/ mediums/ embossing powders.
I’ve been going to scrapbooking crops at Funky Farm, but unfortunately it is now only an online shop, so ‘us’ ladies decided to carry on a monthly crop at the village hall instead.
How did I find swirlydoo’s??? I love Pinterest for idea’s and inspiration and found pins from swirlydoo’s on there. A look at the website confirmed that this was the place for me, with gorgeous kits that suited me! I joined in February this year and I’ve had 2 kits so far and I LOVE it! You are all so friendly and have made me feel very welcome! I really enjoy entering all the challenges and there’s so much to learn with the forum tutorials it’s wonderful!!! Thank you!
Ginny
Here are a some of my favorite projects of Ginny's, sure to inspire you!!
Please come back and visit every first Sunday of the month to see who our next featured member will be! We love our Swirlygirls!!
Wednesday, April 30, 2014
An exciting day for us at Swirlydoos as we are adding three fabulous new designers to our team starting in June! Thank you to all of the ladies who applied to be a part of our team. You all made it very difficult for us! Please give a warm welcome to these very talented ladies!

Hi, I´m Maja Stokk from Sweden a full time working teacher in mathematics and science subjects,
married and mother of five children. I have been into scrapbooking since 2008 and love it!
For me scrapbooking is meditation and a perfect way to live out my creativity. I always try to develop
myself and love to try new things. I say that I don´t have any particular scrappy style, but I guess it´s romantic and sometimes a bitgrungy. I love flowers, layers and to play with stamps, stencils and paint.
I do mostly layouts but also some cards, canvases and altered things. I´m so happy to be a part of Swirlydoos kit club team."

My name is Kimberly (Droopidog) Heard. I’ve been married for 19 yrs and we have no children. Since it’s just the 2 of us we travel as often as we like. Most of my scrappy subjects are involve the many adventures of the Mr and I. Boy does he provide me with plenty of fun and funny scrappy photos. Have to love a man who doesn't mind my scrappy addiction.
I started scrapping in 2001, after my mom died. I had all these copies of photos and didn’t know what to do with them. I had a friend that was into scrapbooking so I called her. Once I did my first page, I was hooked.
Like any good scrapper, I am never without my camera and am always looking for an opportunity to take scrap worthy pictures.

Hi! I'm Debbie Sherman from the Cowboy State, big beautiful Wyoming! I'm so ecstatic be part of the Swirlydoos DesignTeam! I've been admiring this team for a long time! When I'm not scrap booking I am a road designer, photographer, wife, mother, grandmother of 7, auntie and friend. I have been crafting since I was a little girl. I started out sewing and making jewelry around the age of 7 and have been creating ever since. I still bead and sew but now it's mostly on my paper projects. I love photography and sometimes get that "great shot" that all photographers live for! I am fortunate enough to have a press pass and am able to shoot big events occasionally. The city I live in has a yearly old west celebration called the"Daddy of 'em all" and I'm fortunate enough to attend the big rodeo's, Native Americans and several other events in town. With my press pass I have front row seating for these events which allows for some awesome photos. With all the photos I take it gives me the perfect reason to scrap them! I'll be sharing some of those with all of you! I'm so excited to be part of this wonderful team and hope to inspire and be inspired along the way.
Maja Stokk
Hi, I´m Maja Stokk from Sweden a full time working teacher in mathematics and science subjects,
married and mother of five children. I have been into scrapbooking since 2008 and love it!
For me scrapbooking is meditation and a perfect way to live out my creativity. I always try to develop
myself and love to try new things. I say that I don´t have any particular scrappy style, but I guess it´s romantic and sometimes a bitgrungy. I love flowers, layers and to play with stamps, stencils and paint.
I do mostly layouts but also some cards, canvases and altered things. I´m so happy to be a part of Swirlydoos kit club team."
You can check out Maja's beautiful designs on her blog: http://stokk-eyovine.blogspot.
Kim Heard
I started scrapping in 2001, after my mom died. I had all these copies of photos and didn’t know what to do with them. I had a friend that was into scrapbooking so I called her. Once I did my first page, I was hooked.
Like any good scrapper, I am never without my camera and am always looking for an opportunity to take scrap worthy pictures.
Check out Kim's lovely designs on her blog: www.droopidog.typepad.com
Debbie Sherman
You can see Debbie's gorgeous designs on her blog: http://debbie-lovescrappin.

And, we are pleased to announce that we will have a guest designer very soon!
Linda Pekrul
You can see her stunning designs on her blog: www.blueskyscrapping.blogspot.
Congrats, ladies! We look forward to working with you!
Tuesday, April 29, 2014
Hello Everyone,
Today I want to share my lastest card tutorial with you...
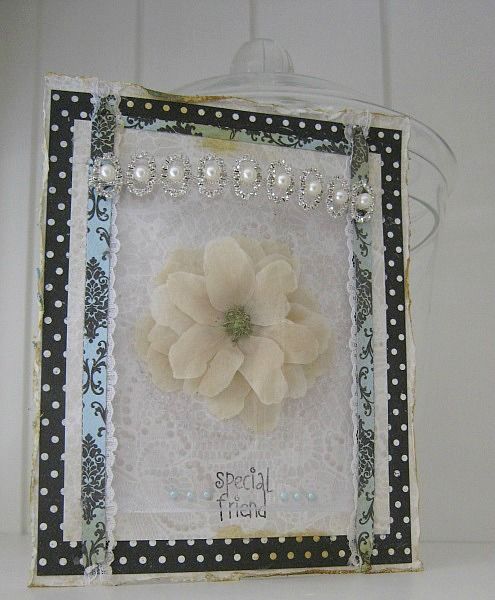
The inspiration for this card, was found whilst doing some garden work. I have this Clematis plant in my garden and oh, how much I love those flowers. Then an idea came to mind, to pick a few flowers and see if I could dry them, and so I did. Of Course, dried flowers are very, very delicate and need some protection, or they will tear. Anyway... this is what I came up with:
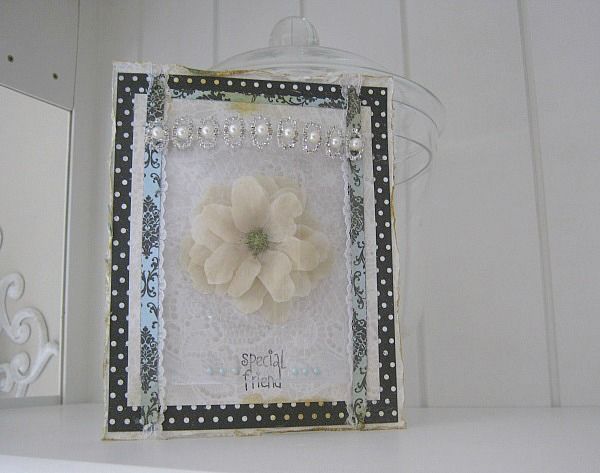
And here's how it came together:
For my base card I folded a A4 piece of white cardstock double and cut it a tad bit smaller than 5.7/8 x 7.4/8
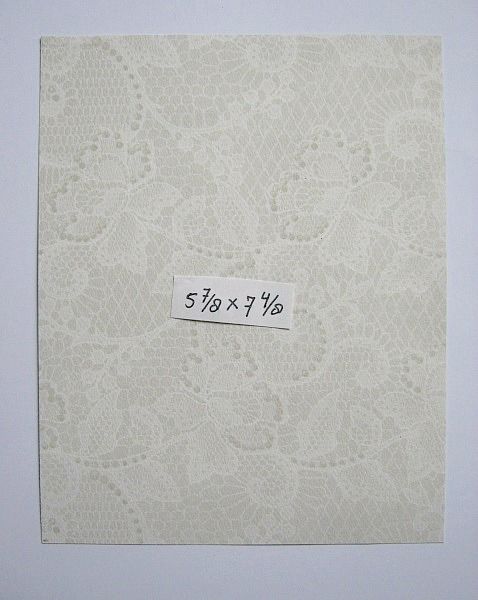
For my first layer I cut a piece of the white lace PP at 5.7/8 x 7.4/8
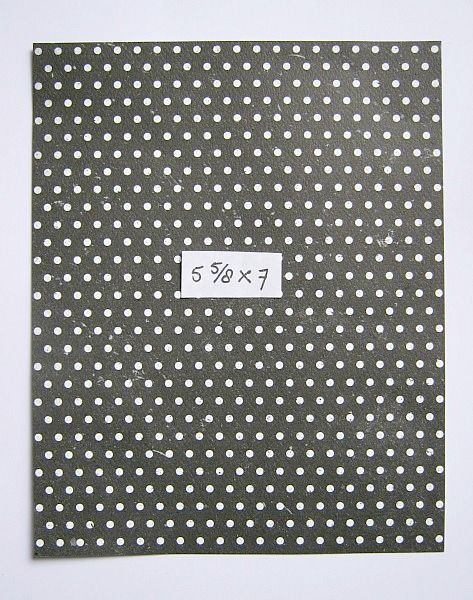
For my second layer I cut a piece of the polka dot PP at 5.5/8 x 7 inch
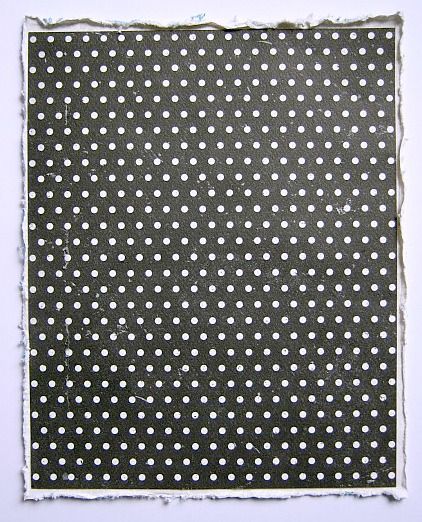
I glued both layers to the base card. I only distressed the first layer.
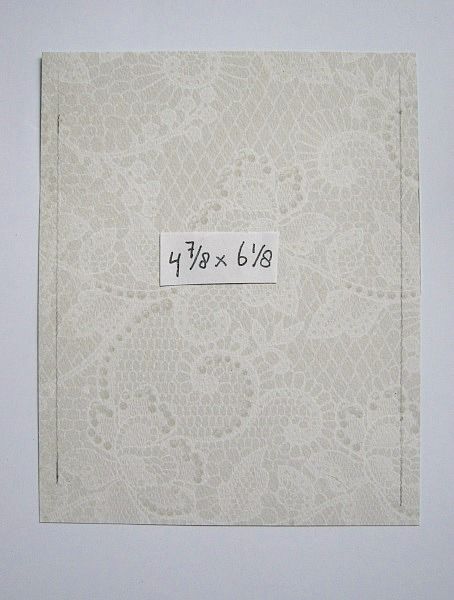
Then I cut a piece of the white lace PP at 4.7/8 x 6.1/8 inch and made a pencil mark at both sides
at 1/4 of an inch
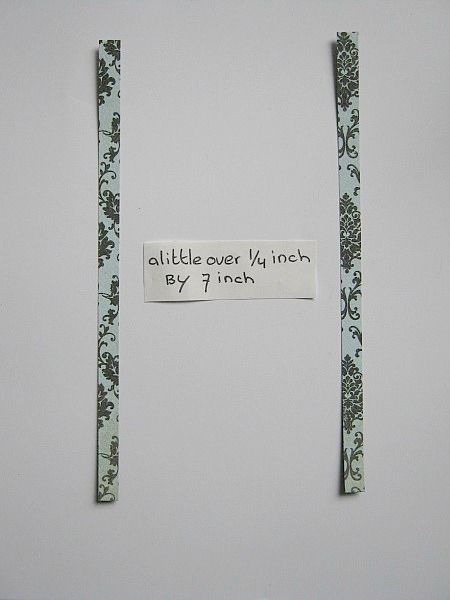
I cut 2 strips of that beautiful teal/black PP
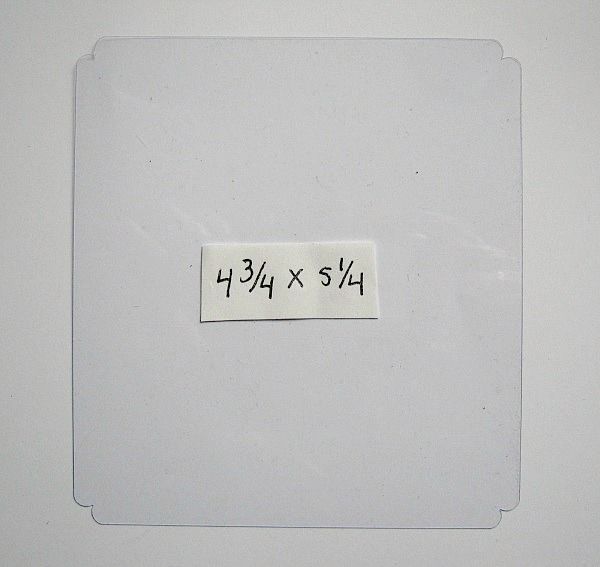
and a piece of acetate at 4.3/4 x 5.1/4 inch. (5.1/4 is the highth) I punched the corners.
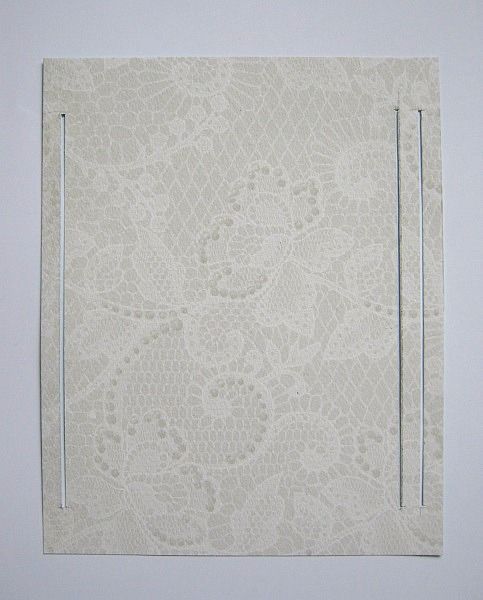
Then on the pencil marks I made cut lines, for the acetate to stick through. LEARN FROM MY MISTAKE ....On the right side you have to go 2/4 of an inch, inwards. So ignore the outer cutline at the right side.
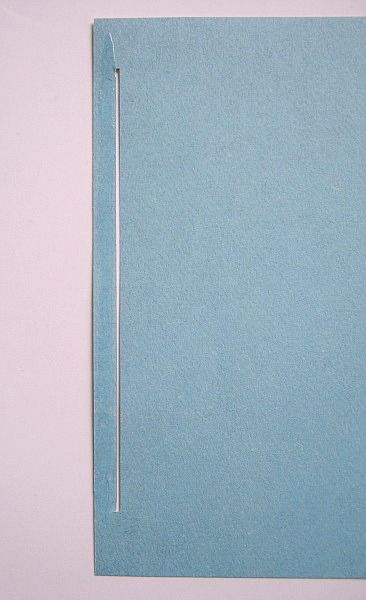
then I flipped the paper over, and if you look closely in the pic, you'll see that I added glue to the left side of the cutline.
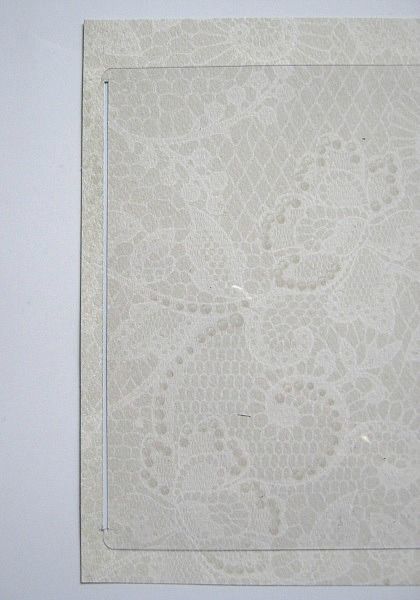
Flip it over again and stick one side of the acetate like in the picture and press the outher edge down.
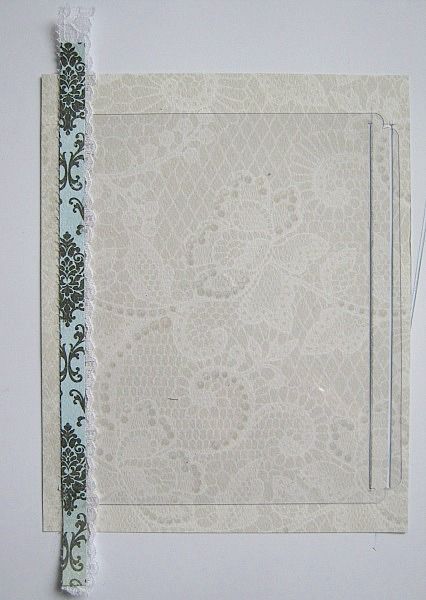
I then added a strip of lace and a strip of the PP. I glued this down using Beacon 3 in 1.
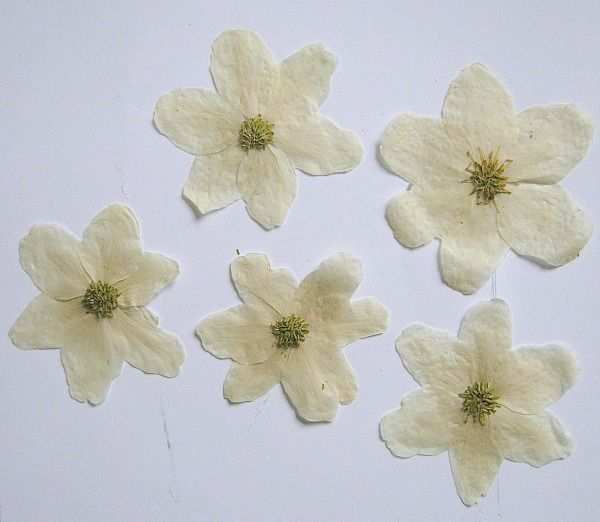
From my garden I took 5 clematis flowers and I wrapped them in paper towel and let them dry for about a week, in an old book. This is how they came out. I want to stack them together.
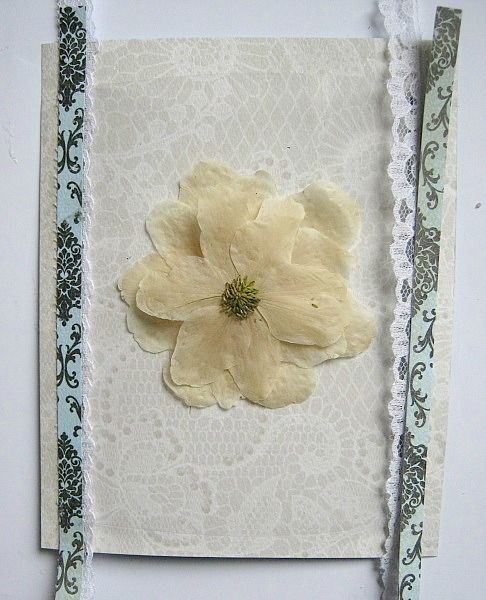
And place them something like this in the center of my card. The acetate will protect this delicate flower.
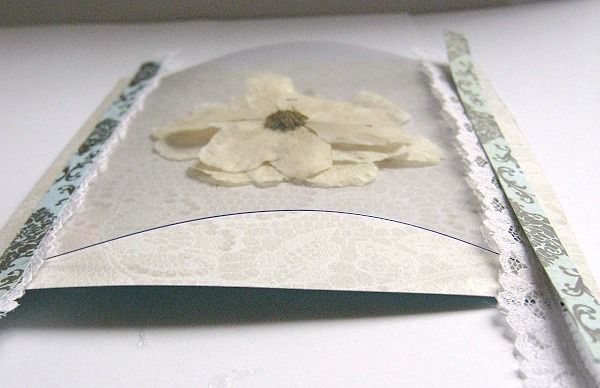
And this is how the acetate will stand out from the card. Okay, back to the flower
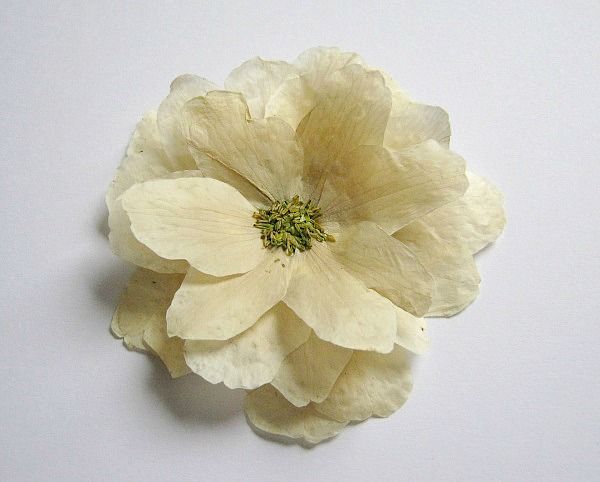
I stacked my flowers together, using Beacon 3 in 1, for the centers..... Isn't that PRETTY?????
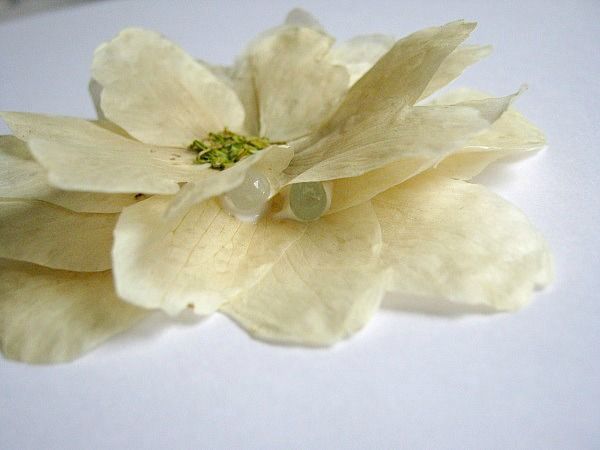
In between the layers I glued some glass beads using Beacon Gem-Tac, for dimension.
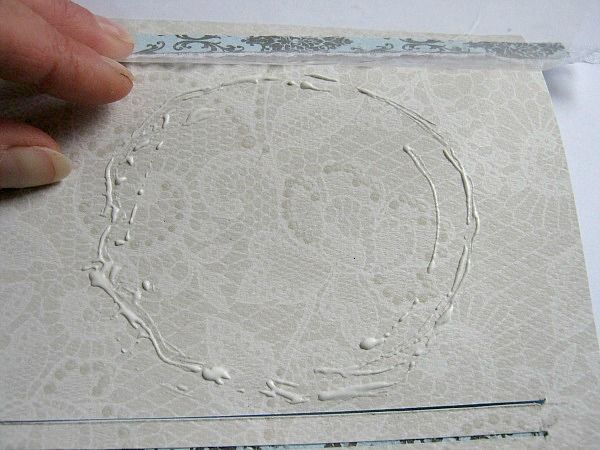
I aslo added a sloppy circle with Beacon Gem-Tac, but you can use Glossy Accents just as well.
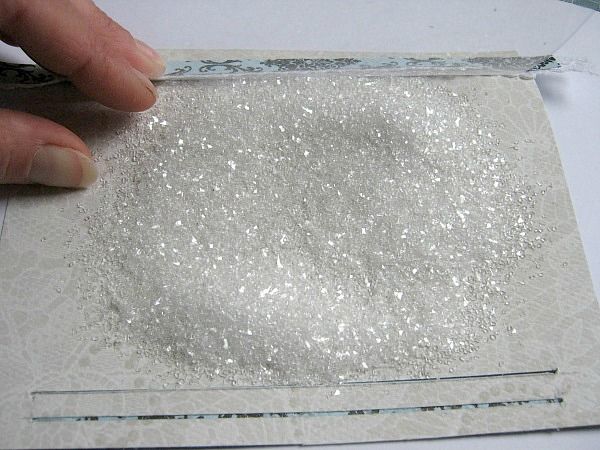
I covered it with Diamond Dust Glass Glitter and on top of that I used a piece of scrap to press the diamond dust into the glue
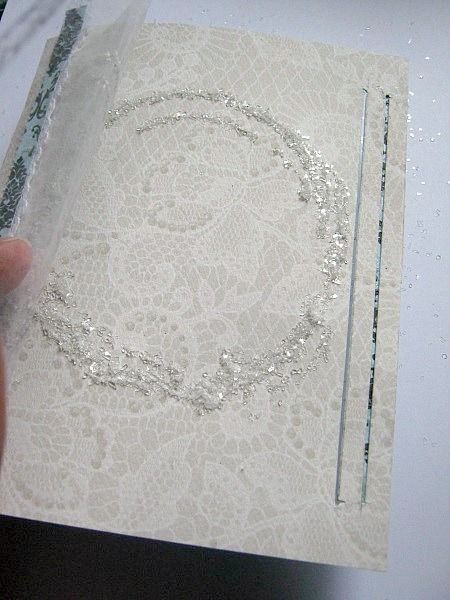
I shook off the excces
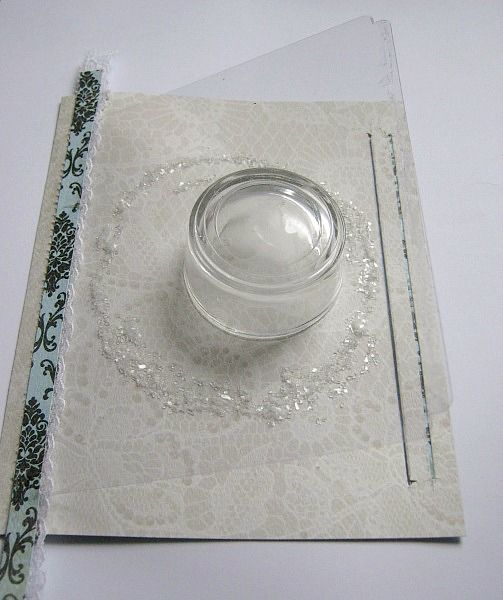
And put a little glass tub in the middle, and left it to dry for about an hour. If you don't have the glass glitter you could use Diamond or chrystal stickles, to make the circle.
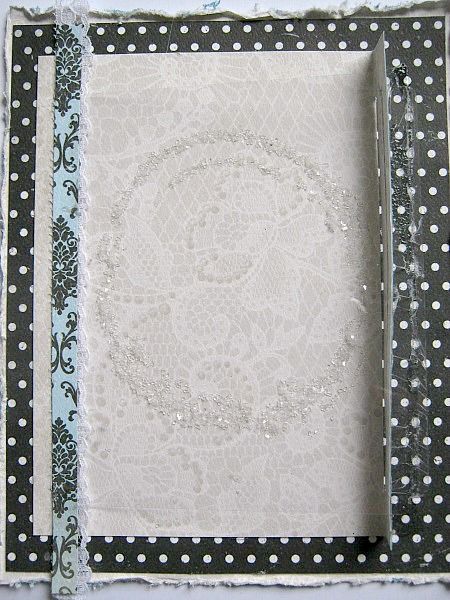
Then I glued this layer, accept for the right side, to the polka dot paper. My acetate leans on the,
folded up, right side.
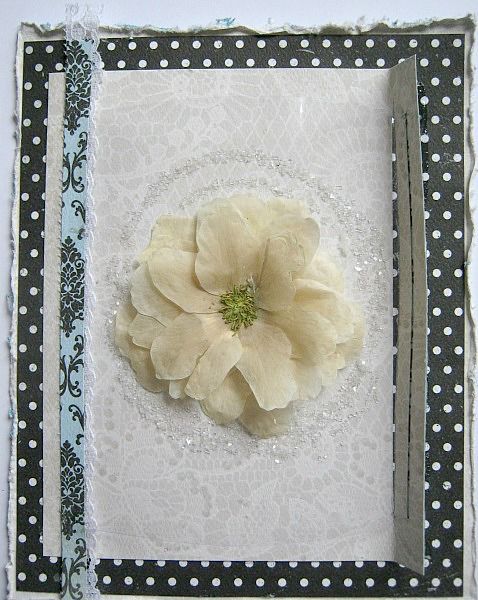
Then I glued my beautiful flower in place. Love how it turned out.
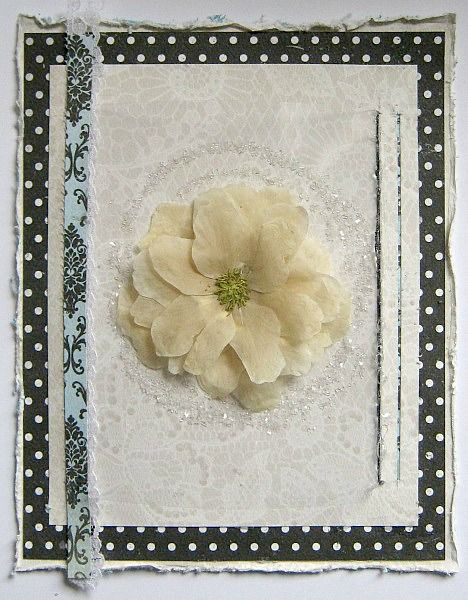
I added glue to the back of the right side, and stick my acetate trough the cutline and pressed everything down.
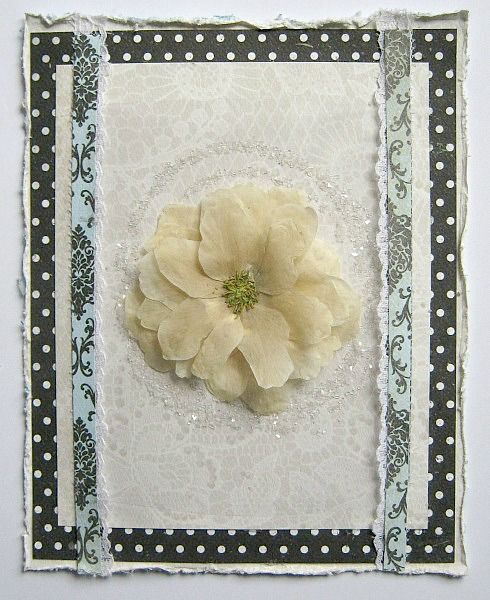
Then I glued my lace and paper strips at the right side, like in the picture.
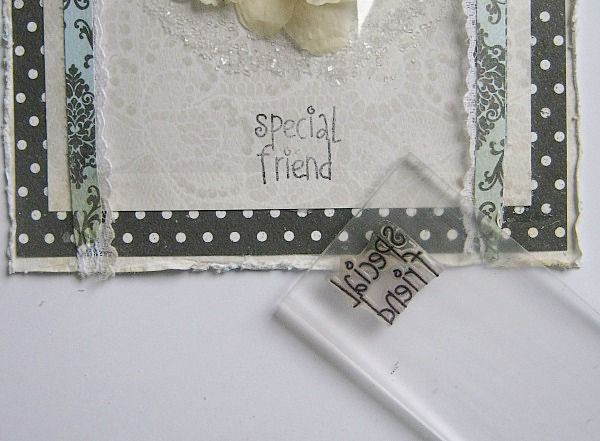
Because of the acetate is standing out, I was able to stamp my sentiment underneath the acetate
using a small stamping-block.
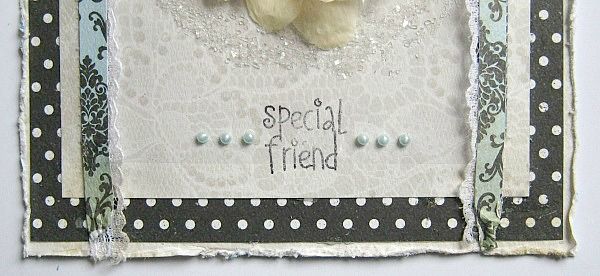
For the finishing touch I added tiny blue pearls on each side of my stamped sentiment.
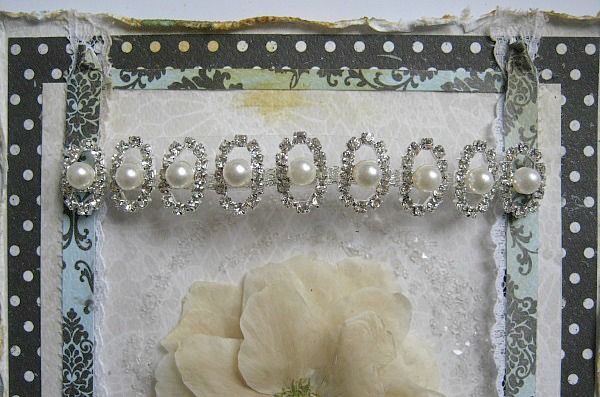
From the Bling AddOn, I had this piece of jewelery left and decieded that it was the perfect match, to top off the acetate. I also added some watered down distress ink (Gathered Twigs) which I applied using a watercolor brush.
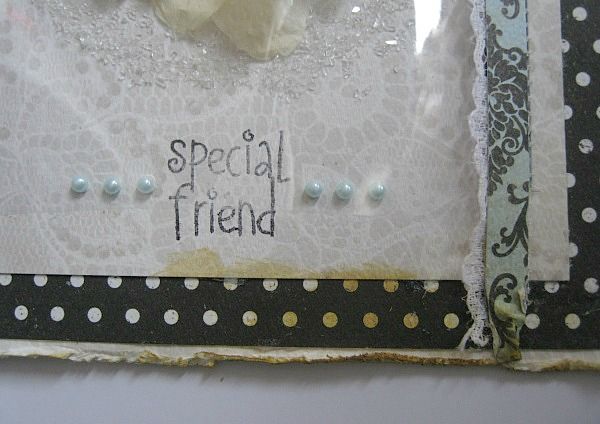
Of course, to balance it out, I added some ink at the bottom too.
I hope you like it and will dry some of those beautiful flowers from your garden.

And here's how it came together:
For my base card I folded a A4 piece of white cardstock double and cut it a tad bit smaller than 5.7/8 x 7.4/8

For my first layer I cut a piece of the white lace PP at 5.7/8 x 7.4/8

For my second layer I cut a piece of the polka dot PP at 5.5/8 x 7 inch

I glued both layers to the base card. I only distressed the first layer.

Then I cut a piece of the white lace PP at 4.7/8 x 6.1/8 inch and made a pencil mark at both sides
at 1/4 of an inch

I cut 2 strips of that beautiful teal/black PP

and a piece of acetate at 4.3/4 x 5.1/4 inch. (5.1/4 is the highth) I punched the corners.

Then on the pencil marks I made cut lines, for the acetate to stick through. LEARN FROM MY MISTAKE ....On the right side you have to go 2/4 of an inch, inwards. So ignore the outer cutline at the right side.

then I flipped the paper over, and if you look closely in the pic, you'll see that I added glue to the left side of the cutline.

Flip it over again and stick one side of the acetate like in the picture and press the outher edge down.

I then added a strip of lace and a strip of the PP. I glued this down using Beacon 3 in 1.

From my garden I took 5 clematis flowers and I wrapped them in paper towel and let them dry for about a week, in an old book. This is how they came out. I want to stack them together.

And place them something like this in the center of my card. The acetate will protect this delicate flower.

And this is how the acetate will stand out from the card. Okay, back to the flower

I stacked my flowers together, using Beacon 3 in 1, for the centers..... Isn't that PRETTY?????

In between the layers I glued some glass beads using Beacon Gem-Tac, for dimension.

I aslo added a sloppy circle with Beacon Gem-Tac, but you can use Glossy Accents just as well.

I covered it with Diamond Dust Glass Glitter and on top of that I used a piece of scrap to press the diamond dust into the glue

I shook off the excces

And put a little glass tub in the middle, and left it to dry for about an hour. If you don't have the glass glitter you could use Diamond or chrystal stickles, to make the circle.

Then I glued this layer, accept for the right side, to the polka dot paper. My acetate leans on the,
folded up, right side.

Then I glued my beautiful flower in place. Love how it turned out.

I added glue to the back of the right side, and stick my acetate trough the cutline and pressed everything down.

Then I glued my lace and paper strips at the right side, like in the picture.

Because of the acetate is standing out, I was able to stamp my sentiment underneath the acetate
using a small stamping-block.

For the finishing touch I added tiny blue pearls on each side of my stamped sentiment.

From the Bling AddOn, I had this piece of jewelery left and decieded that it was the perfect match, to top off the acetate. I also added some watered down distress ink (Gathered Twigs) which I applied using a watercolor brush.

Of course, to balance it out, I added some ink at the bottom too.
I hope you like it and will dry some of those beautiful flowers from your garden.
Here's a close up of the card:

So Go out into your garden and pick yourself some of the gorgeous flowers,and dry them.
Have a lovely day!
Subscribe to:
Posts (Atom)

Be sure to "LIKE & FOLLOW" Swirlydoos for special FB only deals and promos
Follow this blog with bloglovin

Scrapbook Sketches

see all of our sketches here
Keep Tabs On Our Blog!


 Posts
All Comments
Posts
All Comments

Popular Posts
-
 Welcome to Swirlydoos' Mystical Winter kit reveal Blog Hop Block Party!! Happy New Year and Welcome!!! This month's kit,...
 -
 Welcome to Swirlydoos December Kit Reveal Blog Hop BLOCK PARTY!!! We are having a party and you are all invited. We have some amazing projec...
 -
 Welcome back! We have a really fun blog hop all set for you today. Our May kit, So Chic , is well.....just that...so chic! This kit is ...
 -
 Hello, Swirly scrappers! This Saturday tutorial is a simple one. I am sharing how I put together the SACrafters stickle holder that was...
 -
 Welcome to Swirlydoos' February Blog Hop Block Party!! Welcome to Swirlydoos February Kit Reveal Blog Hop BLOCK PARTY!!! ...
 -
 Thank you for joining us today for our ONE DAY blog hop featuring our September kit collection, Gilted Pleasure . **All collec...
 -
 Hello ladies and gents! We now have the BRAND BRAND NEW Cha-w released flowers and Say it in Pearls in the Swirlydoos store! Be sure to swin...
 -
 Welcome to Swirlydoos' June Kit Reveal Blog Hop Block Party!! We are so pleased to show off our June kit, Antiquities!!! This kit...
 -
 It's the big re ve al ! Say hello to our December kit! Be sure to check out a video "tour" of the main kit, kit add ons an...
 -
 Swirlydoos is PROUD to present our April collection Hello Beautiful! Be sure to check out a video "tour" of the main...