Wednesday, March 28, 2012
Here is a quick and easy flowers to place in those little spots as fills ins.
Supplies:
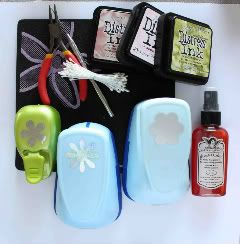
Step 1
Take 3 stamens, fold in half, twist ends then ink with color you prefer
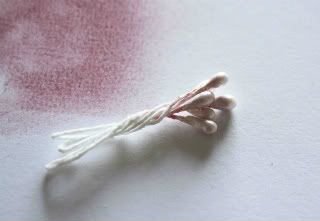
Step 2
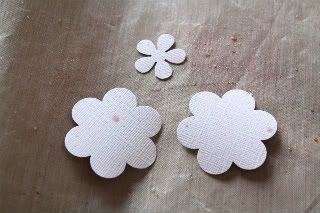
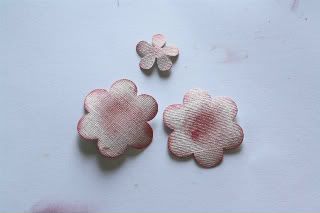
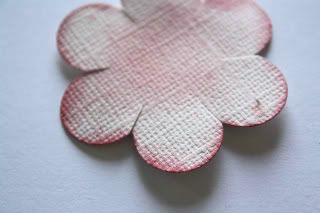
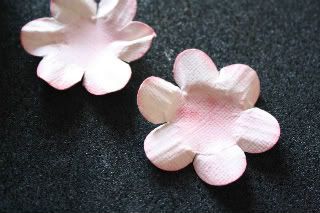
Punch one flower bottom. Ink edges then spray with water lightly. Pinch petals
Step 3
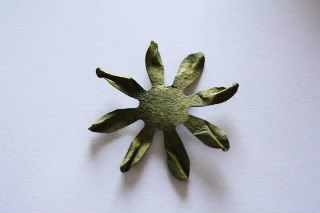
Punch two of the large flower and 1 on the small flower. Lightly mist with glimmermist. Heat to dry
Step 4
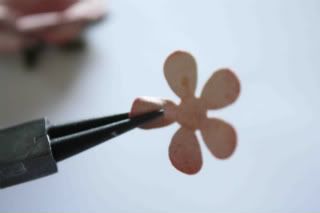
Ink the edges and center
Step 5
snip into the petals
Step 6
Spray with water to blend ink
Okay, don't laugh at my makeshift petal wrinkler. It just clay with ridges to impress into the petal.
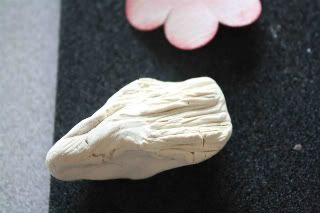
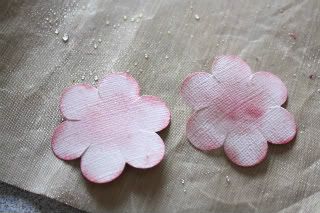
Step 7
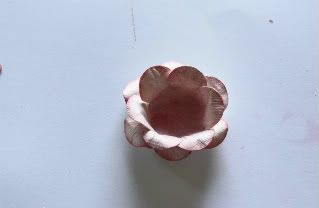
Press into petals while wet to make impression(Use a foam pad). Or you can just pinch and wrinkle

This what it will look like:
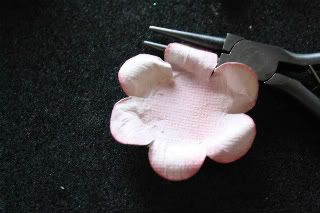
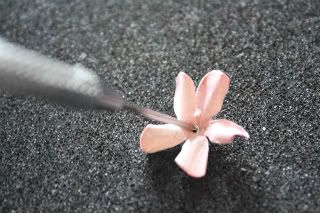
Step 8
Take clean pliers and curl edges.
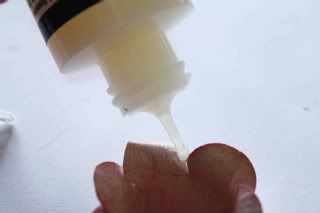
Step 9
Take one of the flower and glue the ends of the petals on top of each other. It will look like a cup once dry
Step 10
Layer on top of the other flower
Step 11
Glue flowers to green bottom
Step 12
Take the small flower and curl with pliers.
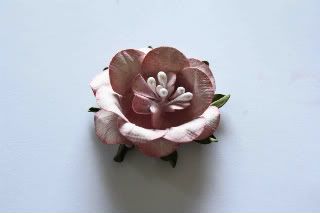
Step 13
Poke hole in middle and thread stamens through. Glue to other flowers
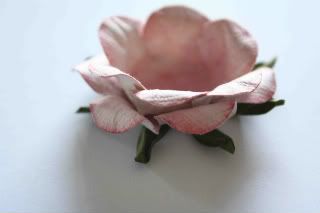
Here is the finished flower
and the layout I used them on

Supplies:
Step 1
Take 3 stamens, fold in half, twist ends then ink with color you prefer
Step 2
Punch one flower bottom. Ink edges then spray with water lightly. Pinch petals
Step 3
Punch two of the large flower and 1 on the small flower. Lightly mist with glimmermist. Heat to dry
Step 4
Ink the edges and center
Step 5
snip into the petals
Step 6
Spray with water to blend ink
Okay, don't laugh at my makeshift petal wrinkler. It just clay with ridges to impress into the petal.
Step 7
Press into petals while wet to make impression(Use a foam pad). Or you can just pinch and wrinkle
This what it will look like:
Step 8
Take clean pliers and curl edges.
Step 9
Take one of the flower and glue the ends of the petals on top of each other. It will look like a cup once dry
Step 10
Layer on top of the other flower
Step 11
Glue flowers to green bottom
Step 12
Take the small flower and curl with pliers.
Step 13
Poke hole in middle and thread stamens through. Glue to other flowers
Here is the finished flower
and the layout I used them on

Subscribe to:
Post Comments (Atom)

Be sure to "LIKE & FOLLOW" Swirlydoos for special FB only deals and promos
Follow this blog with bloglovin

Scrapbook Sketches

see all of our sketches here
Keep Tabs On Our Blog!


Popular Posts
-
 Welcome to: Swirlydoos Kit Club February Scrapbook Kit Reveal & Blog Hop! Swirlydoos is proud to bring you our beautiful Febr...
 -
 Welcome to Swirlydoos November Kit Reveal Blog Hop BLOCK PARTY!!! That's right, we are having a party and you are all invit...
 -
 Thank you for joining us today for our ONE DAY blog hop featuring our September kit collection, Gilted Pleasure . **All collec...
 -
 Welcome to Swirlydoos' June Kit Reveal Blog Hop Block Party!! We are so pleased to show off our June kit, Antiquities!!! This kit...
 -
 Welcome to Swirlydoos' March Kit Reveal Blog Hop Block Party!! We have some amazing projects for you to see today and as a bonus...
 -
 Welcome to Swirlydoos' Mystical Winter kit reveal Blog Hop Block Party!! Happy New Year and Welcome!!! This month's kit,...
 -
 Welcome to: Swirlydoos Kit Club March Scrapbook Kit Reveal & Blog Hop! Swirlydoos is proud to bring you our beautiful March co...
 -
 SCROLL DOWN FOR THE 12 DAYS OF CHRISTMAS CONTEST: DAY FIVE! Welcome to: Swirlydoos Kit Club December Scrapbook Kit Reveal & Blo...
 -
 Welcome back! We have a really fun blog hop all set for you today. Our May kit, So Chic , is well.....just that...so chic! This kit is ...
 -
 Welcome!!! Today is a beautiful day to reveal our April kit, Whispers of Spring. Take a look at how pretty this kit is! I have to tel...
7 comments:
Thank you for this dose of inspiration. I love your flower tutorials here.
Such a beautiful page you've done!
How fun! Great tutorial and the page is amazing! Love it!
thenk thenk thenk you... very beautiful!
Thanks for sharing how to make this cute flowers.. and the layout is adorable too!!
great tut & love your page
Thank you for showing us this amazing technique! I'm definitly going to use this someday!
LOVE THIS FLOWER TUTORIAL!!! Will try it one day.
x0, Damaris