Saturday, November 15, 2014
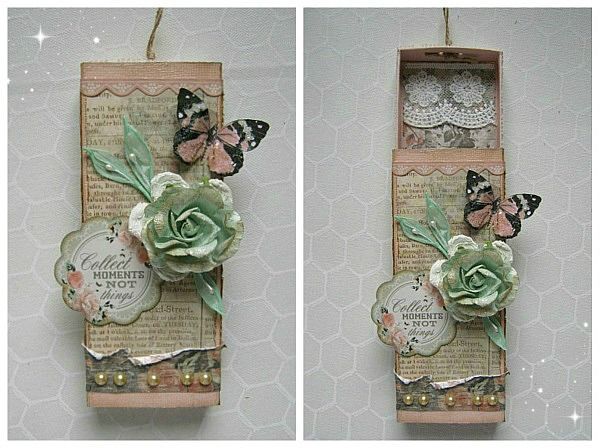
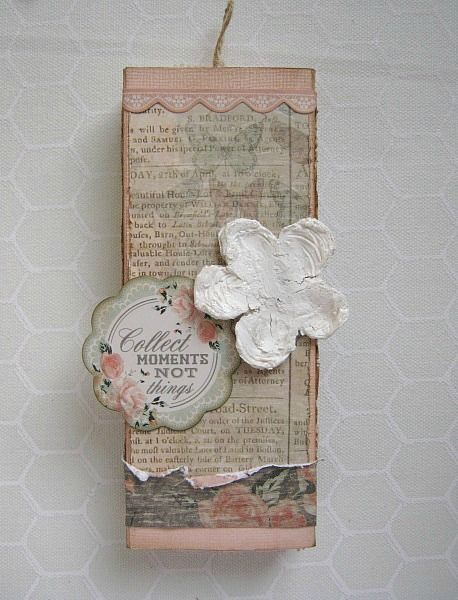
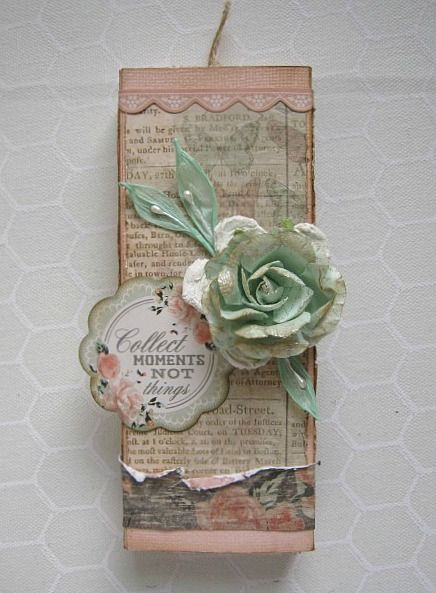
Today I'd like to share a giftbox I made, using the November *Beloved* kit.
You may think it is a bit complicated, but it is not. I photographed each step to make this as easy as possible, but if you do have a question, feel free to ask.
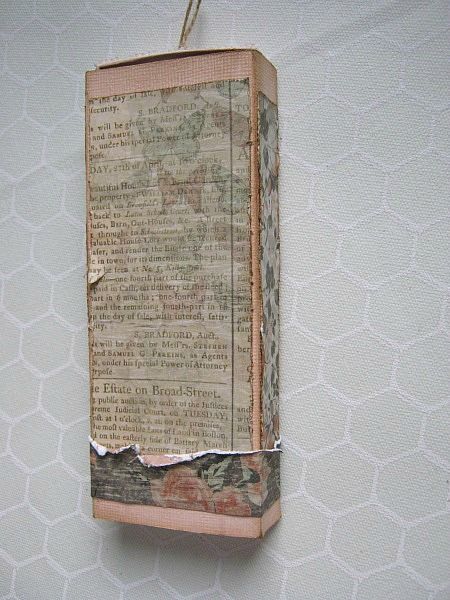
Here's the box:
and here's how it came together.
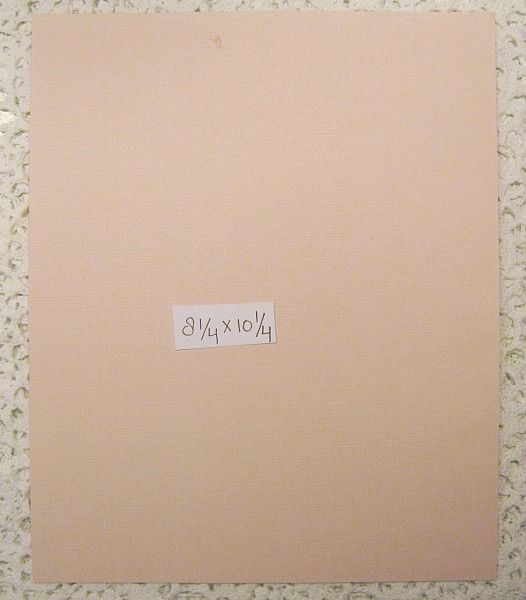
For my giftbox I started with a piece of cardstock, cut down to 8.1/4 x 10.1/4
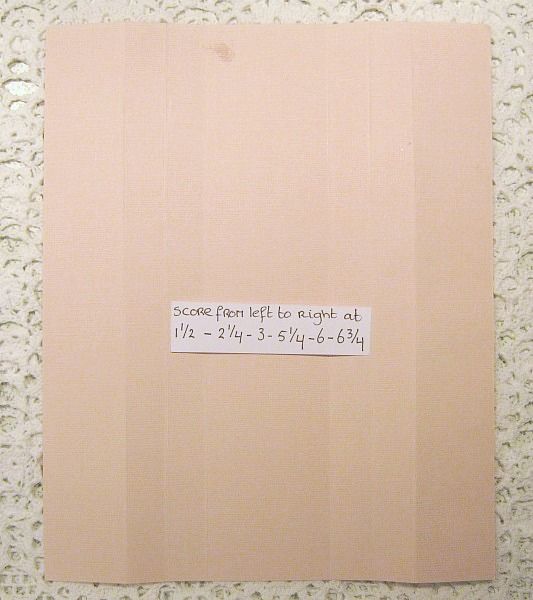
From left to right I scored at 1.1/2 - 2.1/4 - 3 - 5.1/4 - 6 and 6.3/4 Make your folds.
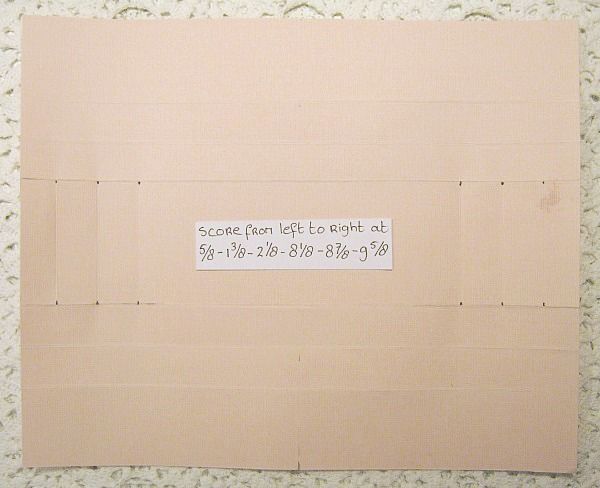
I rotated my cardstock and if you look closely to the picture you can see that I only scored the middelest section. (between the tiny black dots) From left to right I scored at 5/8 - 1.3/8 - 2.1/8 - 8.1/8 - 8.7/8 - 9.5/8
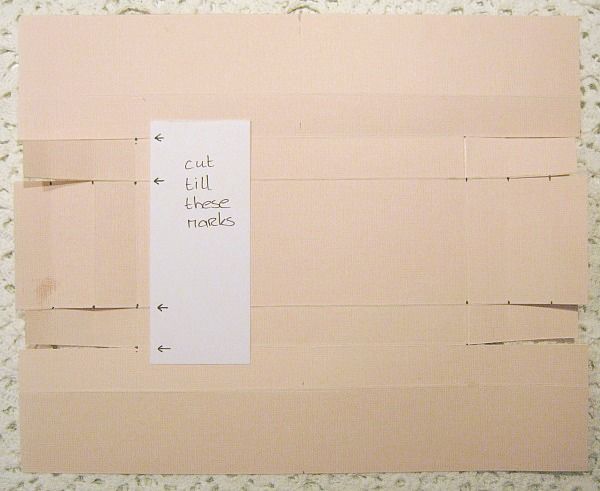
Cut the lines till the marks.
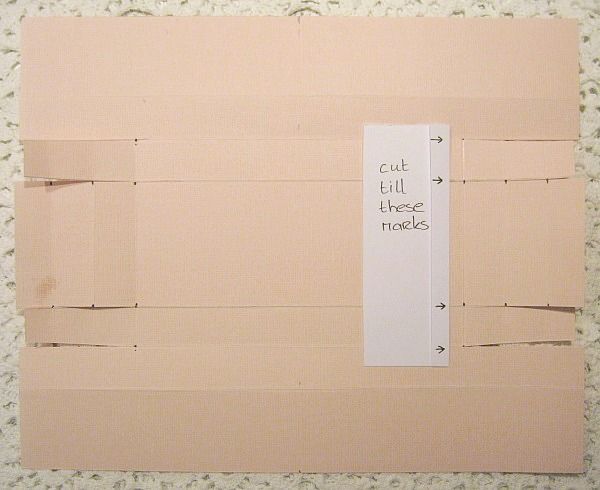
Repeat this on the other side.
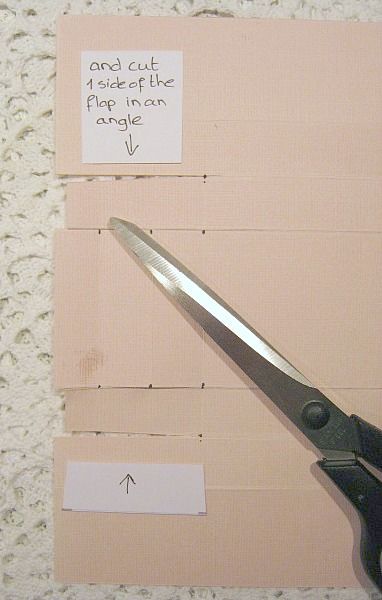
I first made straight cuts and then a little extra snip with an angle. (I hope you get what I mean. look closely to the picture)
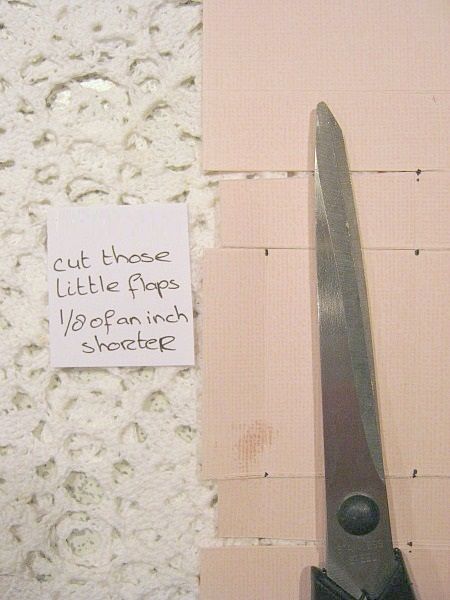
As you can see in this picture... cut the 2 little flaps a little shorter. Repeat on the other side.
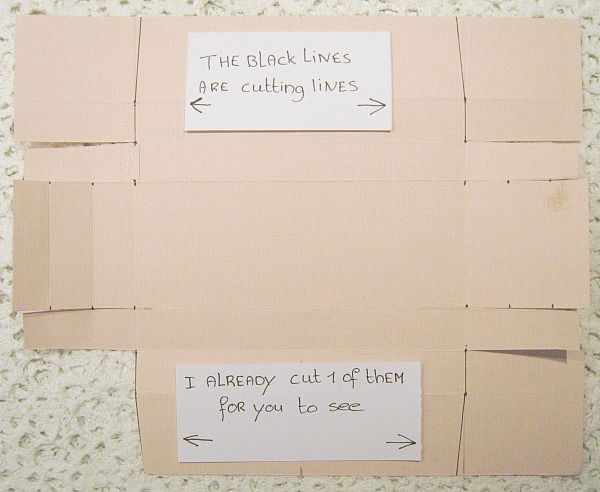
See the black lines in this picture? Those need to be cut off. I did one, in the left bottom corner, for you to see.
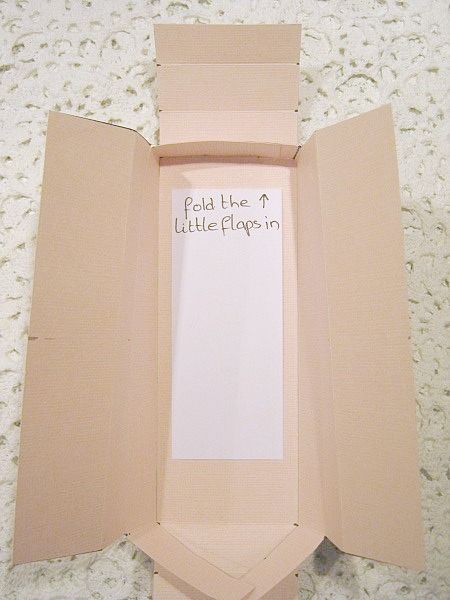
Fold the little flaps in. You could secure with a drop of glue if you want.
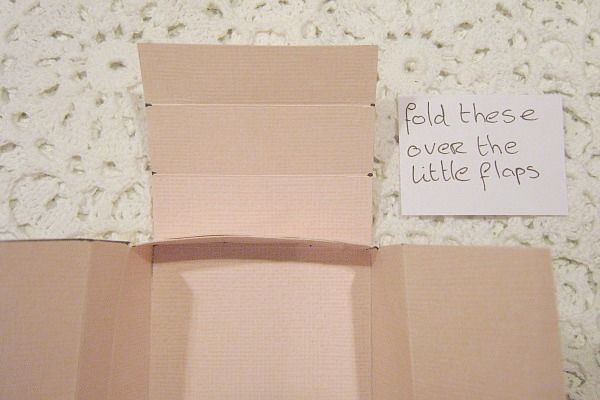
Fold the top inwards, over the little flaps.
Like so
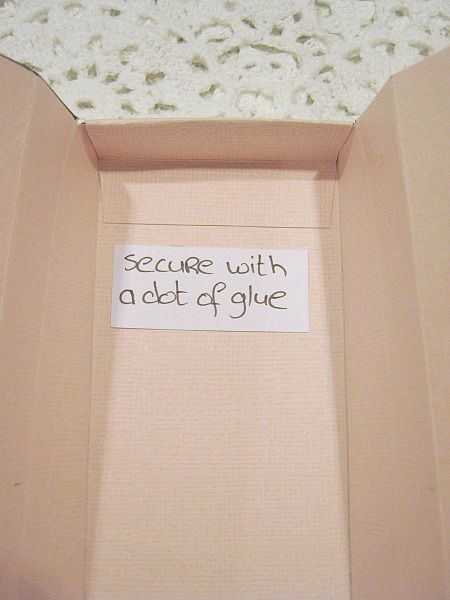
Secure with a dot of glue! And repeat on the other side.
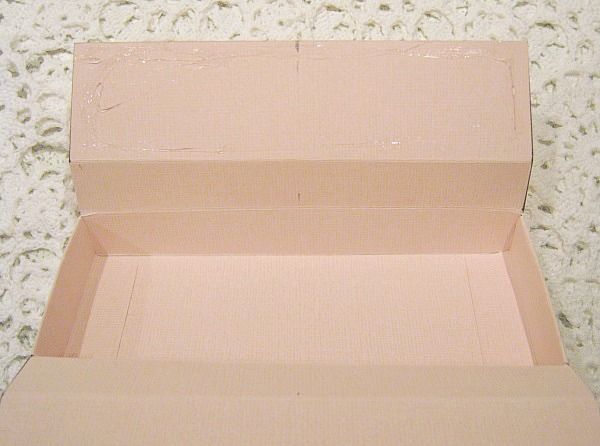
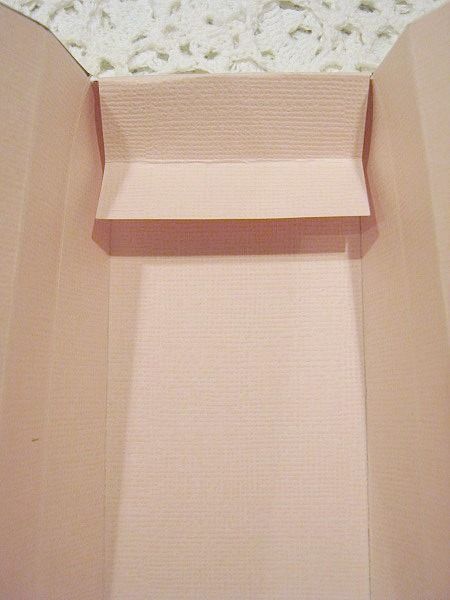
For the long side: add glue to the top part, like in the picture
Fold it inwards and press it to the bottom.

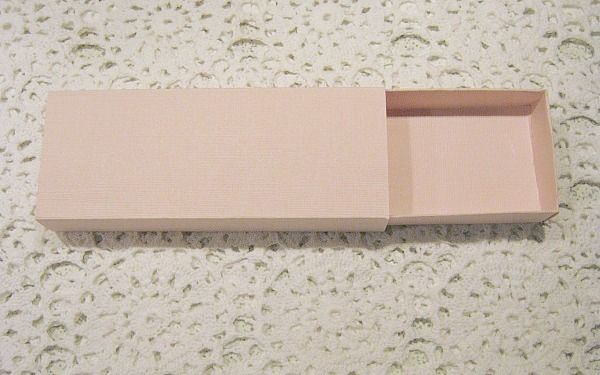
Repeat at the other side and your box is now finished.
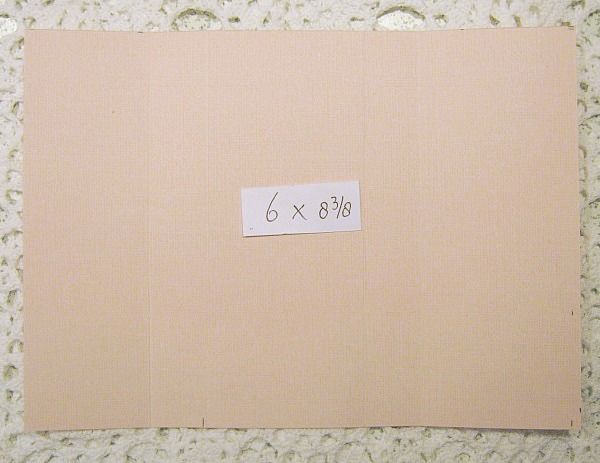
For the cover of the box I cut a piece of cardstock at 6 x 8.3/8. BUT you might want to cut it at 6.1/8 x 8.3/8 Then it will fit a little better.
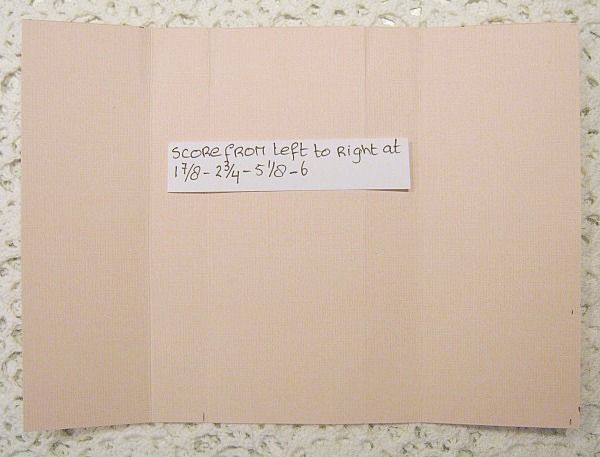
Score from left to right at 1.7/8 - 2.3/4 - 5.1/8 - 6

Add glue to the left part and glue it together.
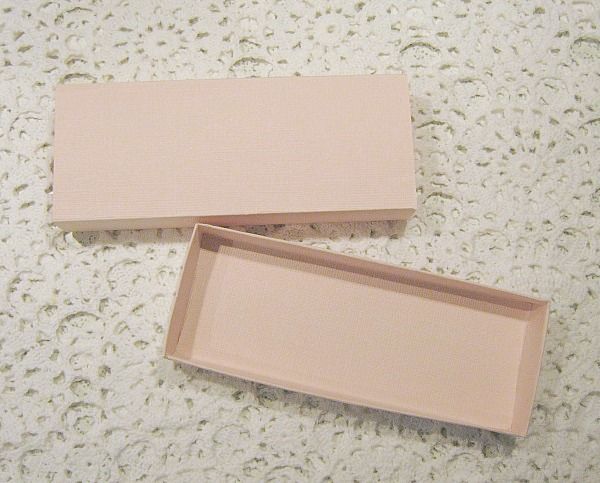
You have now both of these pieces.
Your cover will be little wider than your box is. I did this on purpose, cause I wanted to dress up the sides of my box.
******* Pardon me for the light difference*******
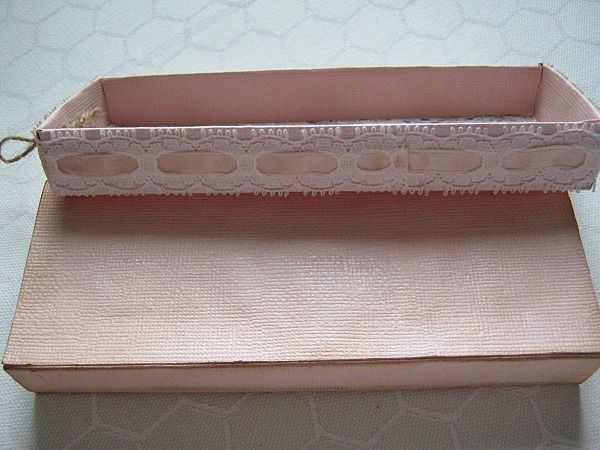
As you can see here I added some lace all around my box.
I made 2 holes at the top and made a loop using twine - knotted it on the inside.
Then I selected my papers to dress up my cover and box. I just eye-balled it and cut it to size.
I lightly distressed and inked the papers.
And glued them to the cover.
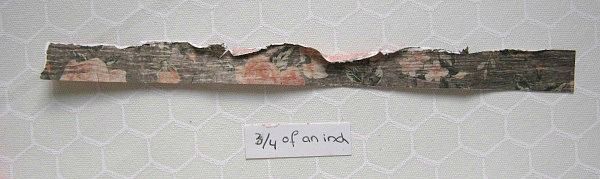
Then I cut a strip of PP at 3/4 of an inch by 12 and scrunched it up
I glued it around the bottom of the cover.
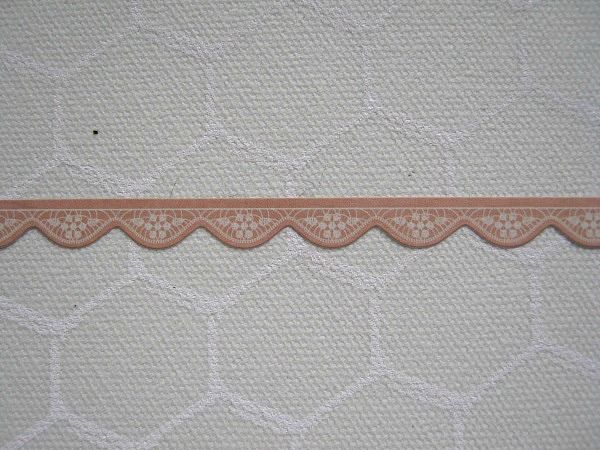
From the sticker sheet I chose this border
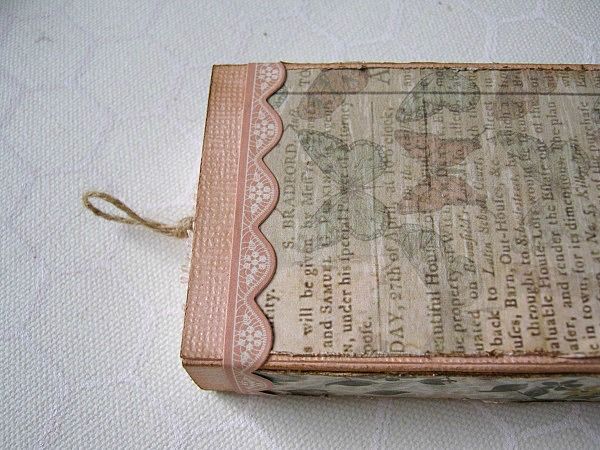
And glued it all around the top of the cover.

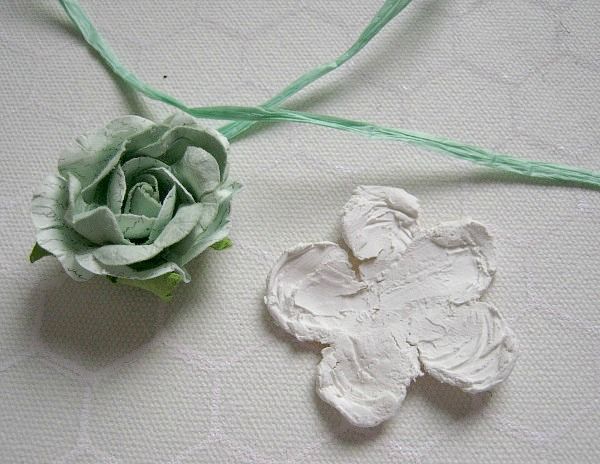
These are my main embellishments, and that white flower is made from texture paste.
Let me show you how I did that.

I used a piece of vellum, (used it before to die cut some flowers) I wanted my flower to be as big as the,(earlier) biggest die cut flower, so that is my guide.....
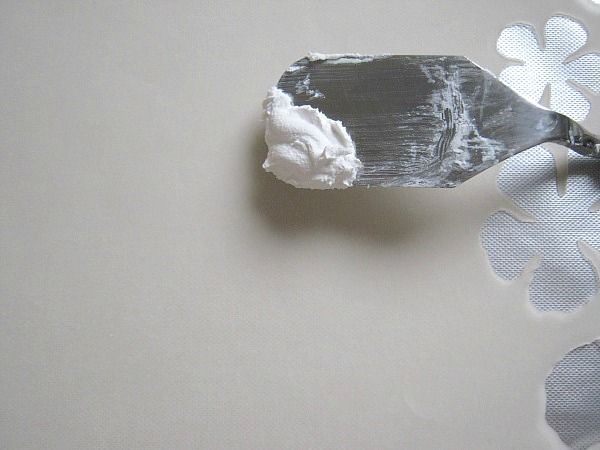
I scooped some texture paste on my spatula (which has rounded corners)
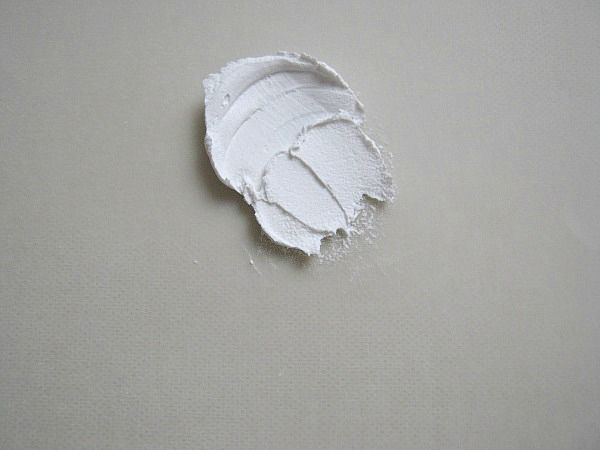
And I simply pressed with my spatula onto the vellum and dragged towards me.
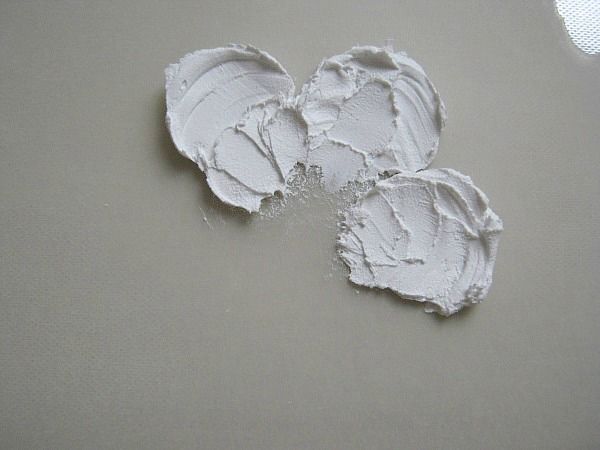
I repeated that a couple of times to form petals
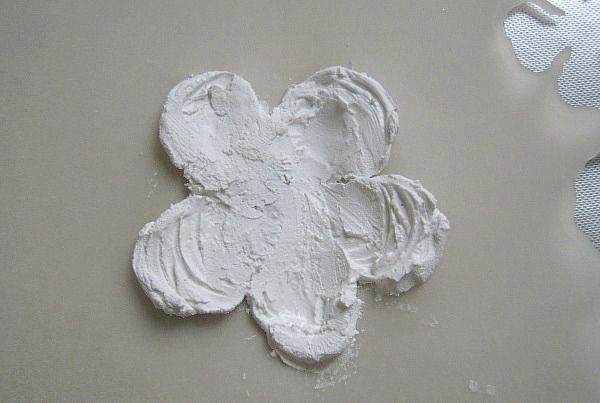
Till I had formed a flower. The last petal was the hardest and I had to use my finger to give it the right shape. Then I let the flower dry overnight, and carefully cut around the petals, the next morning.
So these will be my main embellies, but first let me show you something fun using the raffia.
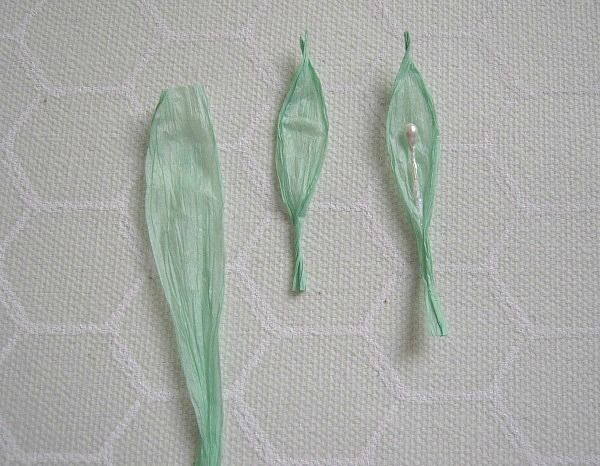
From the raffia, I shaped some leaves. First open up the raffia - then, hold your thumb in the middle and twist the top - cut it to size - if you like you can add a stamen, you want to put a little glue on the stamen - and twist the bottom.
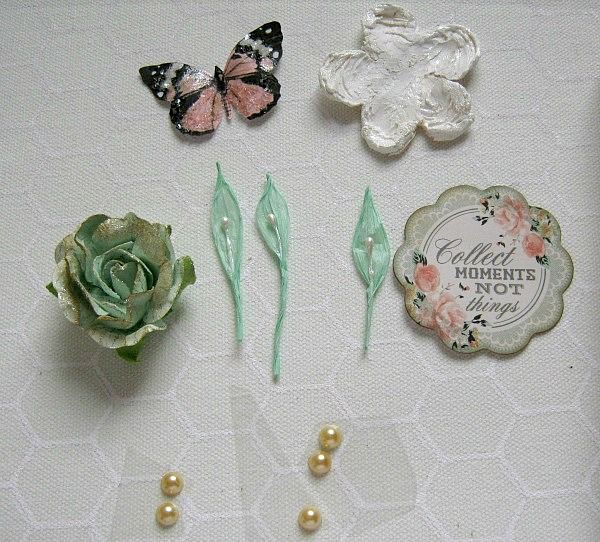
I added some pearls, a sticker and a butterfly to my embellishments I want to use to decorate my box.
And started to glue them down using Beacon Fabri-Tac. Even the texture paste flower, which has a vellum back, was glued down with Fabri-Tac
In this picture you see my "gluing down process"
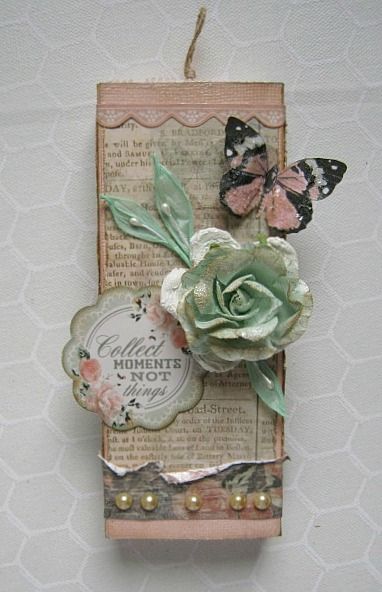
And I finished it off with some pearls and a butterfly.
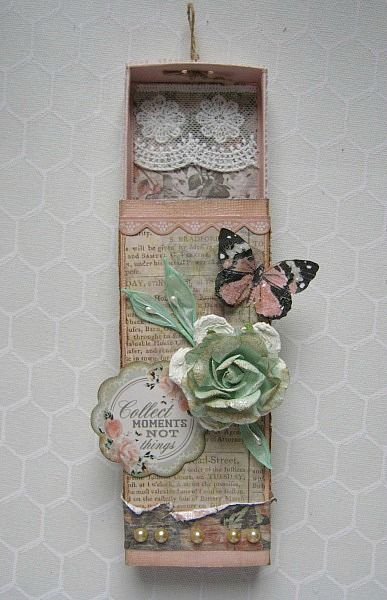
I decieded that the inside of the box would look a little prettier with a piece of lace glued down on both ends.
And there you have it.
You may think it is a bit complicated, but it is not. I photographed each step to make this as easy as possible, but if you do have a question, feel free to ask.
Here's the box:

and here's how it came together.

For my giftbox I started with a piece of cardstock, cut down to 8.1/4 x 10.1/4

From left to right I scored at 1.1/2 - 2.1/4 - 3 - 5.1/4 - 6 and 6.3/4 Make your folds.

I rotated my cardstock and if you look closely to the picture you can see that I only scored the middelest section. (between the tiny black dots) From left to right I scored at 5/8 - 1.3/8 - 2.1/8 - 8.1/8 - 8.7/8 - 9.5/8

Cut the lines till the marks.

Repeat this on the other side.

I first made straight cuts and then a little extra snip with an angle. (I hope you get what I mean. look closely to the picture)

As you can see in this picture... cut the 2 little flaps a little shorter. Repeat on the other side.

See the black lines in this picture? Those need to be cut off. I did one, in the left bottom corner, for you to see.

Fold the little flaps in. You could secure with a drop of glue if you want.

Fold the top inwards, over the little flaps.

Like so

Secure with a dot of glue! And repeat on the other side.

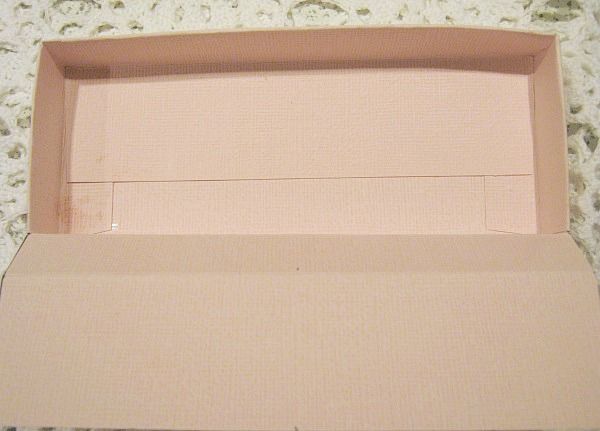
For the long side: add glue to the top part, like in the picture

Fold it inwards and press it to the bottom.

Repeat at the other side and your box is now finished.

For the cover of the box I cut a piece of cardstock at 6 x 8.3/8. BUT you might want to cut it at 6.1/8 x 8.3/8 Then it will fit a little better.

Score from left to right at 1.7/8 - 2.3/4 - 5.1/8 - 6

Add glue to the left part and glue it together.

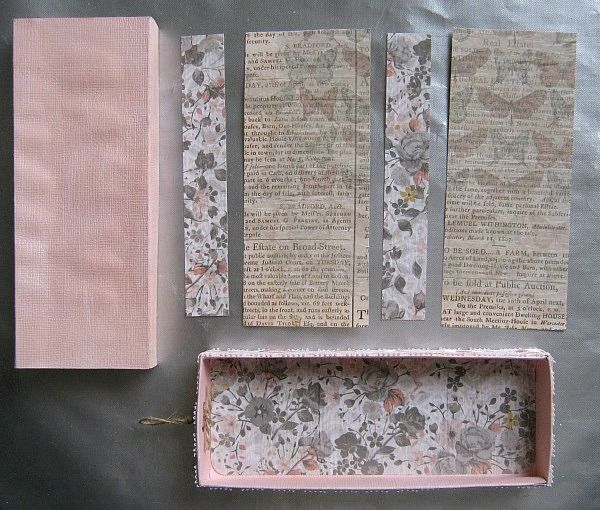
You have now both of these pieces.

Your cover will be little wider than your box is. I did this on purpose, cause I wanted to dress up the sides of my box.
******* Pardon me for the light difference*******

As you can see here I added some lace all around my box.

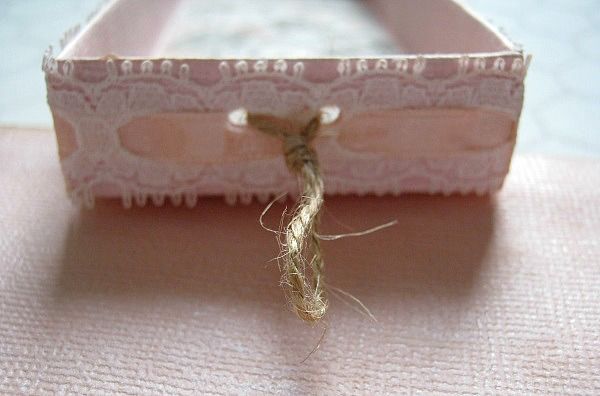
I made 2 holes at the top and made a loop using twine - knotted it on the inside.

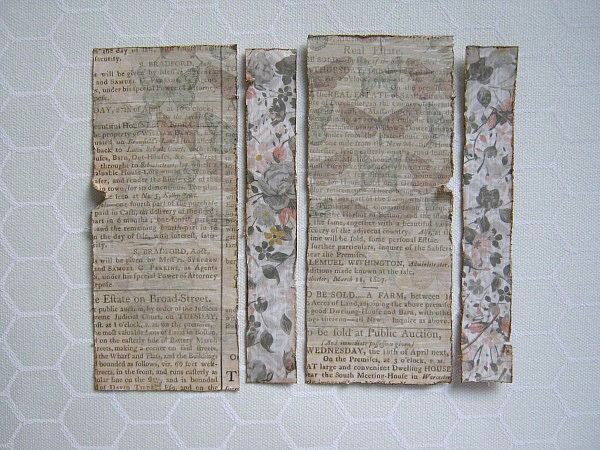
Then I selected my papers to dress up my cover and box. I just eye-balled it and cut it to size.

I lightly distressed and inked the papers.

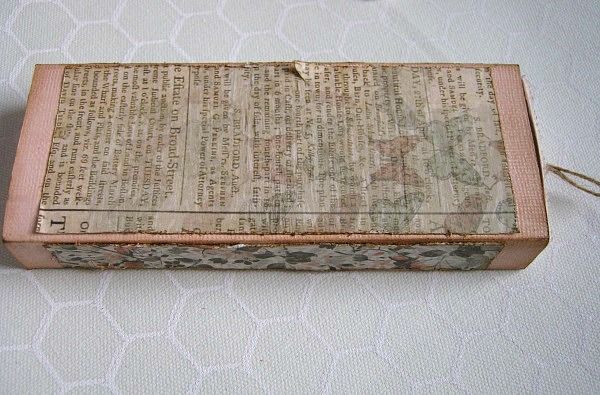
And glued them to the cover.

Then I cut a strip of PP at 3/4 of an inch by 12 and scrunched it up

I glued it around the bottom of the cover.

From the sticker sheet I chose this border

And glued it all around the top of the cover.

These are my main embellishments, and that white flower is made from texture paste.
Let me show you how I did that.

I used a piece of vellum, (used it before to die cut some flowers) I wanted my flower to be as big as the,(earlier) biggest die cut flower, so that is my guide.....

I scooped some texture paste on my spatula (which has rounded corners)

And I simply pressed with my spatula onto the vellum and dragged towards me.

I repeated that a couple of times to form petals

Till I had formed a flower. The last petal was the hardest and I had to use my finger to give it the right shape. Then I let the flower dry overnight, and carefully cut around the petals, the next morning.

So these will be my main embellies, but first let me show you something fun using the raffia.

From the raffia, I shaped some leaves. First open up the raffia - then, hold your thumb in the middle and twist the top - cut it to size - if you like you can add a stamen, you want to put a little glue on the stamen - and twist the bottom.

I added some pearls, a sticker and a butterfly to my embellishments I want to use to decorate my box.

And started to glue them down using Beacon Fabri-Tac. Even the texture paste flower, which has a vellum back, was glued down with Fabri-Tac

In this picture you see my "gluing down process"

And I finished it off with some pearls and a butterfly.

I decieded that the inside of the box would look a little prettier with a piece of lace glued down on both ends.
And there you have it.
I hope you like it.
**********************************************************************
**********************************************************************
Have a lovely weekend!
Subscribe to:
Post Comments (Atom)

Be sure to "LIKE & FOLLOW" Swirlydoos for special FB only deals and promos
Follow this blog with bloglovin

Scrapbook Sketches

see all of our sketches here
Keep Tabs On Our Blog!


Popular Posts
-
 Welcome to Swirlydoos November Kit Reveal Blog Hop BLOCK PARTY!!! That's right, we are having a party and you are all invit...
 -
 Welcome to Swirlydoos' Mystical Winter kit reveal Blog Hop Block Party!! Happy New Year and Welcome!!! This month's kit,...
 -
 Welcome to Swirlydoos December Kit Reveal Blog Hop BLOCK PARTY!!! We are having a party and you are all invited. We have some amazing projec...
 -
 Say Hellllllllloooooo to our October kit, Belle Chanson! Welcome to our October kit reveal and Blog Hop. We have some new and exciting...
 -
 Welcome to Swirlydoos' February Blog Hop Block Party!! Welcome to Swirlydoos February Kit Reveal Blog Hop BLOCK PARTY!!! ...
 -
 Welcome to Swirlydoos' June Kit Reveal Blog Hop Block Party!! We are so pleased to show off our June kit, Antiquities!!! This kit...
 -
 Thank you for joining us today for our ONE DAY blog hop featuring our September kit collection, Gilted Pleasure . **All collec...
 -
 Boy, oh boy do we have a stellar hop for you this month!! Just when I think that Krissy couldn't possibly created a prettier ki...
 -
 Welcome to: Swirlydoos Kit Club February Scrapbook Kit Reveal & Blog Hop! Swirlydoos is proud to bring you our beautiful Febr...
 -
 Welcome back! We have a really fun blog hop all set for you today. Our May kit, So Chic , is well.....just that...so chic! This kit is ...
2 comments:
Lovely, Paulien! What a clever project! I just adore what you did with the raffia!
Love your raffia leaves! Beautiful project!!!