
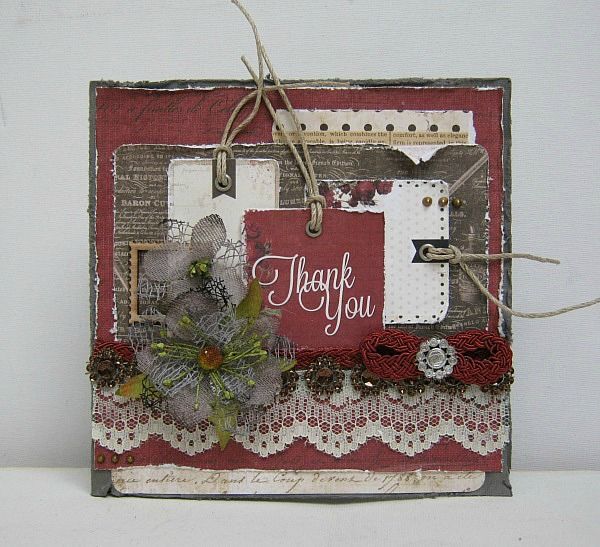
This card was made, using the Beautiful *Salutations* kit.
and some close ups:
and here's how it came together
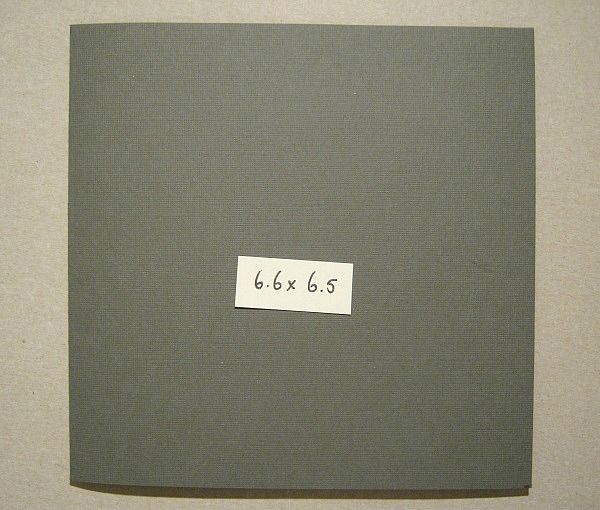
For the base of this card I cut 2 strips of cardstock, which were 6.5# high and 12 long. I glued 2 of the ends together, so that I was able to create a BIG card. After I folded it, it meassured 6.6 x 6.5 I will put the glued line in the front, cause it is going to be covered with paper.
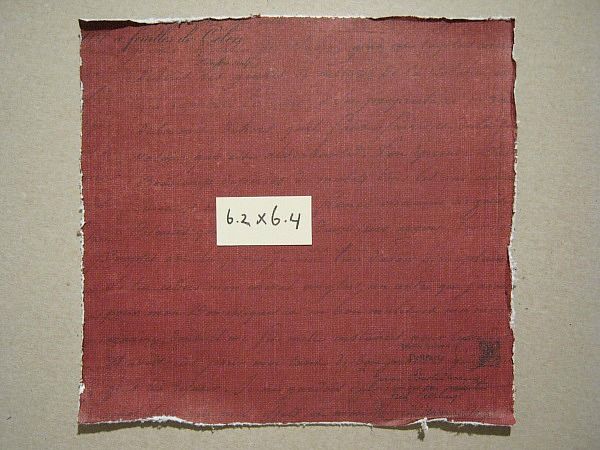
I cut a piece of PP at 6.2 x 6.4. Distressed the edges.

I cut a little strip off this note card and.....
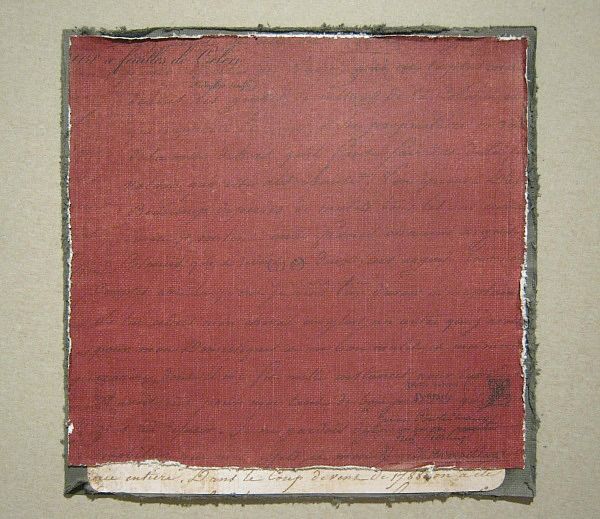
glued my paper and strip to the base card. Like so.
Then from another notecard I teared a little piece off. The one that is marked, I'm going to use.

I glued the little piece behind the black, distressed, notecard.
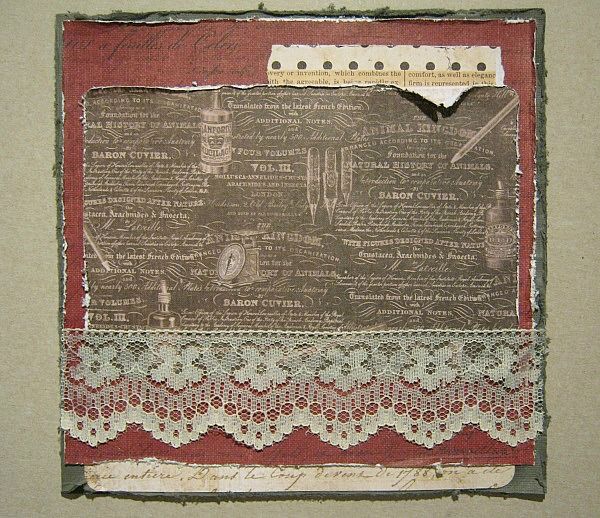
I glued a piece of lace over the bottom of the notecard, using 3 in 1 Craft Glue, (Krissy has these in the BOUTIQUE)
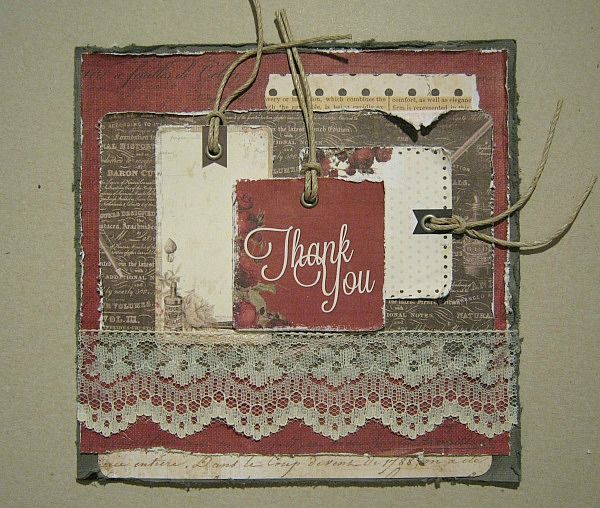
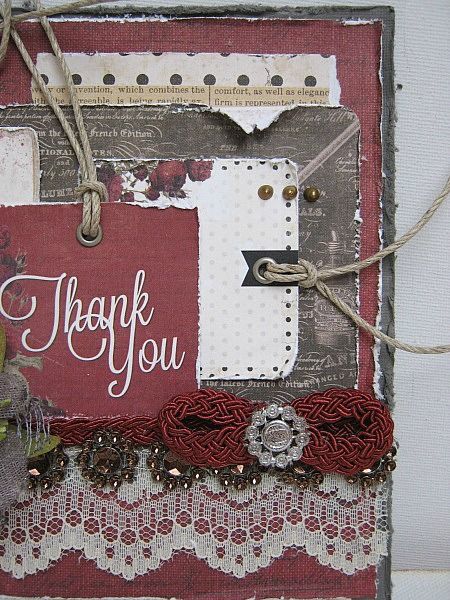
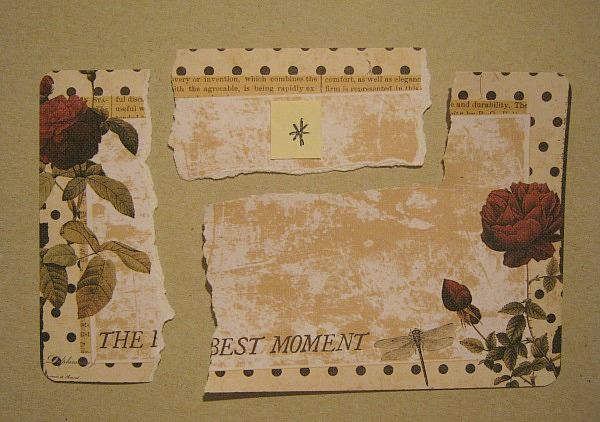
I selected 3 tags, from the bunch we got in the kit, and placed them like this.
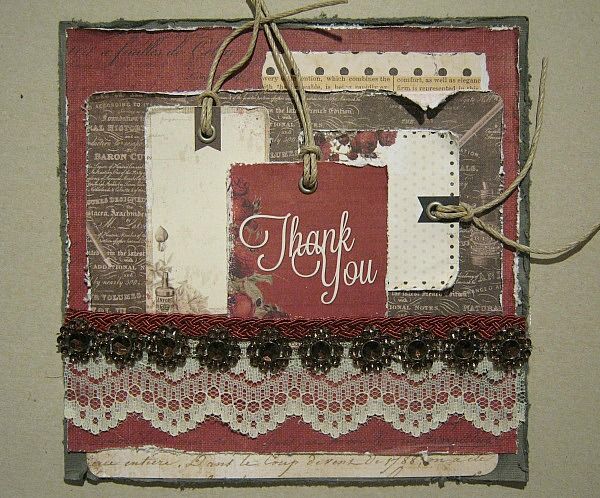
I glued some of the gorgeous red trim (we call that très trim) just above the lace and then a strip of that amazing bling, to cover the line between the lace and red trim.
****TIP****
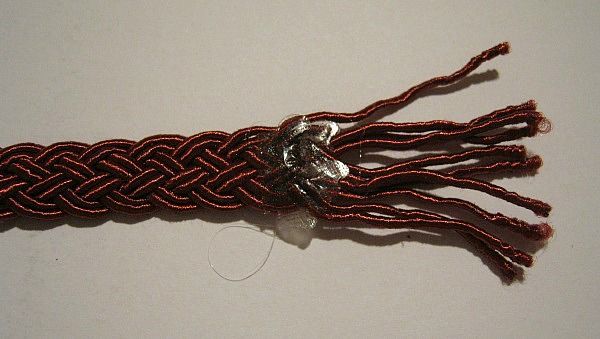
This beautiful red trim, raffles very quickly and to prevent that you have to snip of the raffles all you have to do is, add a dot of glue (I used hot glue) press it down on a non-stck craft mat and after it cooled down..................
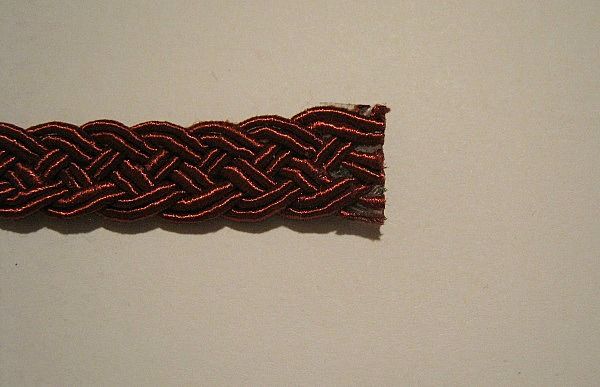
you can easily cut it. This way you won't waste any of the trim .
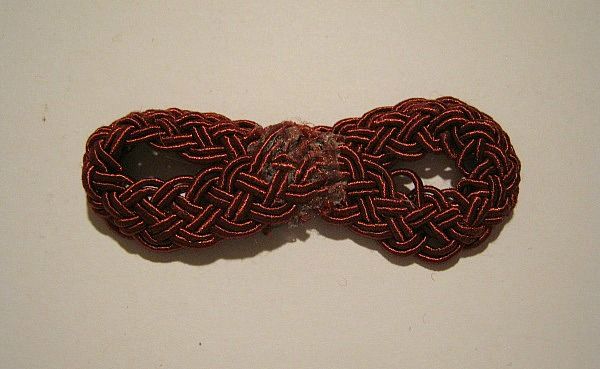
I also folded a figure 8, or bow from the red trim
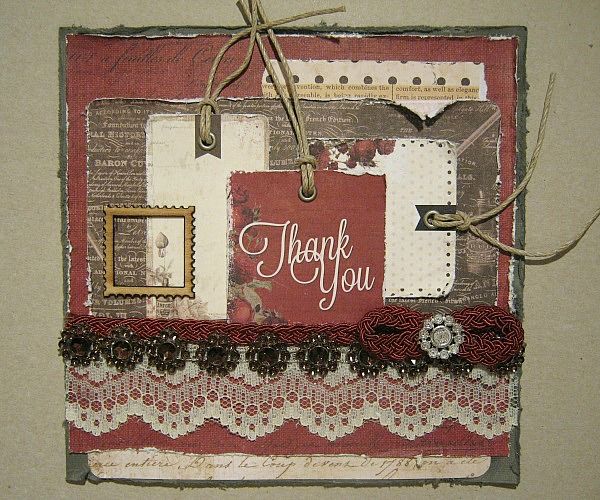
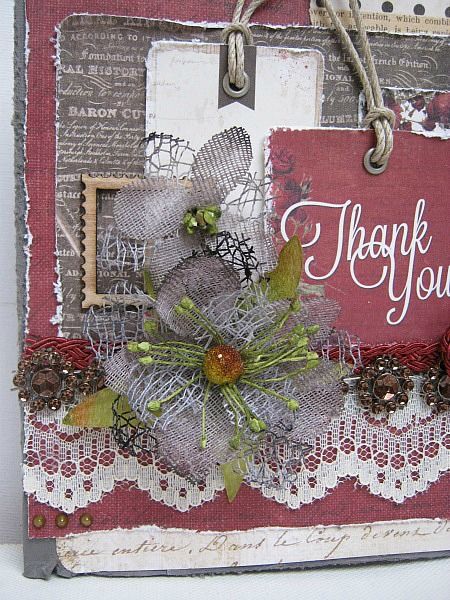
And glued it at the right side of my card. Topped it of with a piece of bling from the kit. I flipped the backside up. Then I added 1 of the Prima wood icon frames....
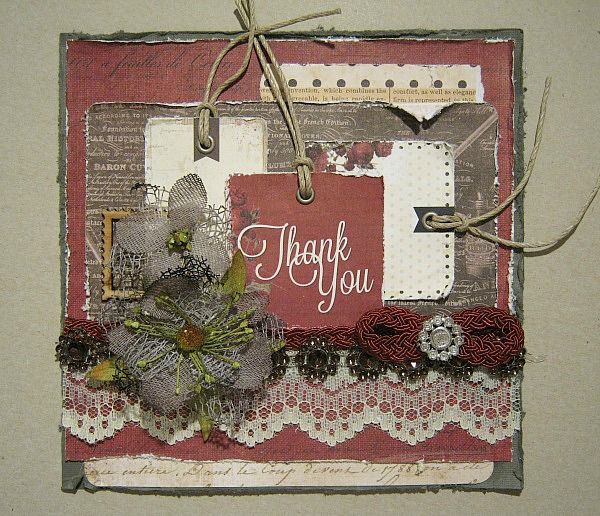
and some of the, love,love,lovely Petaloo flowers.
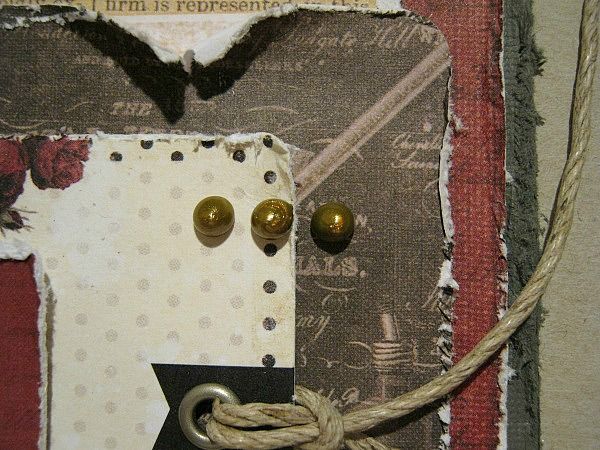
For the finishing touch I added some Liquid Pearls, (at the right top and left bottom) that came in last month's kit.
I had so much fun playing with this GORGEOUS *Salutations* kit... I could go on making lots and lots of cards.

and some close ups:


and here's how it came together

For the base of this card I cut 2 strips of cardstock, which were 6.5# high and 12 long. I glued 2 of the ends together, so that I was able to create a BIG card. After I folded it, it meassured 6.6 x 6.5 I will put the glued line in the front, cause it is going to be covered with paper.

I cut a piece of PP at 6.2 x 6.4. Distressed the edges.

I cut a little strip off this note card and.....

glued my paper and strip to the base card. Like so.

Then from another notecard I teared a little piece off. The one that is marked, I'm going to use.

I glued the little piece behind the black, distressed, notecard.

I glued a piece of lace over the bottom of the notecard, using 3 in 1 Craft Glue, (Krissy has these in the BOUTIQUE)

I selected 3 tags, from the bunch we got in the kit, and placed them like this.

I glued some of the gorgeous red trim (we call that très trim) just above the lace and then a strip of that amazing bling, to cover the line between the lace and red trim.
****TIP****

This beautiful red trim, raffles very quickly and to prevent that you have to snip of the raffles all you have to do is, add a dot of glue (I used hot glue) press it down on a non-stck craft mat and after it cooled down..................

you can easily cut it. This way you won't waste any of the trim .

I also folded a figure 8, or bow from the red trim

And glued it at the right side of my card. Topped it of with a piece of bling from the kit. I flipped the backside up. Then I added 1 of the Prima wood icon frames....

and some of the, love,love,lovely Petaloo flowers.

For the finishing touch I added some Liquid Pearls, (at the right top and left bottom) that came in last month's kit.
I had so much fun playing with this GORGEOUS *Salutations* kit... I could go on making lots and lots of cards.
Love all the layers and gorgeous trims, Paulien!!!
ReplyDeleteThanks so much for the tutorial!!!
Paulien, I love your tutorials. It really helps to see how you do it, step by step. Thank you for sharing your expertise with us.
ReplyDelete