Sunday, June 29, 2014
This week's layout of the week is this bright and beautiful layout by Jan. Jan has recently experienced the loss of her sweet furbaby,Cody, featured in the pic. She has been creating lovely pages in his memory.

Just this side of heaven is a place called Rainbow Bridge.
When an animal dies that has been especially close to someone here, that pet goes to Rainbow Bridge. There are meadows and hills for all of our special friends so they can run and play together. There is plenty of food, water and sunshine, and our friends are warm and comfortable.
All the animals who had been ill and old are restored to health and vigor. Those who were hurt or maimed are made whole and strong again, just as we remember them in our dreams of days and times gone by. The animals are happy and content, except for one small thing; they each miss someone very special to them, who had to be left behind.
They all run and play together, but the day comes when one suddenly stops and looks into the distance. His bright eyes are intent. His eager body quivers. Suddenly he begins to run from the group, flying over the green grass, his legs carrying him faster and faster.
You have been spotted, and when you and your special friend finally meet, you cling together in joyous reunion, never to be parted again. The happy kisses rain upon your face; your hands again caress the beloved head, and you look once more into the trusting eyes of your pet, so long gone from your life but never absent from your heart.
Then you cross Rainbow Bridge together....
She has our sympathies for her loss and our admiration for her beautiful creations.
Saturday, June 28, 2014
Hello everyone,
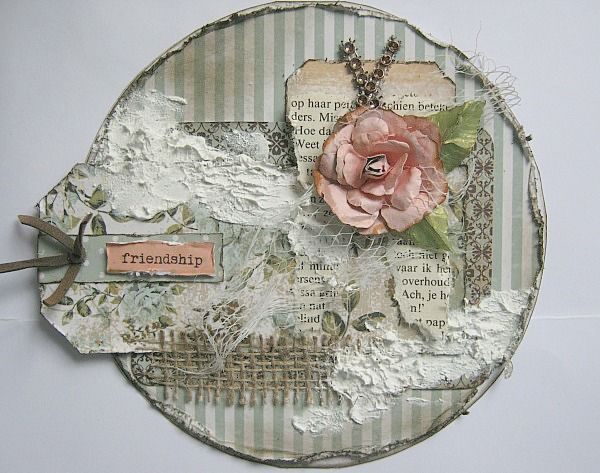
Today I have this card to share:
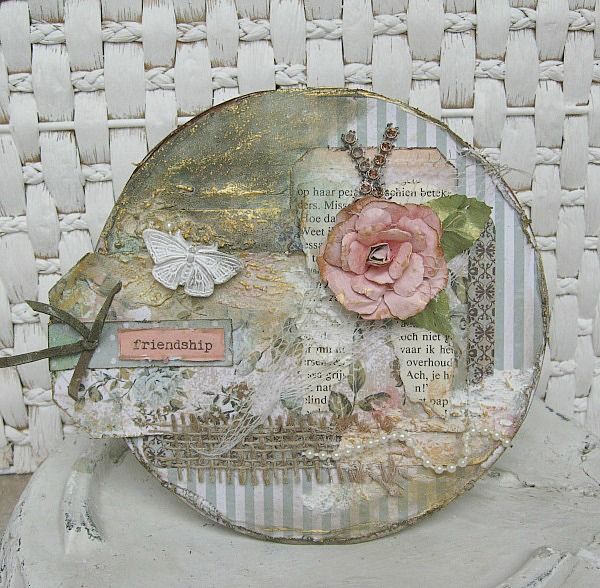
And well.... I can assure you that there were many times, during the creative process, that I thought: You should have left it alone!!!!! But.... we here at Swirlydoos.... we just can't stop adding right?

And well.... I can assure you that there were many times, during the creative process, that I thought: You should have left it alone!!!!! But.... we here at Swirlydoos.... we just can't stop adding right?
So that is exactly what I did, and I'm not too unhappy with it.
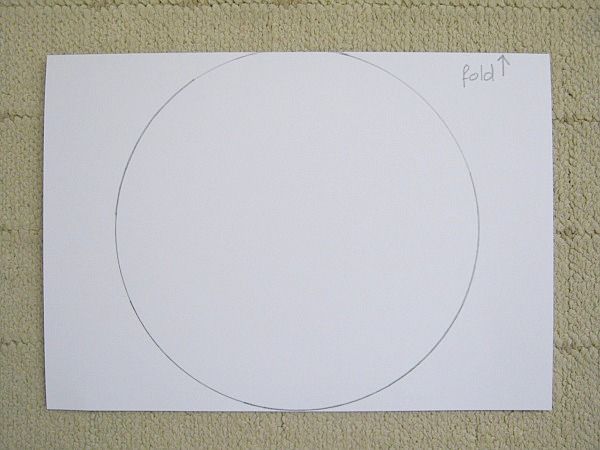
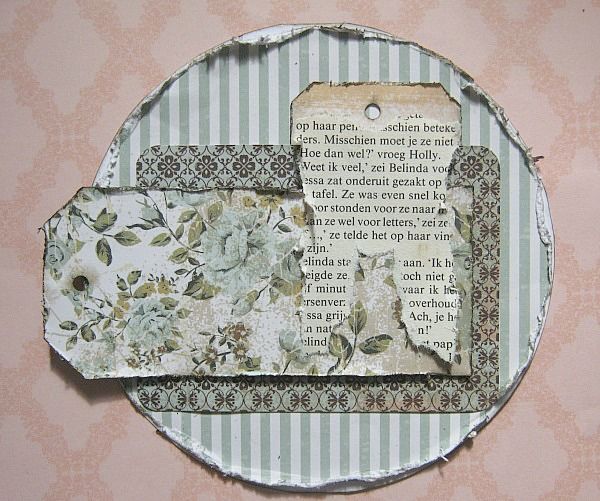
For the base of my card I folded an A4 piece of cardstock double and drew a circle, which at the top, is a little overlapping to create a double round card.
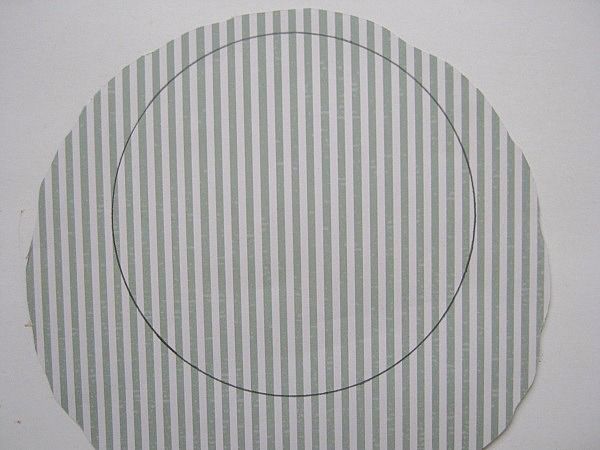
Then I drew another circle (same size as the base card) on PP and cut it out.

For the base of my card I folded an A4 piece of cardstock double and drew a circle, which at the top, is a little overlapping to create a double round card.

Then I drew another circle (same size as the base card) on PP and cut it out.

(Excuse me for the dirty background)
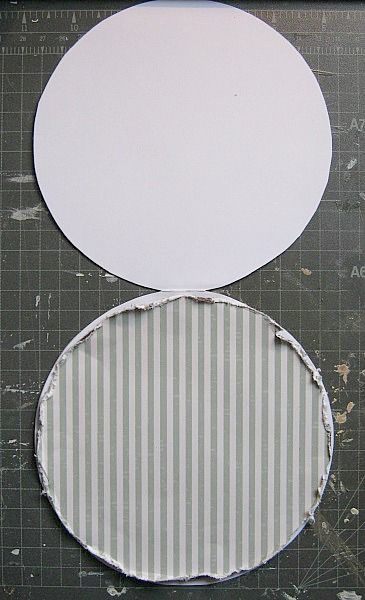
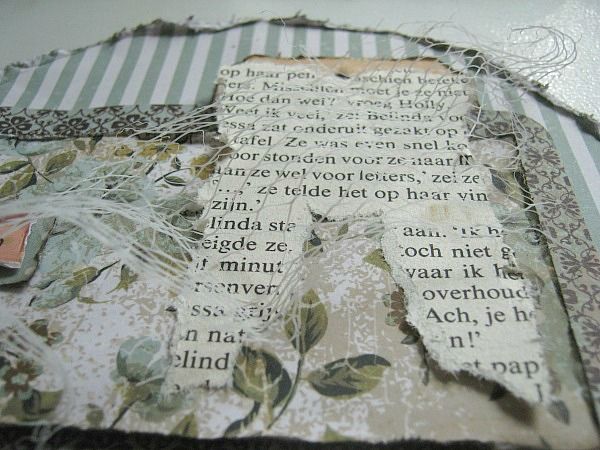
I distressed the edges and glued it onto my opened card base. I find that when you open up your card, you can align it better. Especially helpful with a stripe designed paper.
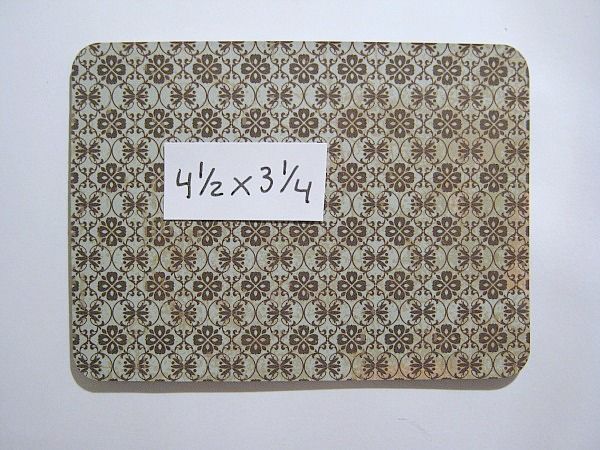
I cut a piece of PP at 4.1/2 x 3.1/4 for my first layer and rounded the corners.

Then, and excuse me for this tag being teared, I cut a tag at 2.1/4 x 3
(that is what you get if you want to use your scrap)
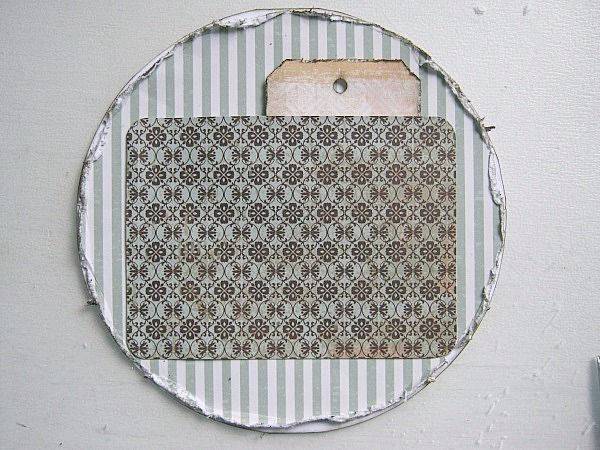
And I placed both pieces like in the picture.
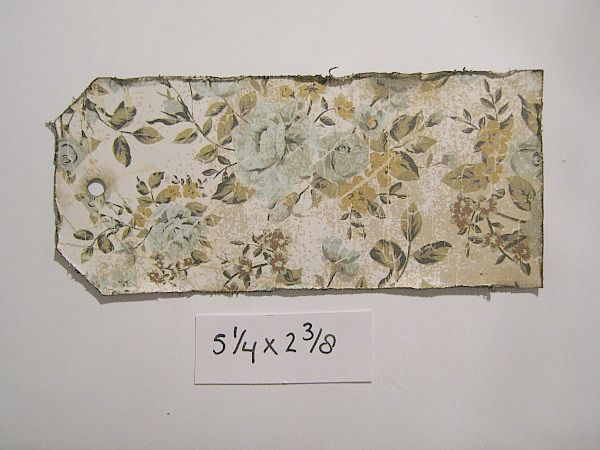
Then I cut another tag from that beautiful rose PP at 5.1/4 x 2.3/8. I distressed and inked the edges.
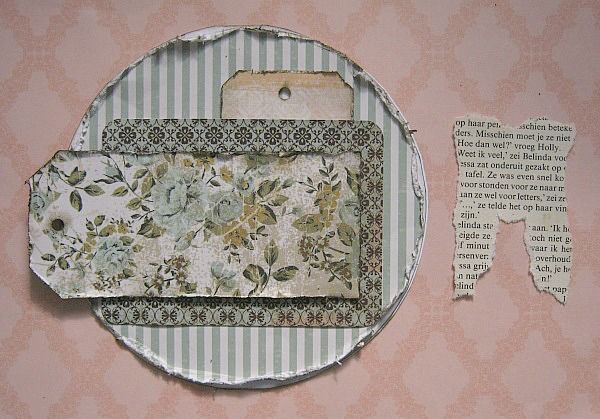
I glued it to the center piece but did raise it a litlle, by using a piece of the box, the kit came in. I also teared, it looks like a letter M to me, from an old book page.
I glued it on top of the frist little tag.
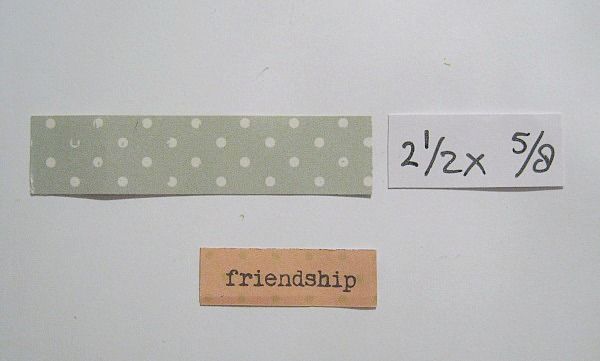
Then I cut a little strip at 2.1/2 x 5/8. This will be a mat for my (from the barcode strip) cut out sentiment *friendship*
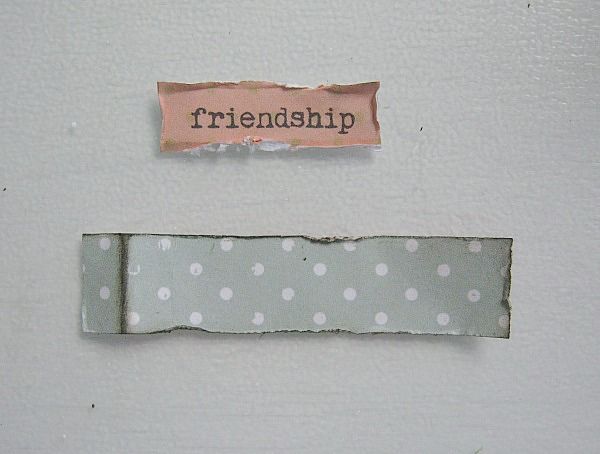
Both pieces got their edges distressed and inked
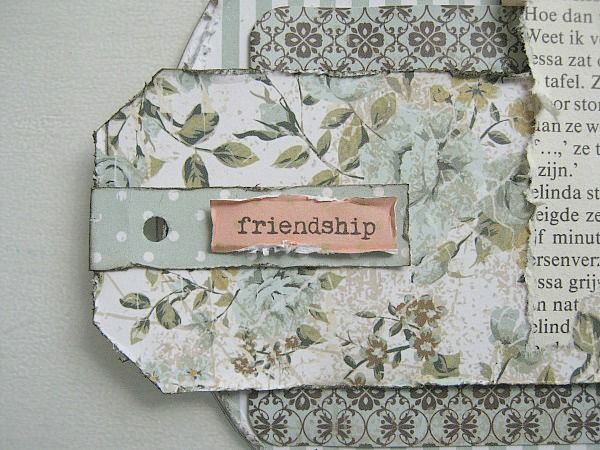
And I glued them to the rose tag like this.
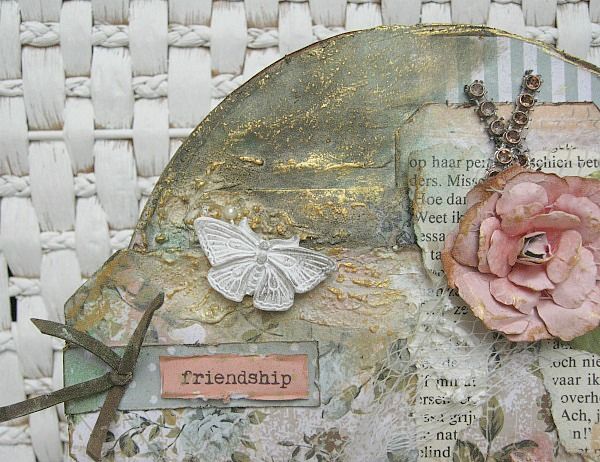
Then I took out a little mesh and placed it over my center. (I made this picture a little darker, for you to see the mesh better)
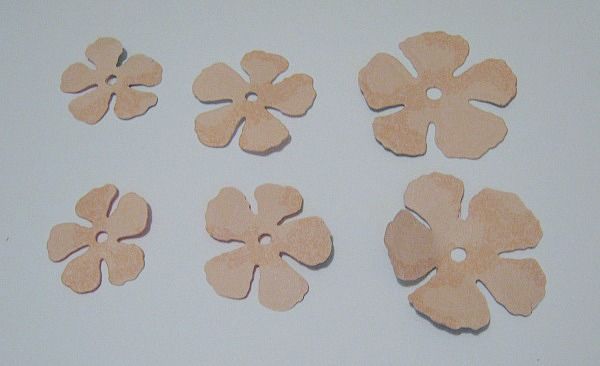
I die cutted some flowers (I used the Spellbinder rose die)

Shaped the edges and turned it into a flower.
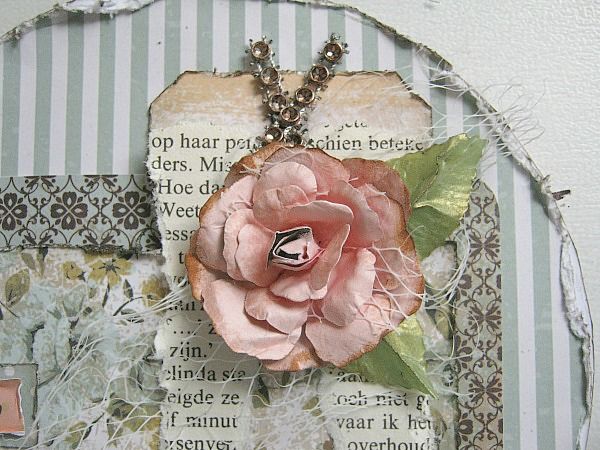
I placed my flower on top of the book-page tag and added some bling which came in the kit and 2 handmade leaves.
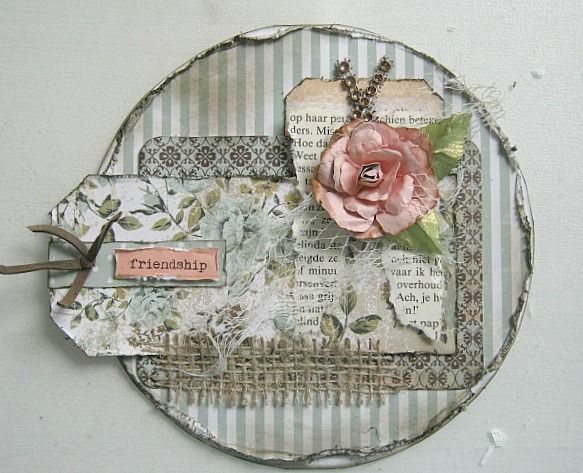
Then I added a little strip of burlap.
I added some structure paste. (And here's where I thought: I should have left it alone)
Because I wanted to add a few mists, but sadly I grapped the wrong bottle and urgh... It turned out a dark blue instead of a lighter teal. So I added some gold mist and some Papersoft and eventually after everything was dry, I added some inka gold.
To finish it off, I glued a resin
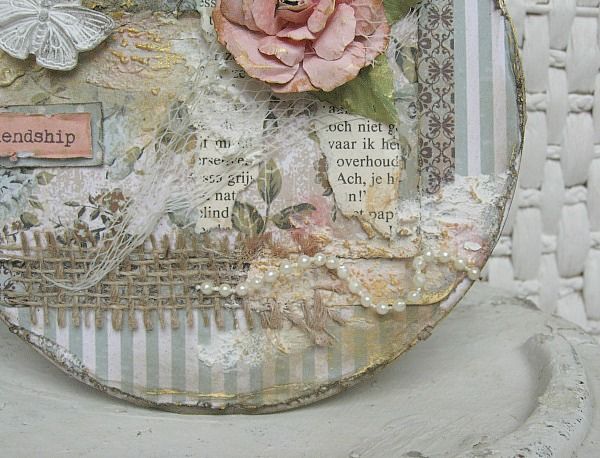
and some pearl strand.
********
SO learn from my mistake and put the bottles of mists you want to use in front of you,
I distressed the edges and glued it onto my opened card base. I find that when you open up your card, you can align it better. Especially helpful with a stripe designed paper.

I cut a piece of PP at 4.1/2 x 3.1/4 for my first layer and rounded the corners.

Then, and excuse me for this tag being teared, I cut a tag at 2.1/4 x 3
(that is what you get if you want to use your scrap)

And I placed both pieces like in the picture.

Then I cut another tag from that beautiful rose PP at 5.1/4 x 2.3/8. I distressed and inked the edges.

I glued it to the center piece but did raise it a litlle, by using a piece of the box, the kit came in. I also teared, it looks like a letter M to me, from an old book page.

I glued it on top of the frist little tag.

Then I cut a little strip at 2.1/2 x 5/8. This will be a mat for my (from the barcode strip) cut out sentiment *friendship*

Both pieces got their edges distressed and inked

And I glued them to the rose tag like this.

Then I took out a little mesh and placed it over my center. (I made this picture a little darker, for you to see the mesh better)

I die cutted some flowers (I used the Spellbinder rose die)

Shaped the edges and turned it into a flower.

I placed my flower on top of the book-page tag and added some bling which came in the kit and 2 handmade leaves.

Then I added a little strip of burlap.

I added some structure paste. (And here's where I thought: I should have left it alone)
Because I wanted to add a few mists, but sadly I grapped the wrong bottle and urgh... It turned out a dark blue instead of a lighter teal. So I added some gold mist and some Papersoft and eventually after everything was dry, I added some inka gold.

To finish it off, I glued a resin

and some pearl strand.
********
SO learn from my mistake and put the bottles of mists you want to use in front of you,
to make sure that you will NOT grab the wrong color mist.
I hope you like it anyway, and have a lovely weekend.
I hope you like it anyway, and have a lovely weekend.
Thursday, June 26, 2014
Maggi here to share some more projects that I did with the June kit. I seriously love the papers that came in this kit, especially the Kaisercraft Storyteller collection.
On this page I've layered scraps underneath my photo and the title card. From my stash I added the beautiful Creative Embellishments swirl underneath the photo. It has been heat embossed with Lindy's embossing powder from the main kit. Love how that turned out!


Cardstock: Bazzill French Vanilla
Patterned paper: Kaisercraft Storyteller collection: orange frame - Memoir P1501, light base - Feature P1505, title card & blue dotted - Journal P1508, striped - Anecdote P11506, Collectables CT793, light orange - Ruby Rockit Heritage Old News, coral cardboard - Fancy Pants
Chipboard: Creative Embellishments flourish
Embossing powder: Lindy's Coral Blush
Diecuts and punches: Martha Stewart Deco Flower
Flowers: Petaloo Botanica Ephermera Coral, Petaloo Botanica Spring Berry Clusters yellow/greenKaisercraft paper blooms coral
Mist: Lindy's Maidenhair fern green, wild honeysuckle coral geranium
Masks: Prima
Masking paste: Shimmerz TextureZ Tidy Widy
Other: wood frames - Prima Wood Embellishments Time Travelers Memories
On this page I've layered scraps underneath my photo and the title card. From my stash I added the beautiful Creative Embellishments swirl underneath the photo. It has been heat embossed with Lindy's embossing powder from the main kit. Love how that turned out!
Supplies:
Cardstock: Bazzill French Vanilla
Patterned paper: Kaisercraft Storyteller collection: orange frame - Memoir P1501, light base - Feature P1505, title card & blue dotted - Journal P1508, striped - Anecdote P11506, Collectables CT793, light orange - Ruby Rockit Heritage Old News, coral cardboard - Fancy Pants
Chipboard: Creative Embellishments flourish
Embossing powder: Lindy's Coral Blush
Diecuts and punches: Martha Stewart Deco Flower
Flowers: Petaloo Botanica Ephermera Coral, Petaloo Botanica Spring Berry Clusters yellow/greenKaisercraft paper blooms coral
Mist: Lindy's Maidenhair fern green, wild honeysuckle coral geranium
Masks: Prima
Masking paste: Shimmerz TextureZ Tidy Widy
Other: wood frames - Prima Wood Embellishments Time Travelers Memories
This Prima frame was in the technique addon kit for June. Don't you just adore this frame? That is my favorite photo of Chena peeking at you! I've added some flowers, metal pieces and Leaky Shed Studios chipboard from my stash to complete this look.


The photo that I used on this layout comes from the Library of Congress and is part of a series of photos done about children working in textile mills. This photo was taken in 1908 at a NC mill.

This gorgeous Creative Embellishments chippy is from my stash. I've embossed it with Stampendous Aged Ivory Embossing Enamel.

For this tag, I cut a tag 3.5 x 8.5" and layered some of the Kaisercraft Storyteller journal cards. Along the side I fussycut the flowers from the Reminisce paper and popped them up over some white lace from my stash. I've embossed some Creative Embellishments leafy vines (from my stash) with Stampendous shabby green embossing enamel and cut the vines apart and tucked in here and there on my tag.
 These flowers are from the flower addon kit.


.png)
This gorgeous Creative Embellishments chippy is from my stash. I've embossed it with Stampendous Aged Ivory Embossing Enamel.
Supplies:
Patterned paper: Kaisercraft
Storyteller collection: stripe - Anecdote P1506. white misted - Myth P1503,
diecut circle - Confession P1502, floral - History P1504, dotted swiss -
Journal P1508, black patterned - Reminisce P1507
Chipboard: Creative
Embellishments
Embossing powder:
Stampendous aged ivory
Diecuts and punches: EK
Success Flower Burst, Lucky 8 WRMK Frilly Lace
Flowers: Prima
Ink: Distress walnut stain
Mist: Tattered Angels
Gumdrop
For this tag, I cut a tag 3.5 x 8.5" and layered some of the Kaisercraft Storyteller journal cards. Along the side I fussycut the flowers from the Reminisce paper and popped them up over some white lace from my stash. I've embossed some Creative Embellishments leafy vines (from my stash) with Stampendous shabby green embossing enamel and cut the vines apart and tucked in here and there on my tag.
I hope I've given you some ideas and maybe a little inspiration of how you can use this kit! Thank you so much for stopping by the Swirlydoos blog!
Wednesday, June 25, 2014
Hello everyone! Debbie here with you today to share my final projects with the June Swirlydoos kit, Rose Bouquet. The first project I want to share is a canvas that I created with the main kit.I have to tell you that I used all but just a few scraps and of this gorgeous kit. I did add a little chipboard, modeling paste, chalk ink and some flowers from my stash. The first project is a mixed media canvas.


 Swirlydoos is a special kit club and when I heard that all the designers created cards to go into a vault for any of our members going through a tough time I knew that this club took very good care of their members. So I created 3 cards for the vault from this kit.I had just small bits and pieces left of the kit so I thought that paper bag cards would be perfect for this. If you've never created a paper bag card, you're missing something that is so fun to do! Anyway, here are my 3 paper bag cards.


 These cards are so much fun and they have lots of pockets and tags for photos. If you open the top of the bag you can include goodies like stamp sets or anything that will fit in the bag.
As always, thanks for stopping by the Swirlydoos blog today!
Debbie
As always, thanks for stopping by the Swirlydoos blog today!
Debbie
Tuesday, June 24, 2014
Happy Tuesday! Today I want to share with you 2 more projects created using the lovely June Kit,"Rose Bouquet" and the Add-ons. I know,I know,I say every kit is my favorite but this one is really up my alley with the feminine,yet rich colors.
My first page features my daughter again,modeling her peach (oh,does it happen to match the paper?) gown.

These aptly named Ornate Corners are the perfect anchor to give my page a look of elegance.

First I colored the chipboard with 2 different shades of blue with blunt tipped alchohal pens. I then randomly smudged blue,white,gold and coral gelatos. I added stickles in Patina for some extra sparkle!

I played with paper pleating as you can see in this closeup. After running a lace ribbon (from stash) and some of the bling from the kit, I pleated and used hot glue to hold it in place. I like how it anchors my framed title (both from the kit) and draws the eye to my daughter in her lovely gown.
Krissy likes to put together fun Off-the-page items and this month she offered us this metal shadowbox frame kit from Prima:

Using items from the kit and my stash I created this birthday gift for my daughter:

The back of the frame (I think it looks like a little vintage TV) comes off which makes it so easy to glue your background items on!

I love the new Prima lace stickers-so cute and easy! My background is a combonation of older Swirly papers and stamping. The oval frame is from the kit and it was colored with gelatos and a Prima Say it in Crystal.


I topped it with a blue flower cluster and lots of ribbon-just the way I like it!
Thanks for stopping by and I hope I inspired you to create some projects of your own using this beautiful kit!
Have a fabulous day!

Subscribe to:
Posts (Atom)

Be sure to "LIKE & FOLLOW" Swirlydoos for special FB only deals and promos
Follow this blog with bloglovin

Scrapbook Sketches

see all of our sketches here
Keep Tabs On Our Blog!


Popular Posts
-
 Welcome to Swirlydoos' Mystical Winter kit reveal Blog Hop Block Party!! Happy New Year and Welcome!!! This month's kit,...
 -
 Welcome to Swirlydoos November Kit Reveal Blog Hop BLOCK PARTY!!! That's right, we are having a party and you are all invit...
 -
 Welcome to Swirlydoos' February Blog Hop Block Party!! Welcome to Swirlydoos February Kit Reveal Blog Hop BLOCK PARTY!!! ...
 -
 Welcome to Swirlydoos December Kit Reveal Blog Hop BLOCK PARTY!!! We are having a party and you are all invited. We have some amazing projec...
 -
 Welcome to: Swirlydoos Kit Club February Scrapbook Kit Reveal & Blog Hop! Swirlydoos is proud to bring you our beautiful Febr...
 -
 Thank you for joining us today for our ONE DAY blog hop featuring our September kit collection, Gilted Pleasure . **All collec...
 -
 Welcome back! We have a really fun blog hop all set for you today. Our May kit, So Chic , is well.....just that...so chic! This kit is ...
 -
 It's the big re ve al ! Say hello to our December kit! Be sure to check out a video "tour" of the main kit, kit add ons an...
 -
 Boy, oh boy do we have a stellar hop for you this month!! Just when I think that Krissy couldn't possibly created a prettier ki...
 -
 SCROLL DOWN FOR THE 12 DAYS OF CHRISTMAS CONTEST: DAY FIVE! Welcome to: Swirlydoos Kit Club December Scrapbook Kit Reveal & Blo...